|
Creating and Accessing Zoom Meetings through eClass
Last modified on 30 October 2023 04:28 PM
|
|
|
Zoom is currently available for use to all Faculty and Staff at the UofA. If a Zoom account is required by a Staff or Faculty member who does not want to access Zoom via eClass, please contact us at eclass@ualberta.ca to request a manual account in Zoom This article describes how instructors can create and launch Zoom meetings through their eClass course. Follow these instructions for creating online sessions outside of regular Beartracks credit sections. 1. First ensure that you have turned editing on in your course by clicking Edit mode in the top right corner of your course page. Then click on 'Add an activity or resource' in the desired topic to add the Zoom meeting activity tool:
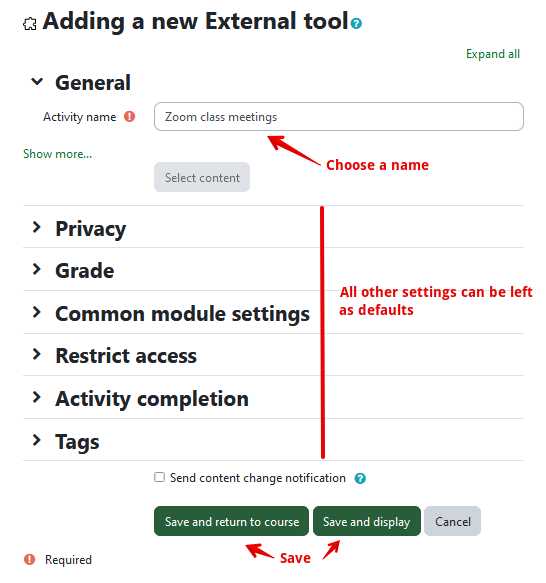
2. Give the activity a name that will indicate where all the course meetings will be located. You will only need to add a single Zoom activity to your course and add multiple meetings within it. All the other settings can be left as defaults:
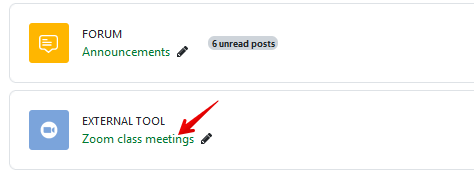
3. If you chose Save and return, click the new Zoom tool link from your course:
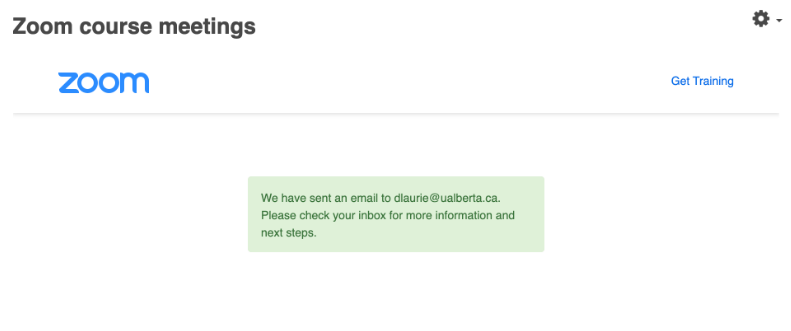
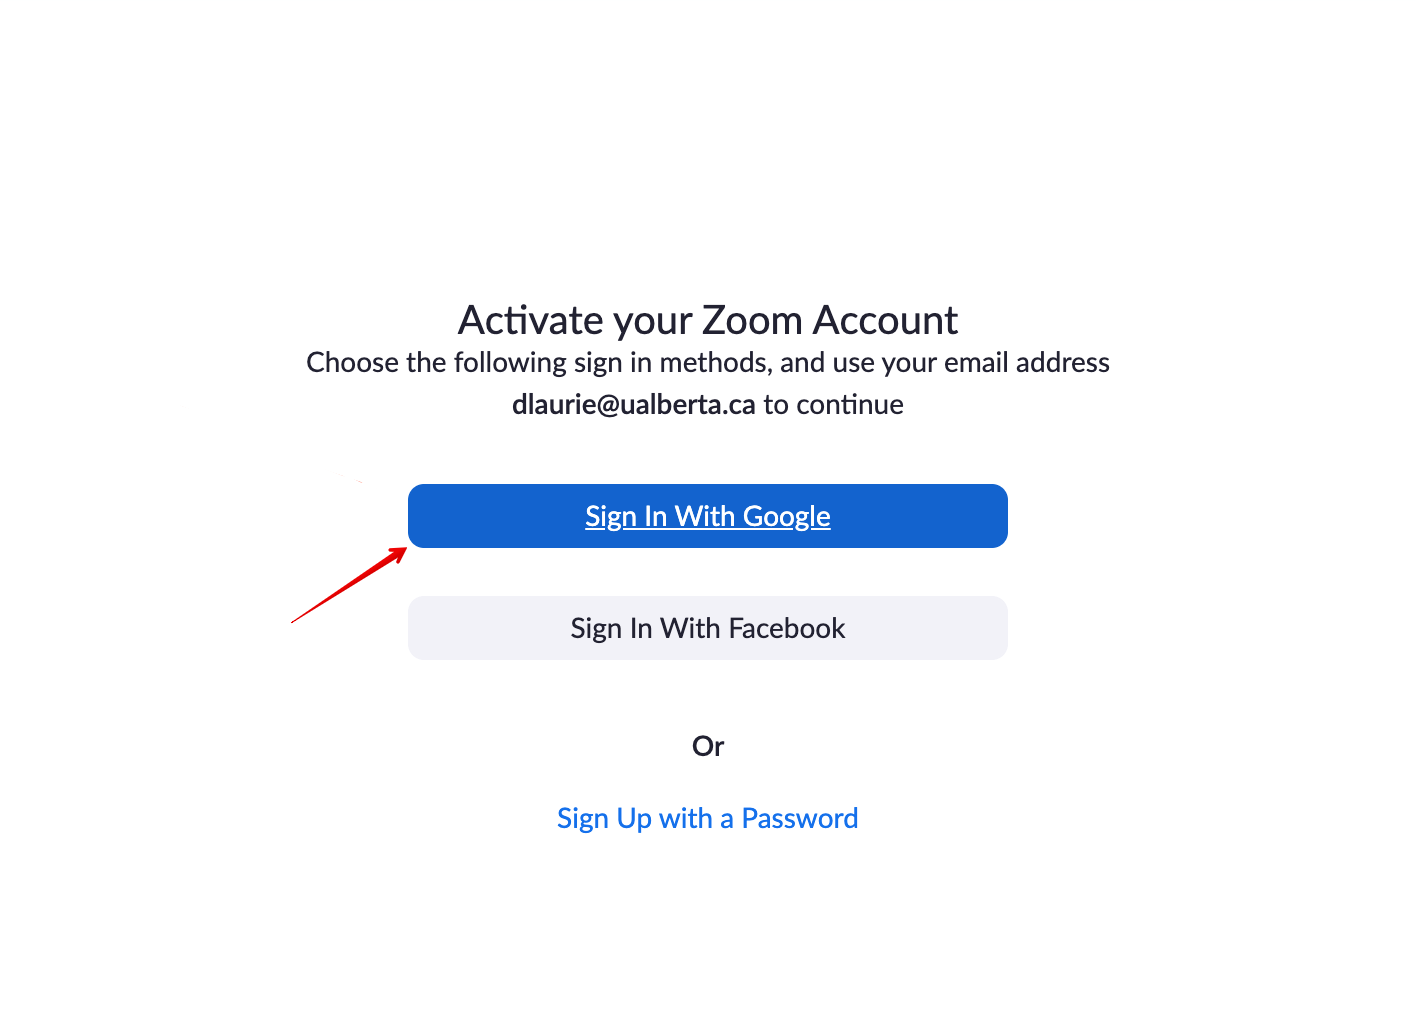
4. If you chose Save and display (or clicked the link), you should now see the Zoom course dashboard. If this is your first time accessing the tool (and Zoom), you will need to confirm your UAlberta email address as an account on the system. Note: if you already have a Zoom account associated with your UAlberta Gmail account (in the form ccid@ualberta.ca) you may encounter problems with this step. You will need either to delete or rename your personal account to link an account to Zoom through eClass.
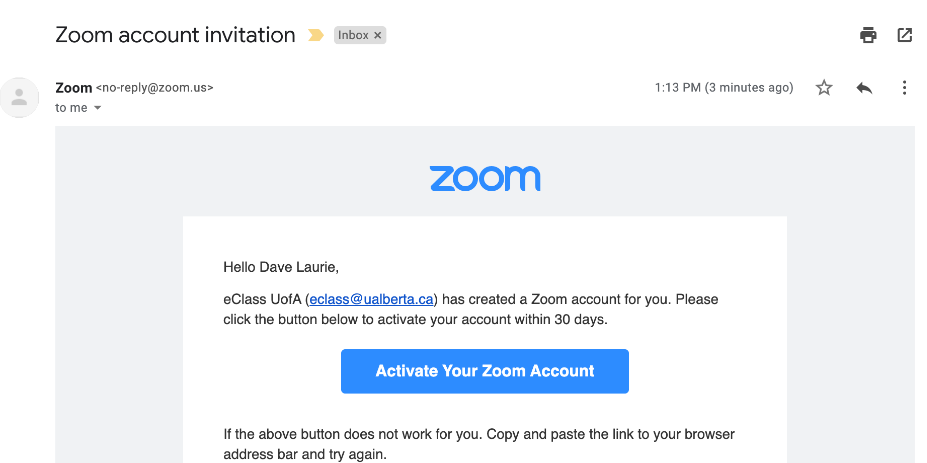
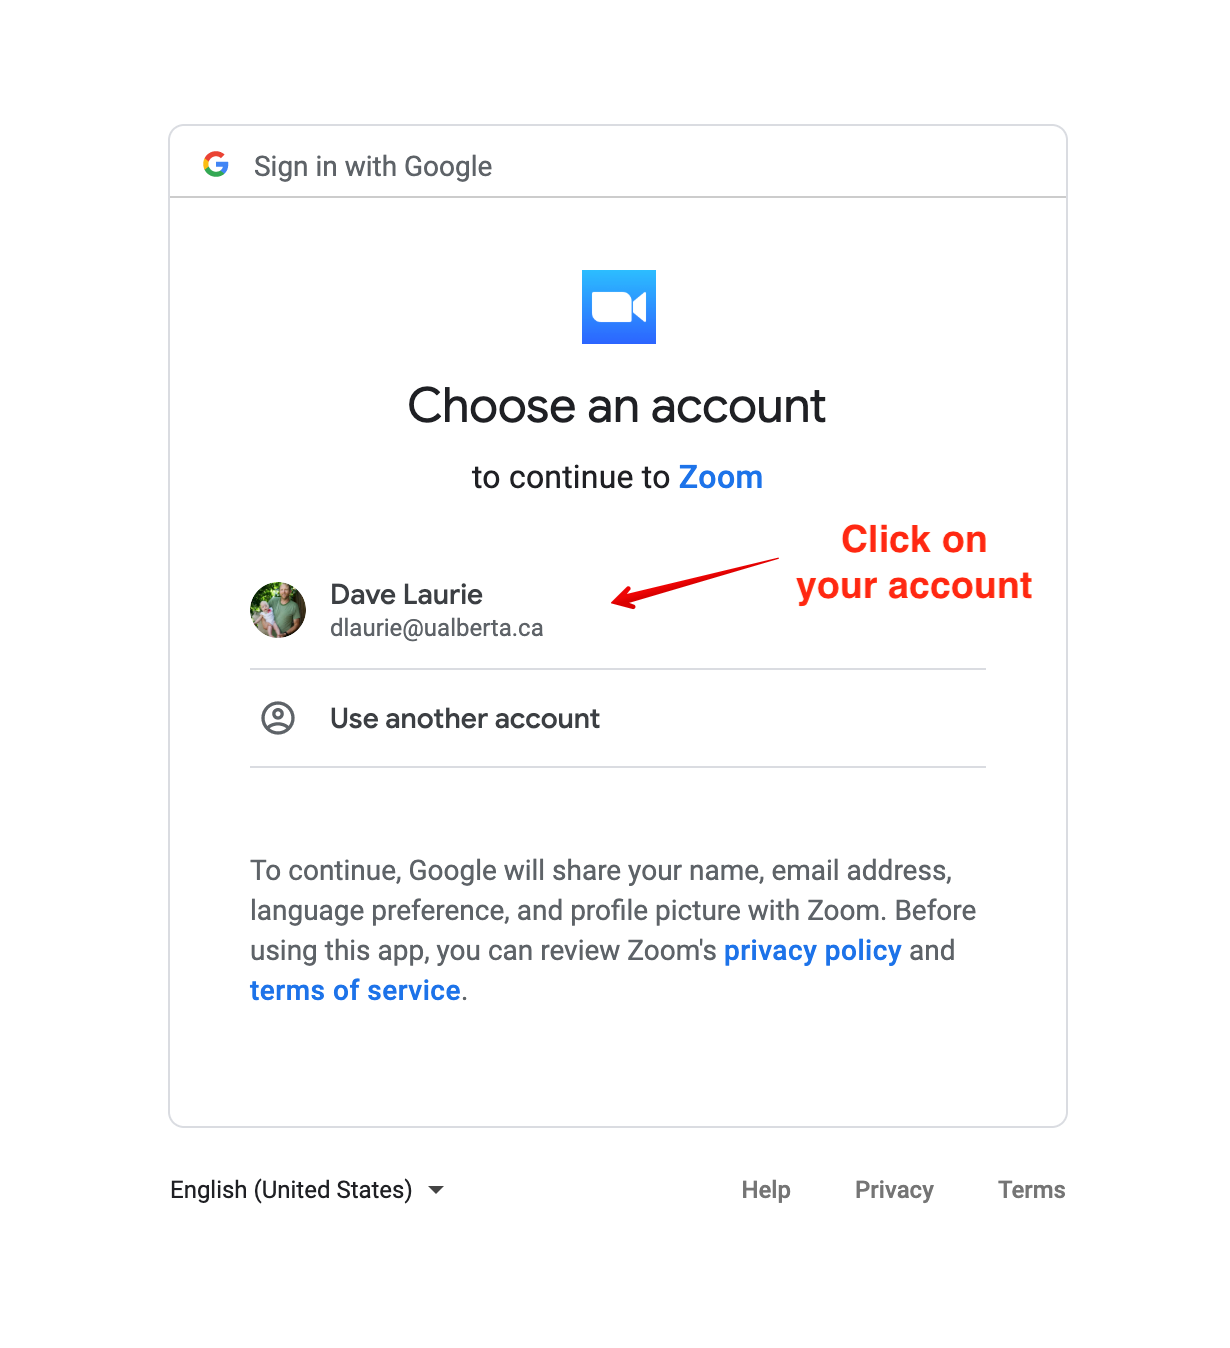
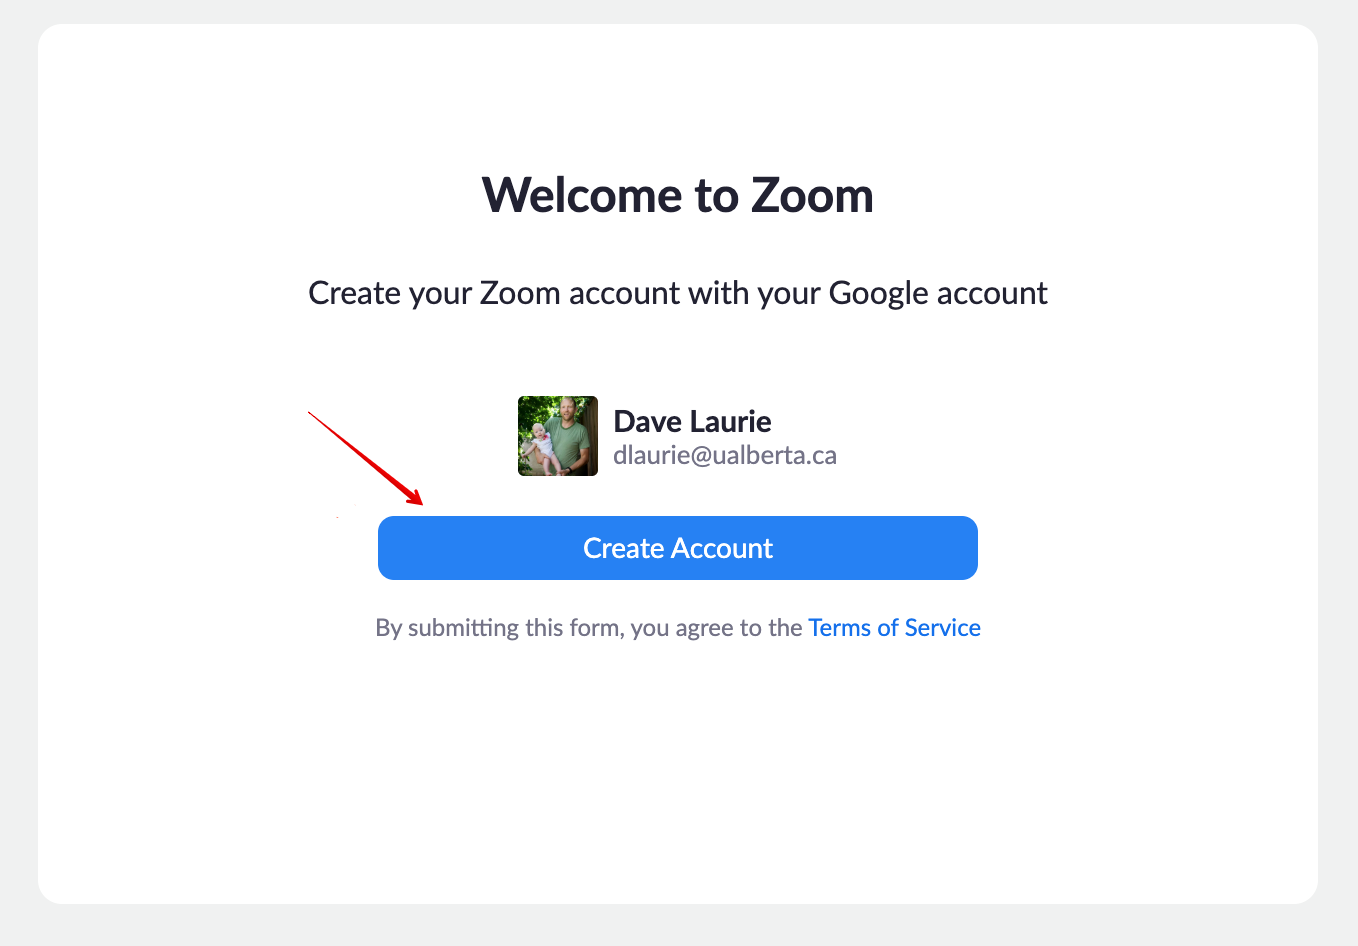
5. Clicking the link in your UAlberta email account will allow you to follow a sequence of steps to sign in to and connect your account to Zoom. Note: some people have had their accounts created without needing to go through this step. If you go into the Zoom tool and just see the screen in step 6, your account should be set up.
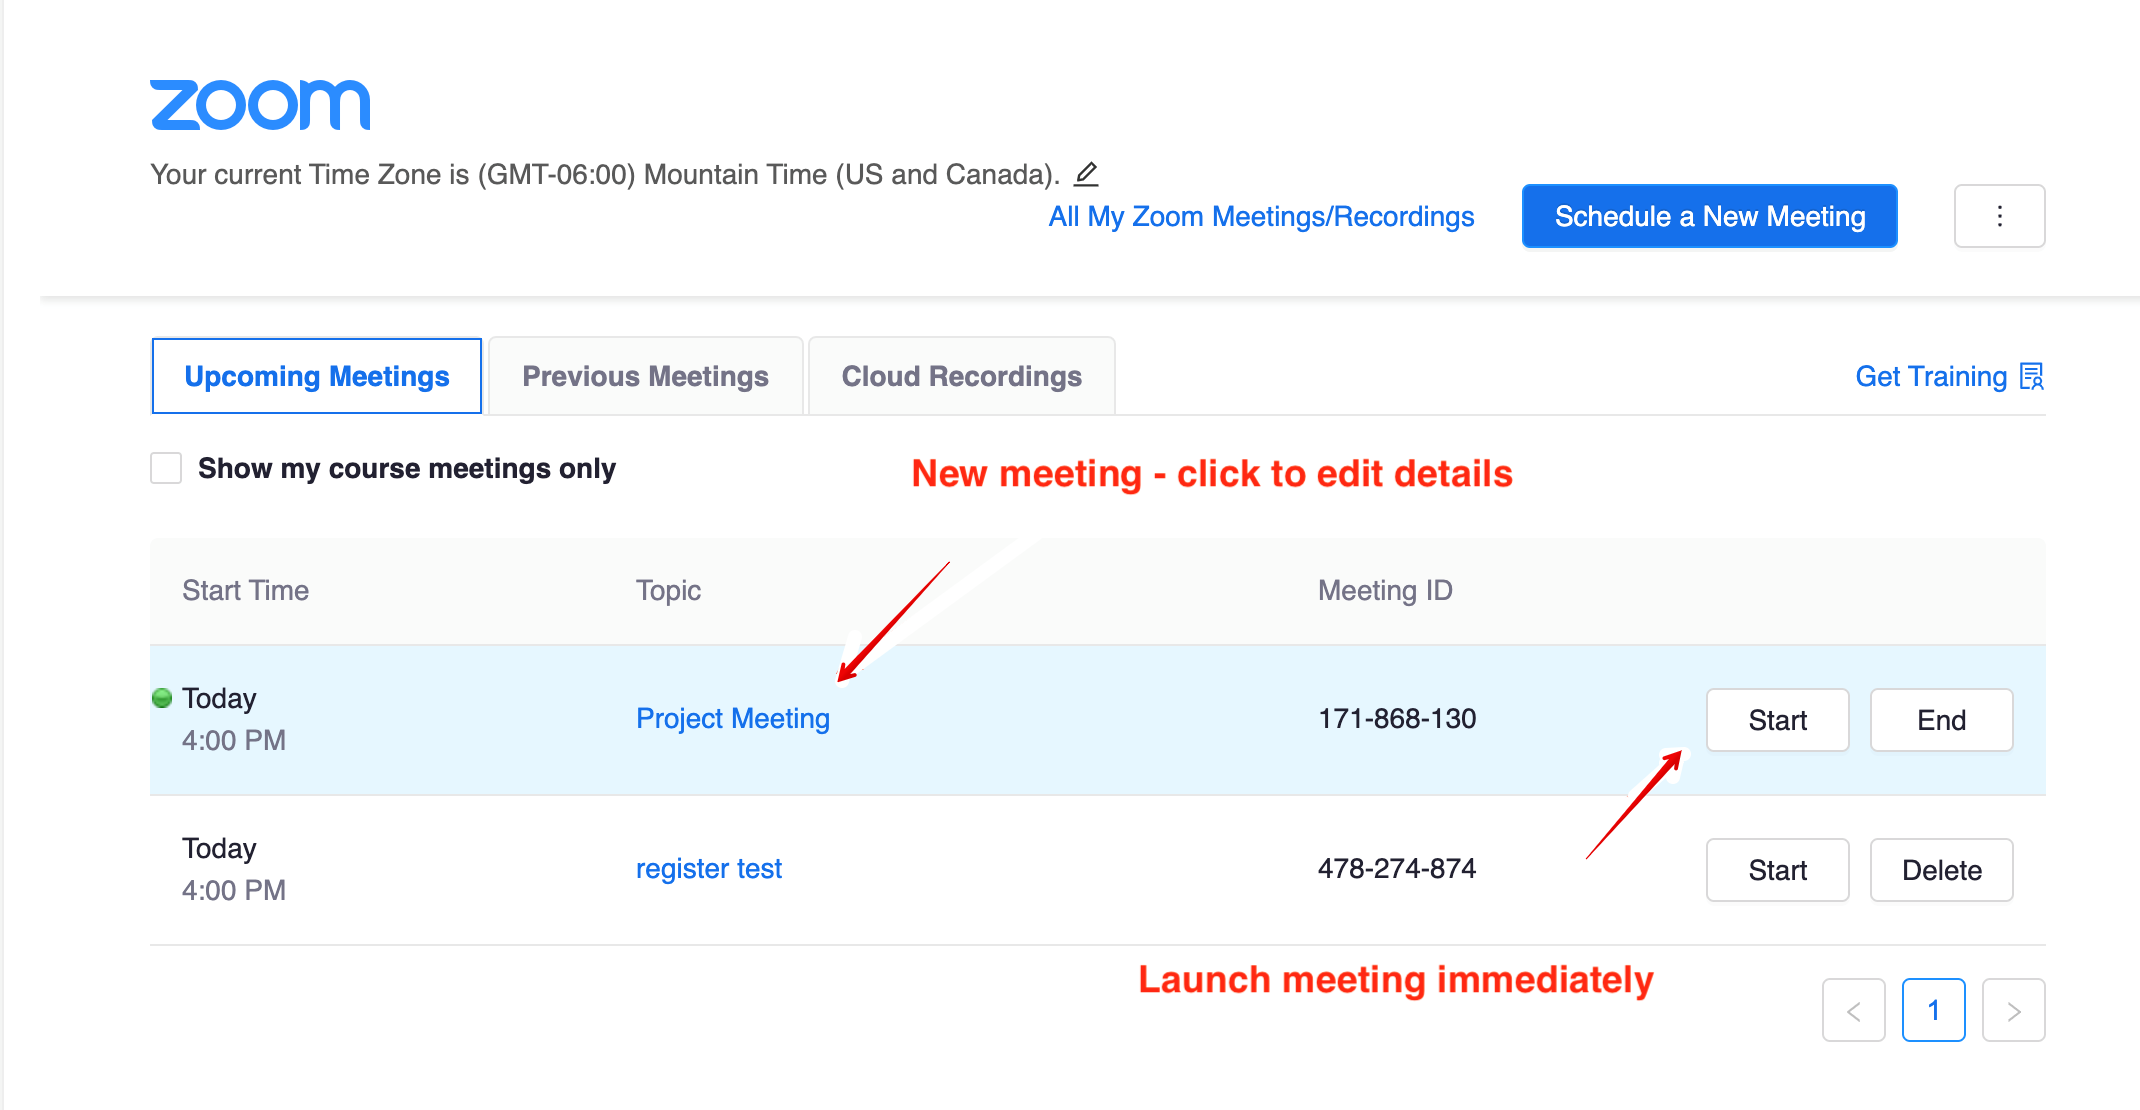
Creating Zoom meetings in eClass: 6. Now your account is enabled and you will be signed in to the Zoom web application. As this interface is slightly different from the integrated eClass tool, it is recommended that you navigate back to eClass and refresh your page. You should see the Zoom Course recordings interface at this point. This will show any Upcoming meetings you’ve already created, along with tabs for Previous meetings, and any Cloud recordings:
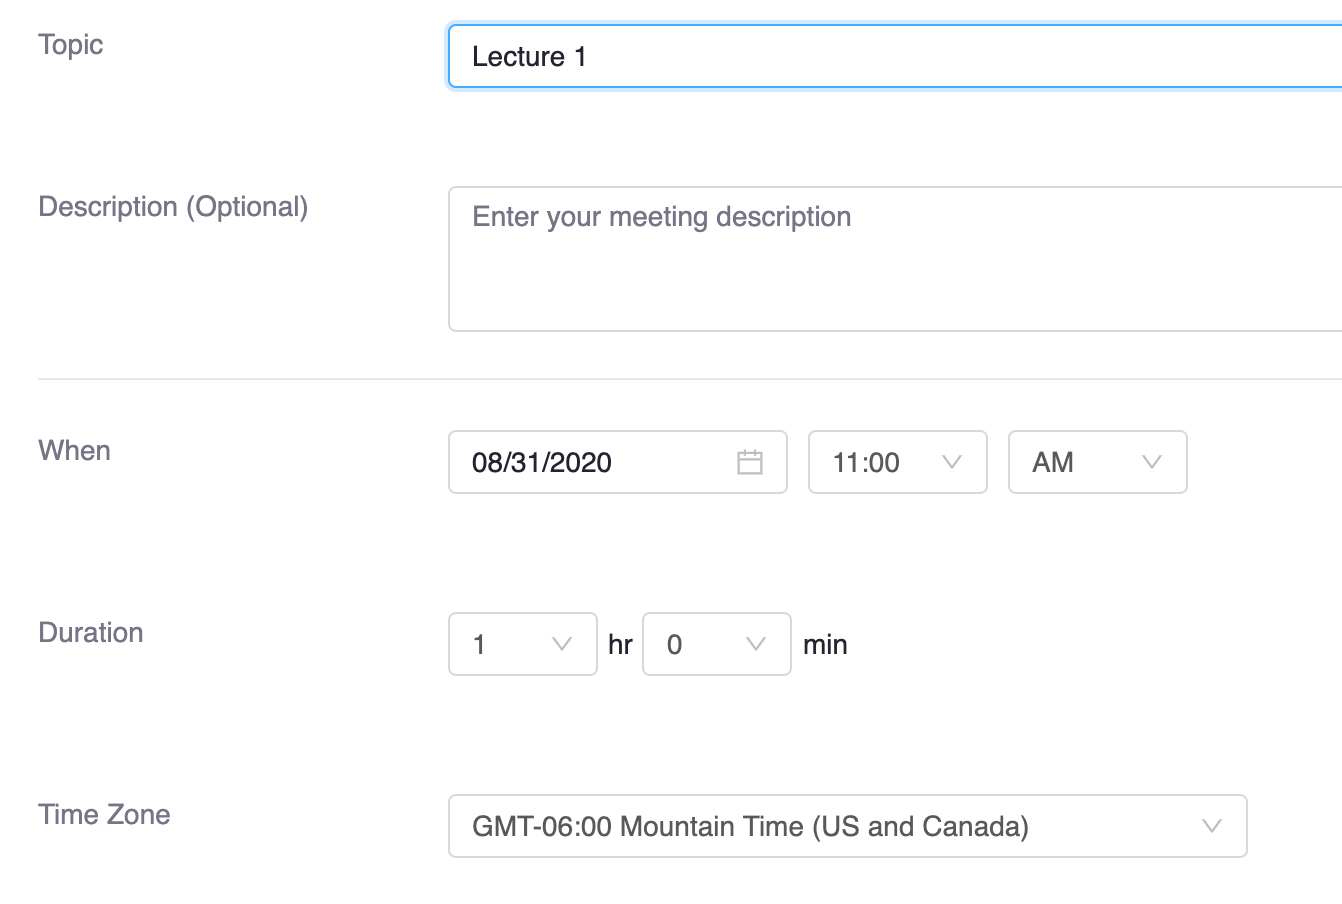
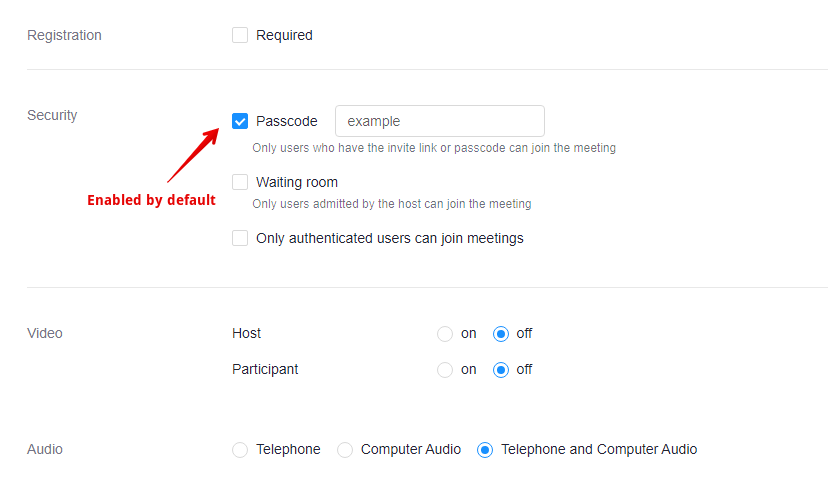
7. When creating a new meeting, you can specify the following:
8. Once created, you will see your meeting listed under ‘Upcoming meetings’:
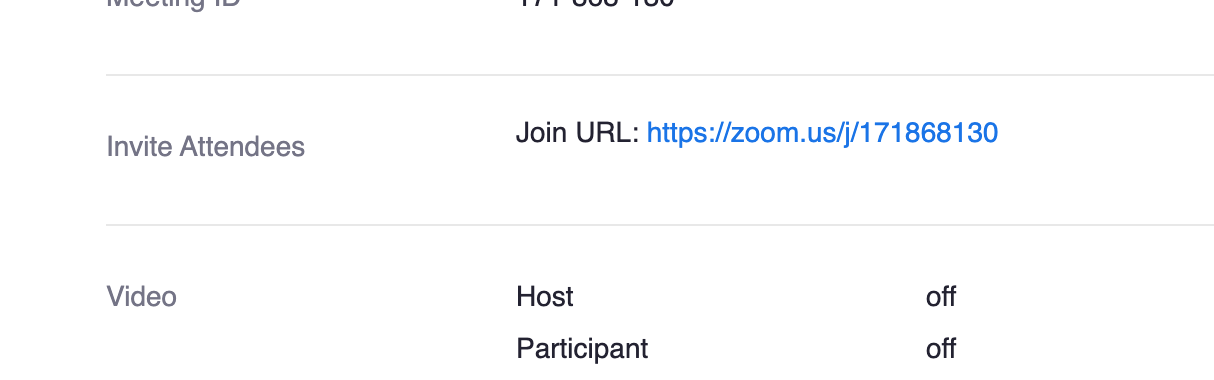
9. Accessing the meeting settings will provide you with a link to share with external participants. Students in your class can just click the link to join.
| |
|
|
Knowledgebase: Learning Environment Tools


Comments (0)