|
Using the eClass Calendar
Last modified on 02 October 2023 03:46 PM
|
|
|
Calendars can be very useful in your course for displaying assignment due dates, online quiz availability, synchronous meeting session times, or any other event you would like to draw students' attention to. New in June 2023, a new block has been added to student's dashboards called the Timeline block. This tool lists students important upcoming events from their calendars across all their courses. Contents:
As an instructor, there should be a calendar block already showing on the right side of your course page. If not, you may need to open the Block drawer and toggle on Edit mode:
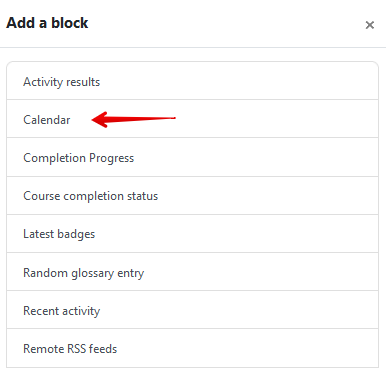
With the Block drawer open and in Edit mode, click on 'Add a block':
Then select Calendar.
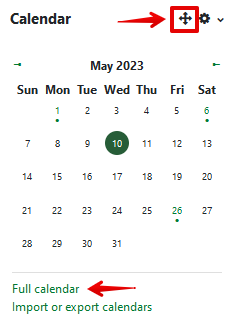
Move the calendar in the Block drawer: If you wish to move the Calendar up or down in the Block drawer, click on the four-headed arrow:
Clicking on an item will move the Calendar above the selected item:
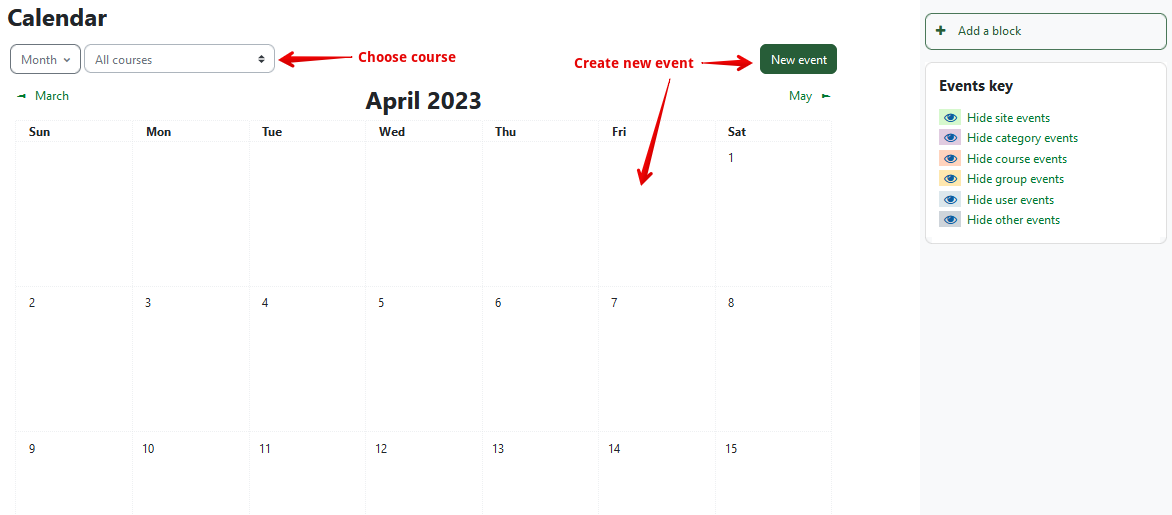
Clicking the Full calendar link at the bottom of the block will open the calendar in full-page view for more detail and to add new events. The various types of events (assignments, quizzes, etc) are identified by colour and users can filter out particular categories of events with the various Hide ... events links. From the full-screen month view, you can switch to other course calendars, look at a detailed view of particular days, add new events, and export or import external calendar events. To export your eClass Calendar to either your computer or other online calendars such as Google, please refer to the following article: How to export your calendar from eClass To add an event to a particular course, choose the course from the drop-down menu at the top of the calendar. Then, click on New Event in the top right corner or click directly on any day in the monthly view.
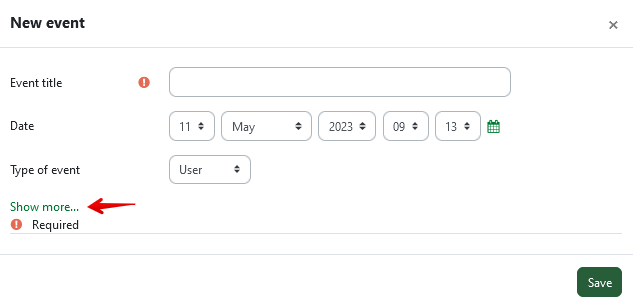
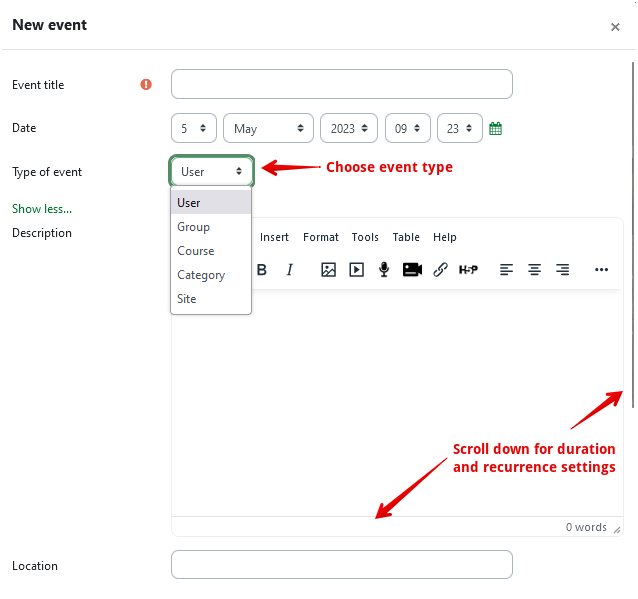
A pop-up will appear. To add a simple event, all that is required is the Title and date. To access additional options click Show more...
Enter the details of your event. The type of event can be a course-wide event where all instructors, students and TAs can see it, or you can restrict it to a certain group within your course, or to only yourself by selecting user. When complete, click Save. If you accidentally place your event on the wrong day you can simply drag the newly created event to the correct date in the calendar view.
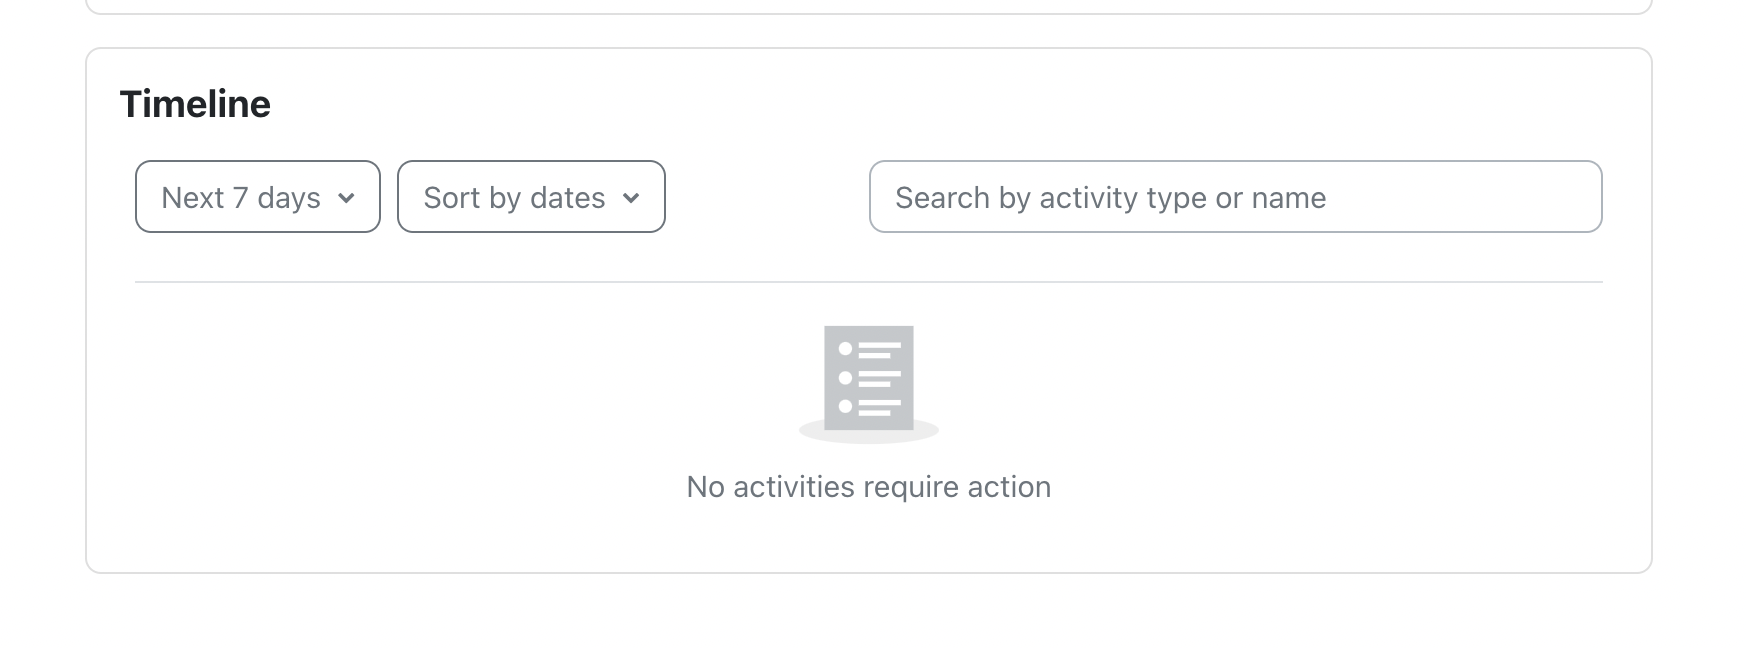
Students now see a a searchable, sortable list if upcoming deadlines on their course dashboards:
Instructors do not need to do anything to add regular course activities that have deadlines to this block, ie. assignments, quizzes, or forums requiring posts. It is important to note that the same limitation on external tool due dates mentioned above applies to the timeline block (events only show if they have an 'Expect completion by' date set.) Additionally a known issue prevents user-entered course calendar events from appearing on timeline blocks. Instructors who make heavy use of the calendar and create numerous custom course events should advise students to check their calendar in addition to the timeline. | |
|
|