|
Smart Exam Monitor (SEM) is a 3rd-party external tool that allows instructors to proctor Canvas online exams remotely. SEM can be used for providing security for a variety of assessment activities in Canvas. Different SEM sessions can be created within courses for different offerings of exams (see Recommended practices below). It can also be used as a monitoring tool for other web-based activities.
SEM uses the student's webcam and microphone to confirm their identity and then record them during a remote exam attempt. Their onscreen activity is also recorded and the system intelligently monitors for suspicious activities. This tool is authorized under the UofA's Security and Privacy policies.
Important note for April 2026: SEM version 1 will be decommissioned by the vendor after Winter 2026 term. The screenshots in this guide have all been updated to show the SEM V2 interface. Instructors can also view the vendor-supplied documentation for SEM version 2.
System requirements for using SEM:
- Google Chrome browser (both for instructors AND students)
- Desktop or laptop computer (i.e., Windows, MacOS)
- Chromebooks are supported, but iPads and tablets are not, i.e., no Apple iOS or Android devices, etc.
- Please note: because SEM requires as working webcam to function, it does NOT function in on-campus computer labs. Instructors should use Respondus LockDown browser and physical proctoring in those environments.
Determining whether to use SEM:
Guidelines for delivering remote exams
SEM known Issues, system limitations, and recommendations
SEM V1 or SEM V2: SEM 2 is the recommended option since it is improves the student monitoring setup process. Version 1 will be decommissioned by the vendor after Winter 2026 term.
Enabling SEM to deliver a quiz:
The starting point for using SEM is to already have created the quiz. Users will then need to enter the quiz url into the SEM session configuration so that students can only link to it once their monitoring is enabled.
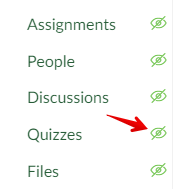
1. Ensure that the quiz link itself is not displayed in a course module and that the course-level Quizzes area is hidden. The course's quiz area visibility can be adjusted in the course settings under Navigation:
2. Once a quiz is already made, set an Access Code (password) for it. Students can sometimes find the link to a quiz with other Canvas tools (eg. calendar, gradebook, to do list, etc.) but setting a password that is only given to students through the SEM interface prevents students from circumventing monitoring.
3. Note the quiz URL:
- For Classic Quiz, you can copy the URL from the browser address bar. e.g. https://canvas.ualberta.ca/courses/292/quizzes/5645
- For New Quizzes, you can copy the URL, but will need to remove the suffix shown after the activity number. e.g. https://canvas.ualberta.ca/courses/347/assignments/726703/edit?quiz_lti
- https://sites.ualberta.ca/~eclass/kb-images/canvas/canvas-sem-new-quiz-url.png
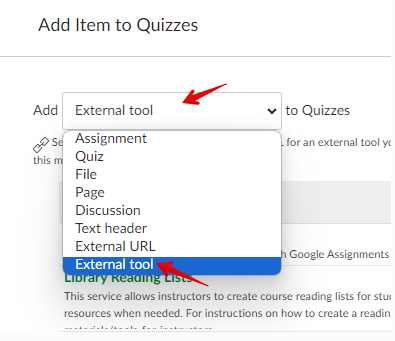
4. To set up the SEM session, add an item to a module, filter by External Tool, and add Smart Exam Monitor V2.
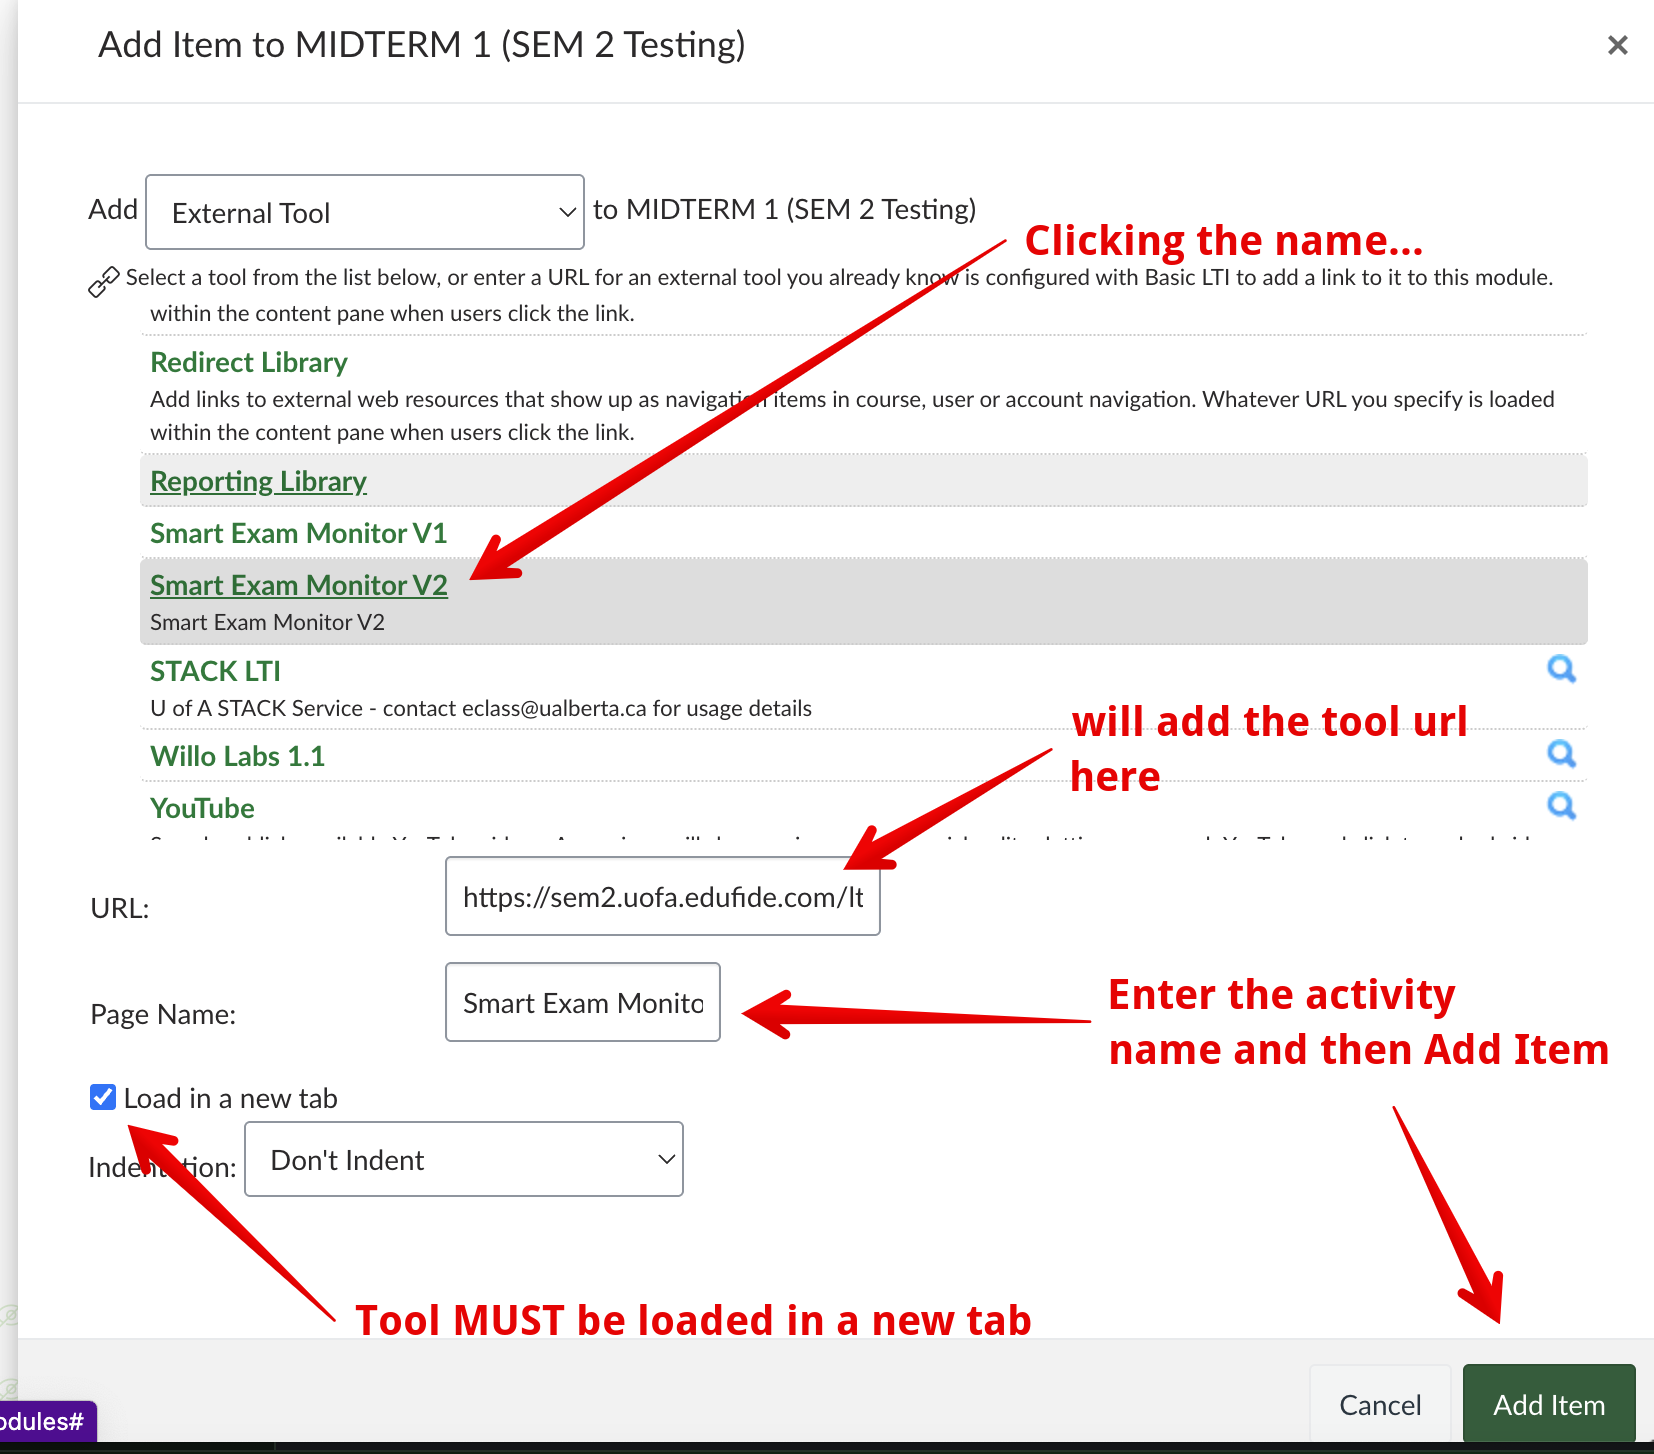
You will know that you have successfully selected a tool when the URL field is populated. (If it is blank, click on the tool name again to make a URL appear.) Ensure that Load in a new tab is checked. Proctoring results will not load if the external tool is not loaded in a new tab.
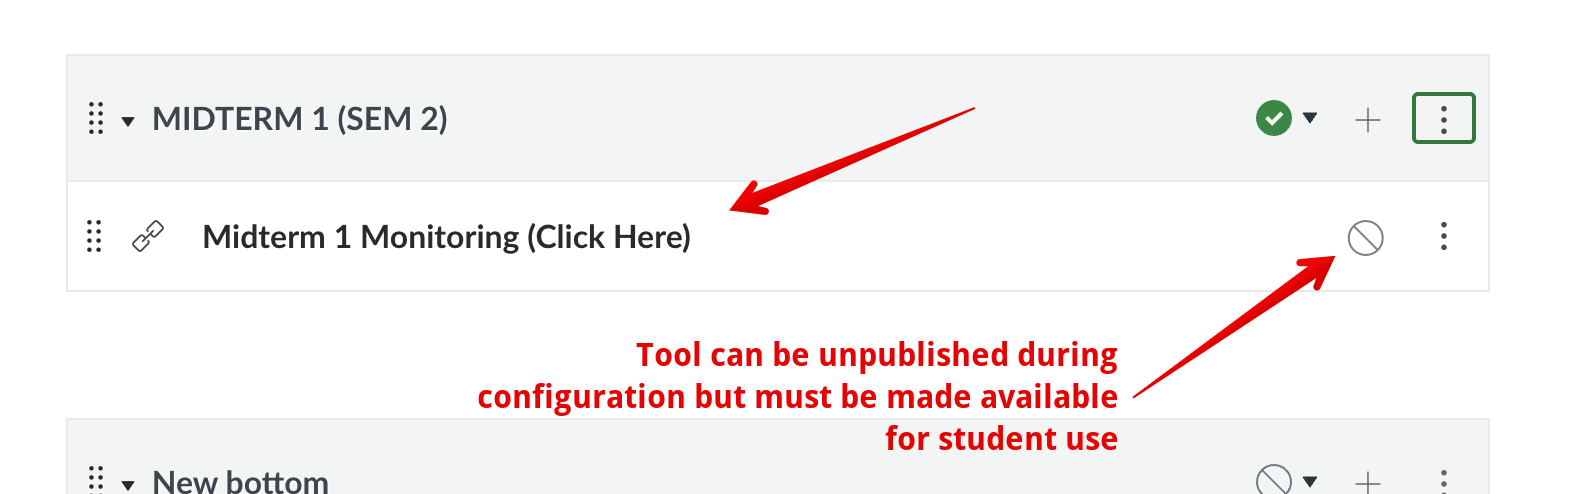
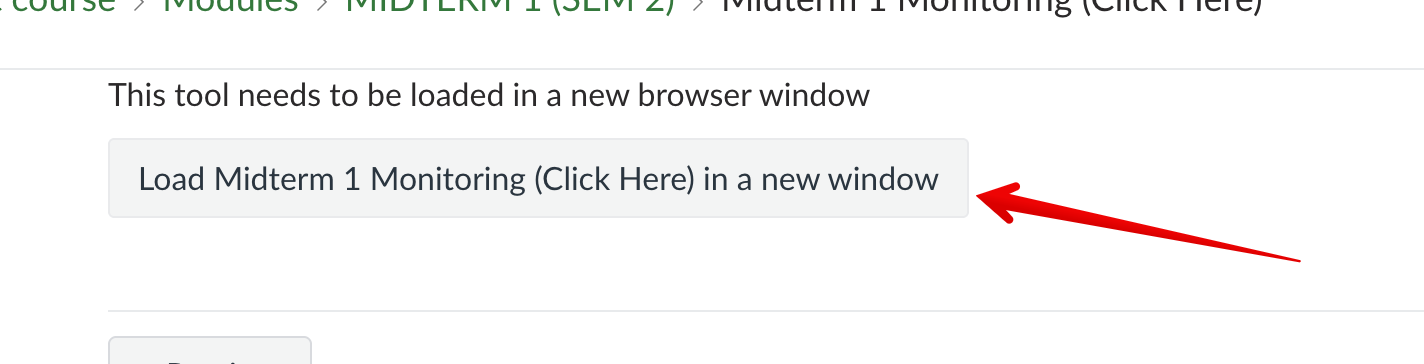
6. Once added to a module, click the name you selected and then the button to load it in a new window:
Configuring a SEM session:
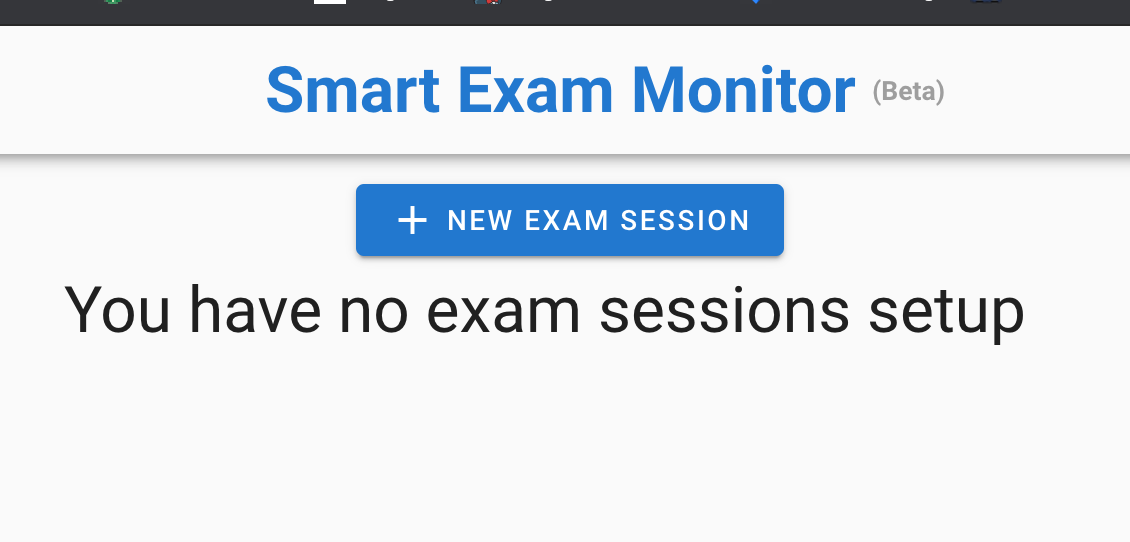
Now that you have added the SEM activity to a module, you can add sessions to it.
1. Click 'Create Session'.
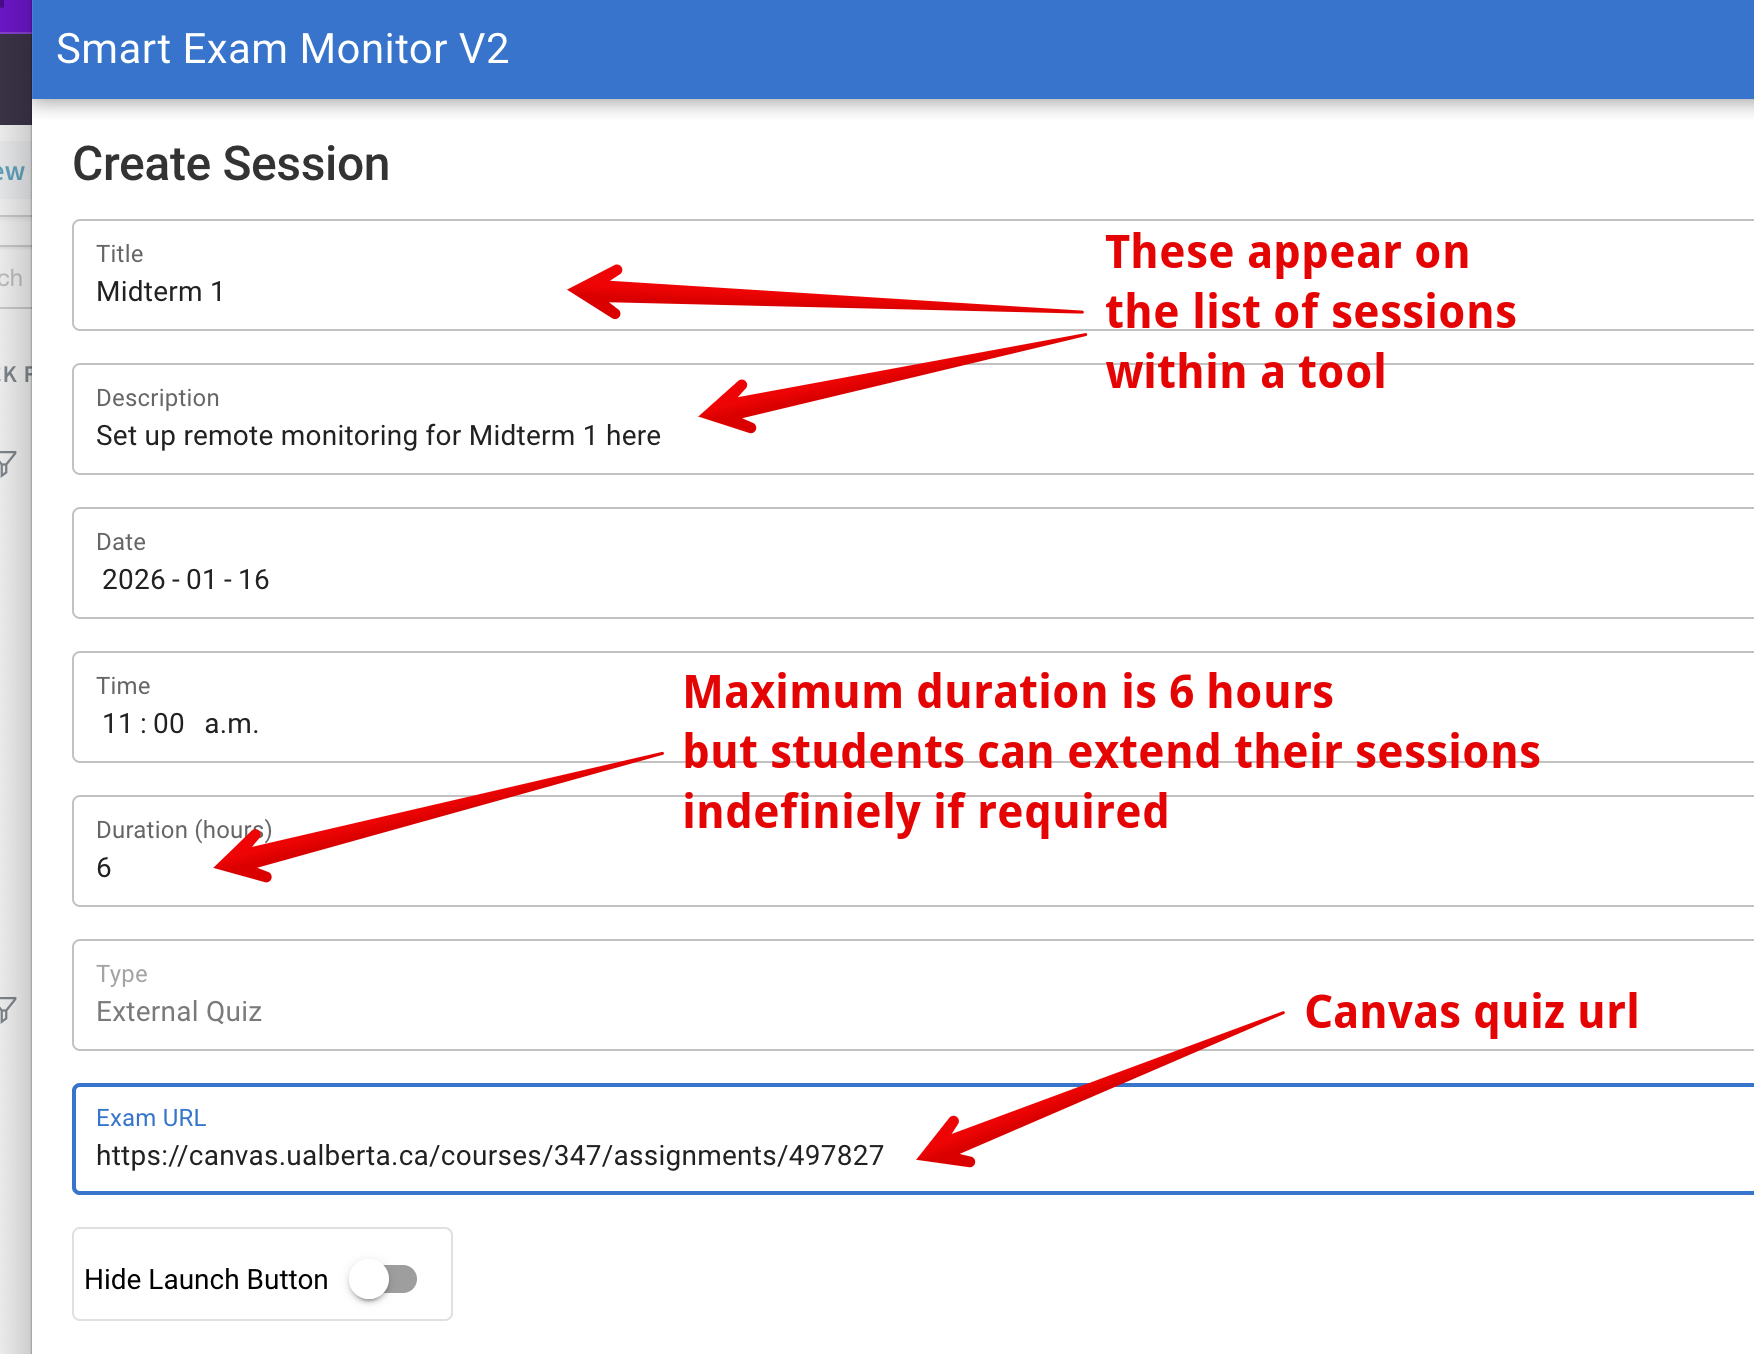
2. Enter the session information. In the first section complete the following fields:
- Title (required): Shown to students in the list of sessions once it is toggled 'Open to students'.
- Description: Visible to students below the session title once it is toggled 'Open to students'. This field can be useful to help students distinguish between different sessions for the same assessment.
- Date/Time: The date and time at which the session will display students the quiz link and password once they have configured their monitoring.
- SEM sessions can be open for setup at any time, but the quiz launch will be restricted by the time set here.
- The start date and time in the SEM settings must be a date on or after the quiz's open date and time (if applicable) to prevent early launches onto a closed quiz which may cause confusion.
- Duration (hours): This value is how long the monitoring session should be set to run by default, up to a maximum of 6 hours. Sessions can be closed at any time by students and can also be extended indefinitely by students. This duration is mostly in place to ensure that the monitoring turns off in case a student forgets to close their SEM app/tab after completing their exam and should not be confused with the quiz timer/duration which is set on the quiz itself in Canvas.
- Exam URL: this is the link to the exam (as shown above.)
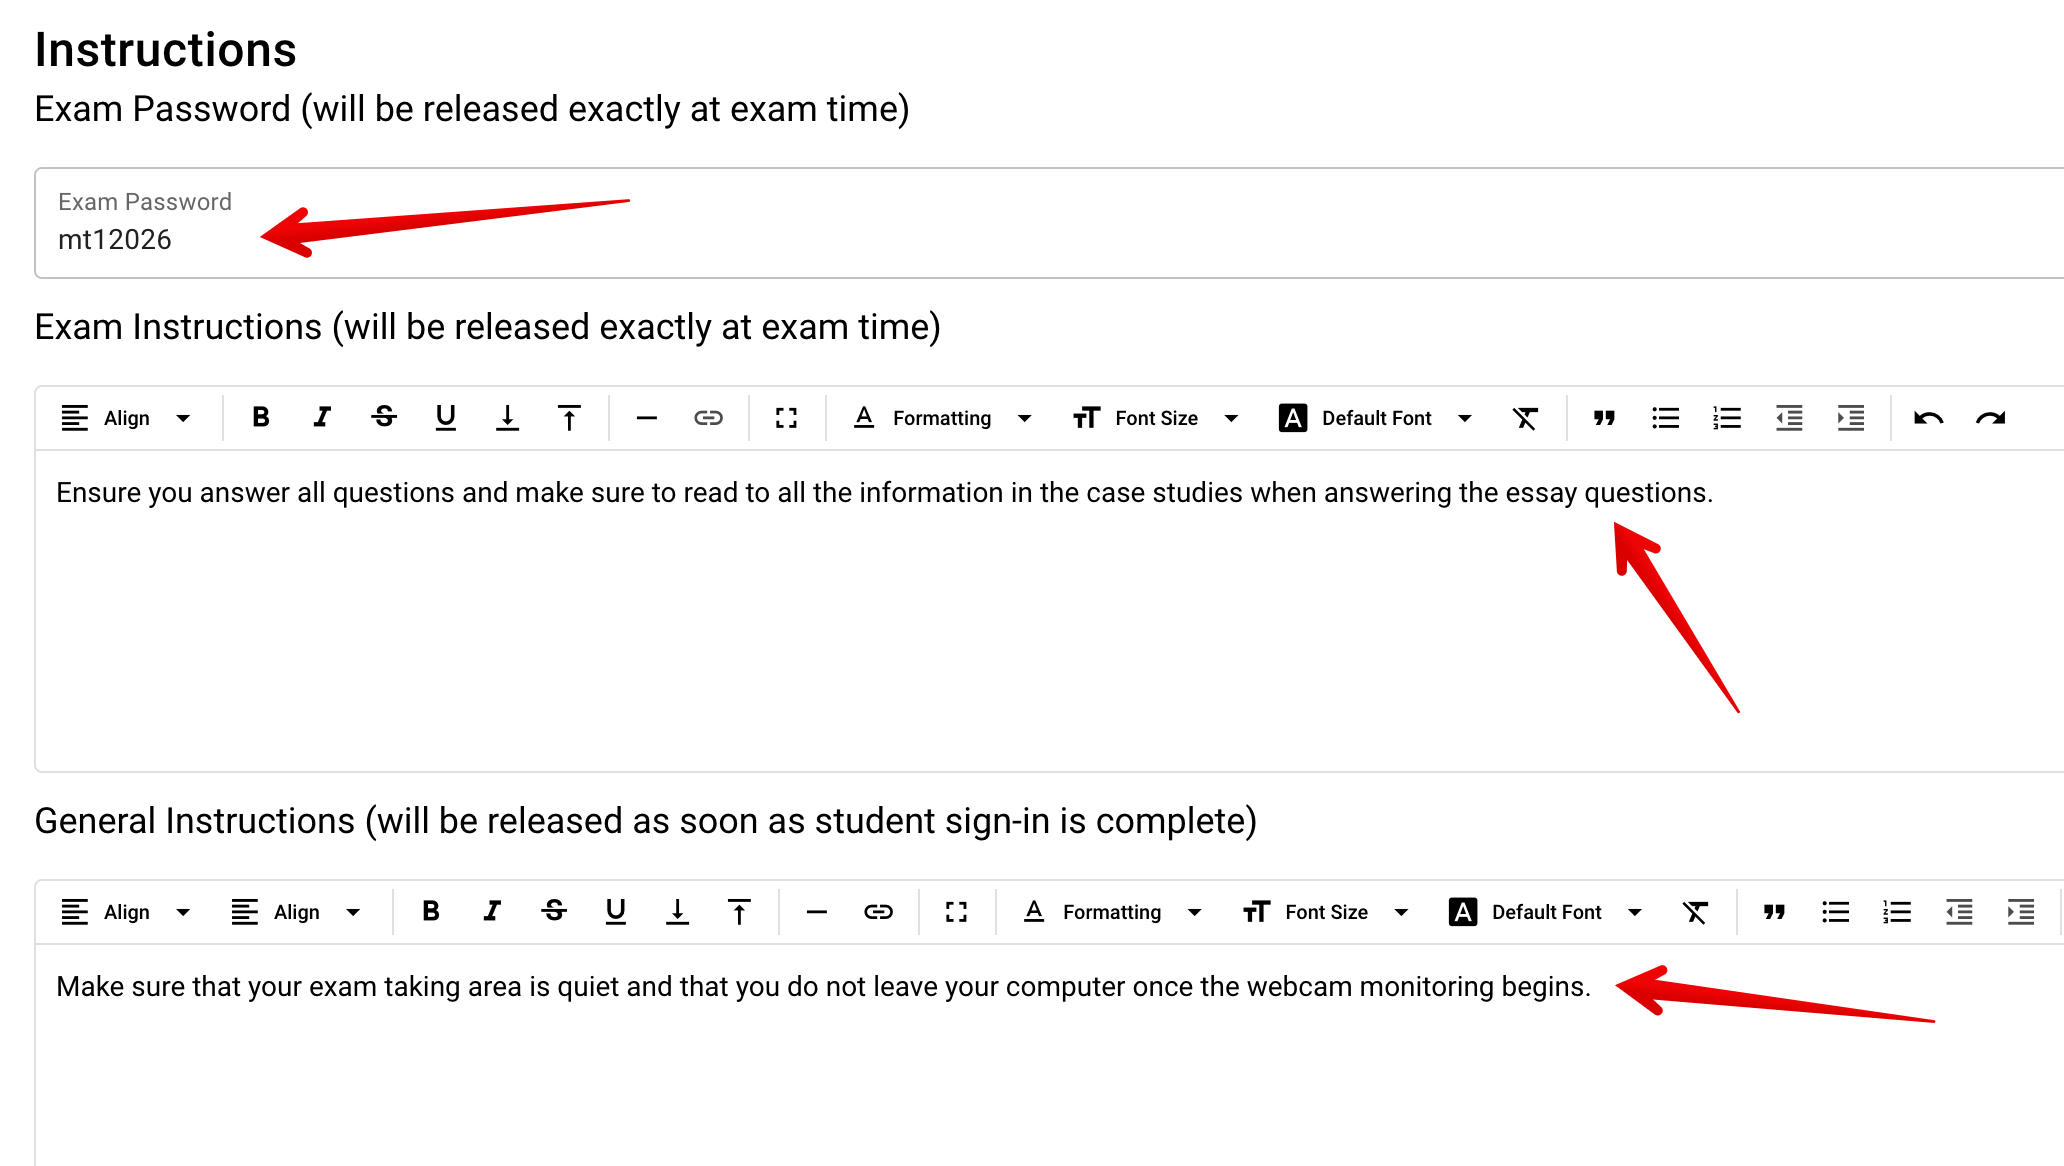
In the 'Instructions' area section, set:
- Exam password: Will be displayed to students (along with a button to copy it) only after they have initiated their monitoring session and the SEM session start time is reached. Ensure that the password (if pasting from the Canvas quiz settings) does not contain leading or trailing spaces.
- Exam Instructions: These become visible to students only after they have initiated their monitoring session and the SEM session start time is reached. Instructors can write any special instructionsstudents would need once taking their exam.
- General Instructions: These become visible to students only after students have initiated their monitoring session but before the SEM session start time is reached. Instructors can write any standard instructions relating to the exam or the students monitoring set up.
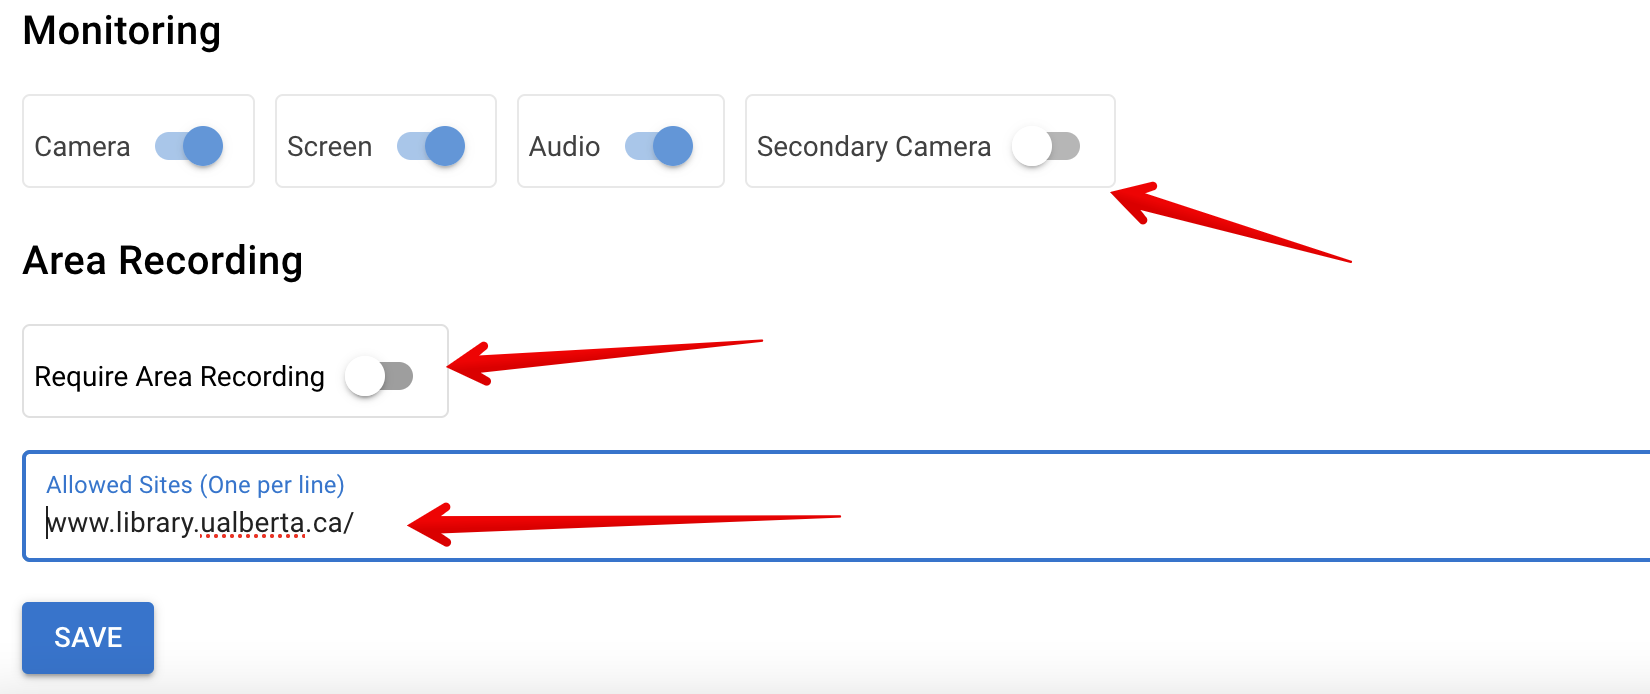
Instructors can then select the options for monitoring:
- Camera: Monitor students using their device webcam. Cannot be disabled at this time.
- Screen: Monitors and records all the student's onscreen activity. Cannot be disabled at this time.
- Audio: Monitors student audio. Cannot be disabled at this time.
- Secondary Camera: An option for increased security on exams where students enable an external webcam or their mobile device as additional monitoring. Not available at this time.
- Area Recording: Require students to make a recording of their surroundings to demonstrate a clean exam-taking environment. Optional.
- Allowed sites: Websites that students can access and not be flagged for by the screen monitoring. Enter 1 per line.
- Note: addtional urls can be added after attempts to clear unwanted alerts that are appearing during proctoring reviews.
Then click Save.
When you are ready, sessions can be made available to students by toggling the Open to students slider. This will allow students to access the session and begin their SEM setup process but they would still only be able to see the quiz url and password once the start time is reached.
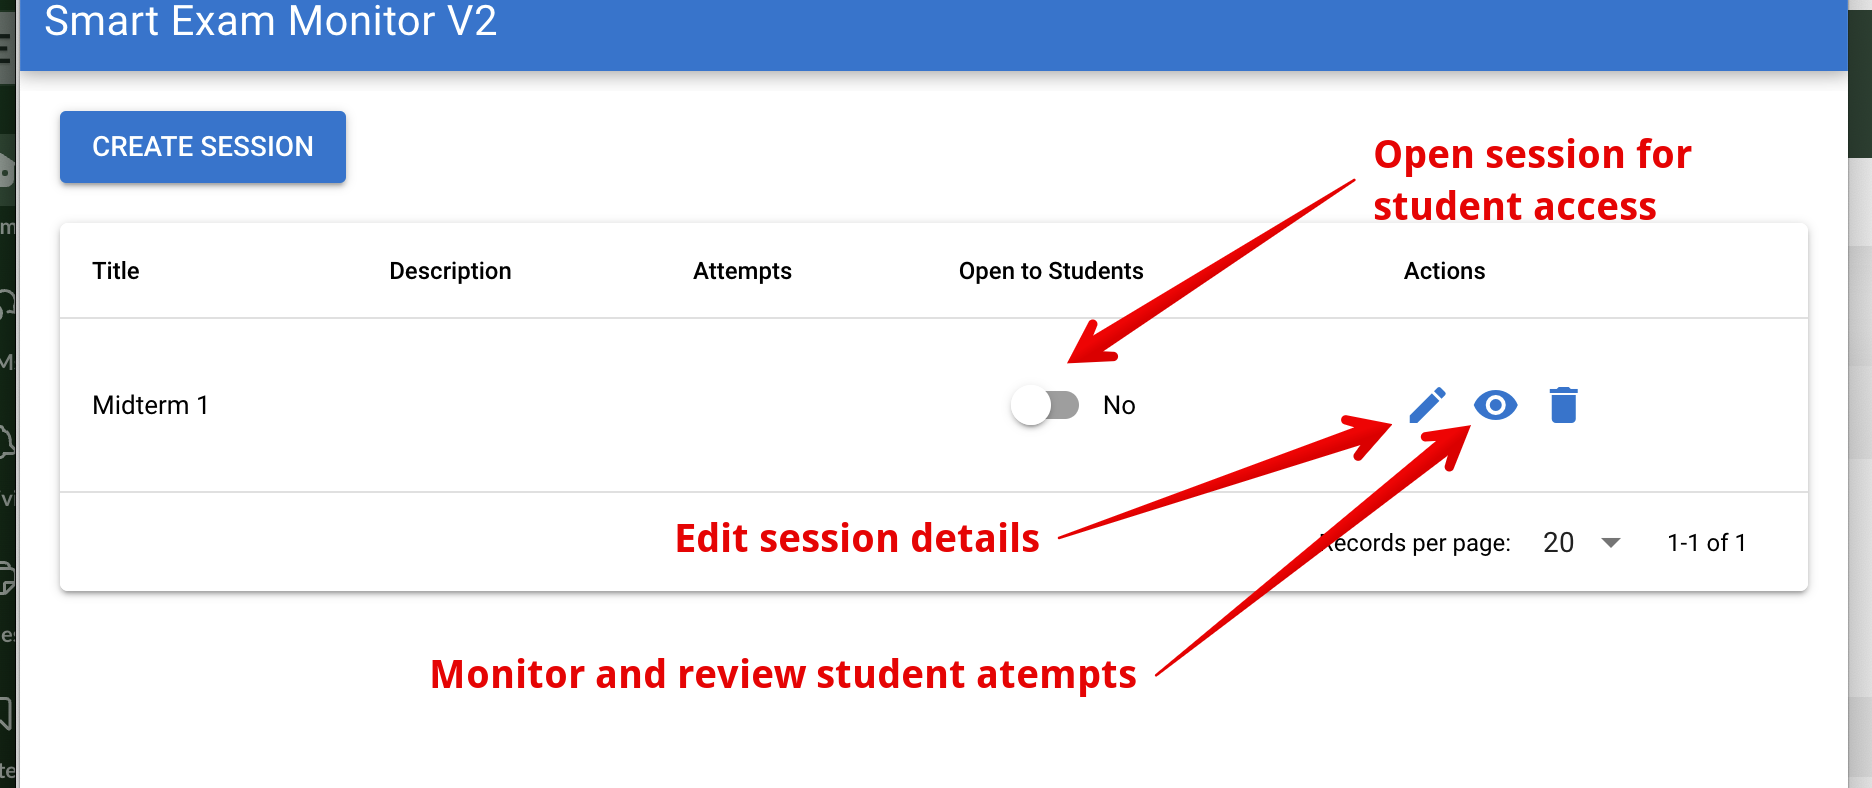
Already created sessions also allow instructors to:
- Edit: Make any changes to the session.
- Proctor: Review and/or monitor students in-session.
- Delete (the session)
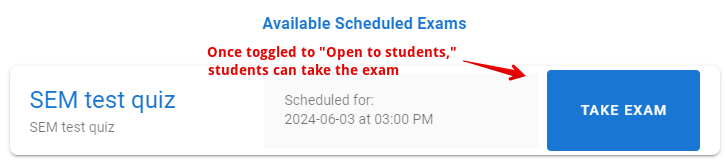
Once a session is toggled to open and the students pass across the link in Canvas that opens the app and performs their device validation, they will be able to click the Take Exam button:
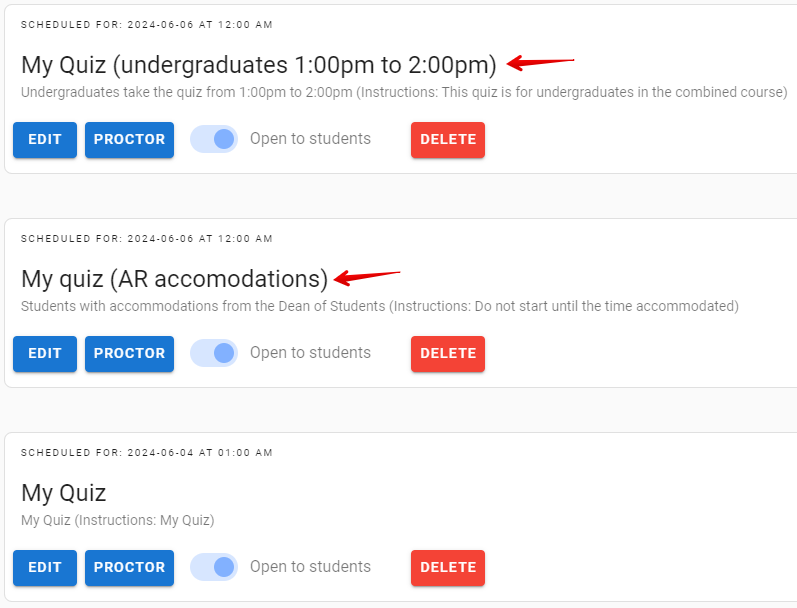
Recommended practices:
- Multiple SEM sessions may be created within the same module link for different exam windows or accommodations. Each sessions should have unique names for diverting the flow of attempts (e.g. image below):
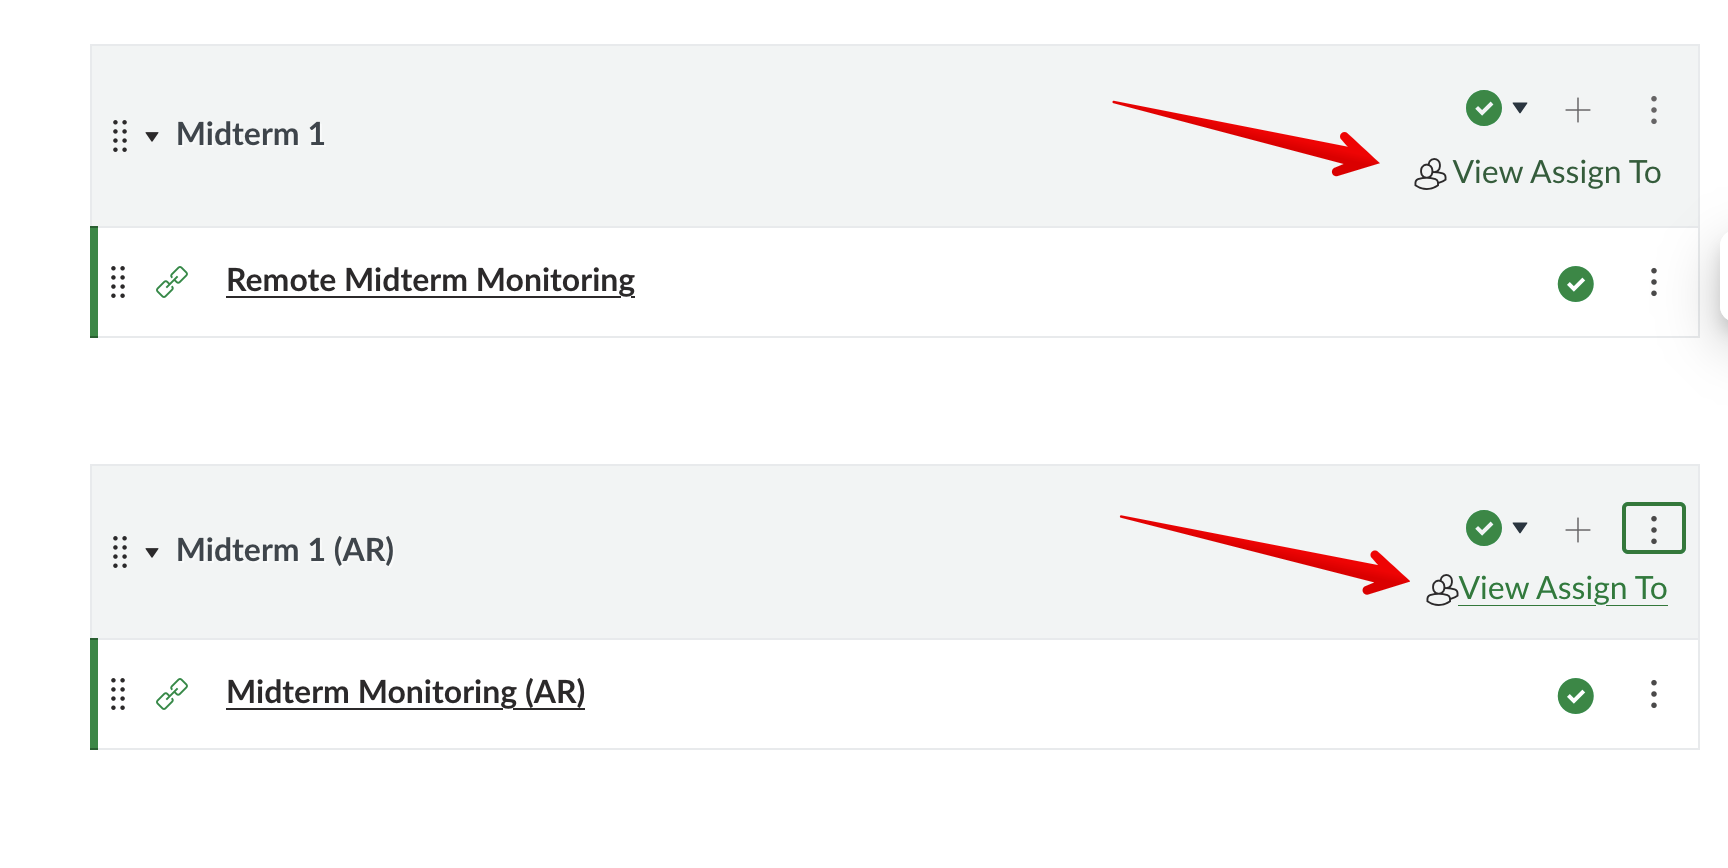
- If instructors want to control student access to different tools (ie. not rely on them to select the correct exam session), this can be set up using multiple SEM tools created in separate modules and then controlling which students can see the links in the different modules using 'Assign to' using either the course sections or more flexibly using differentiation tags:
- Single SEM sessions should not to exceed 600 students as any more than this may result in slower load times when using the proctoring view.
Click here to view learn more about the student experience with SEM.
|