|
Using Smart Exam Monitor (SEM) - Students
Last modified on 11 September 2025 08:55 PM
|
||
|
This document outlines the steps students need to follow to launch a monitored exam session using Smart Exam Monitor (SEM). This 3rd party tool is a mechanism to provide proctoring for online exams at-a-distance when students cannot complete exams in person. SEM has been approved for use at the U of A by the CISO who has created an Information and Privacy statement regarding remote exam proctoring for any interested students to review. New in Winter 2025, SEM version 2 has been launched in an open beta so students should confirm with their instructors which version of the software they should be using. Contents:
To ensure the integrity of the exam-taking environment, the tool monitors (and records) the computer screen, the webcam, and the microphone during exams. SEM requires the following for use: Basic Requirements - Operating System: macOS, Windows, ChromeOS - Browser: Chrome - Webcam - Microphone - Internet connection - System task bar set to display on the bottom The tool is accessed through Canvas or eClass and runs in a browser window (no software installation is required.) Users are required to validate and grant permission to their webcam, microphone, and grant permission for screen recording. See below for detailed setup instructions. In general instructors will always provide a practice session before a 'real' midterm or final and students should ensure they take this opportunity to test that their device functions normally on SEM in advance of any high stakes exams. Students who do encounter issues should check the troubleshooting tips here and contact eClass Support if the problems persist.
General Exam Taking Guidelines When taking exams, the online testing environment should mimic the ‘in class’ testing environment and should conform to the conditions listed below. Please note: if any of the guidelines below conflict with a student's approved academic accommodations, they should notify their instructor immediately.
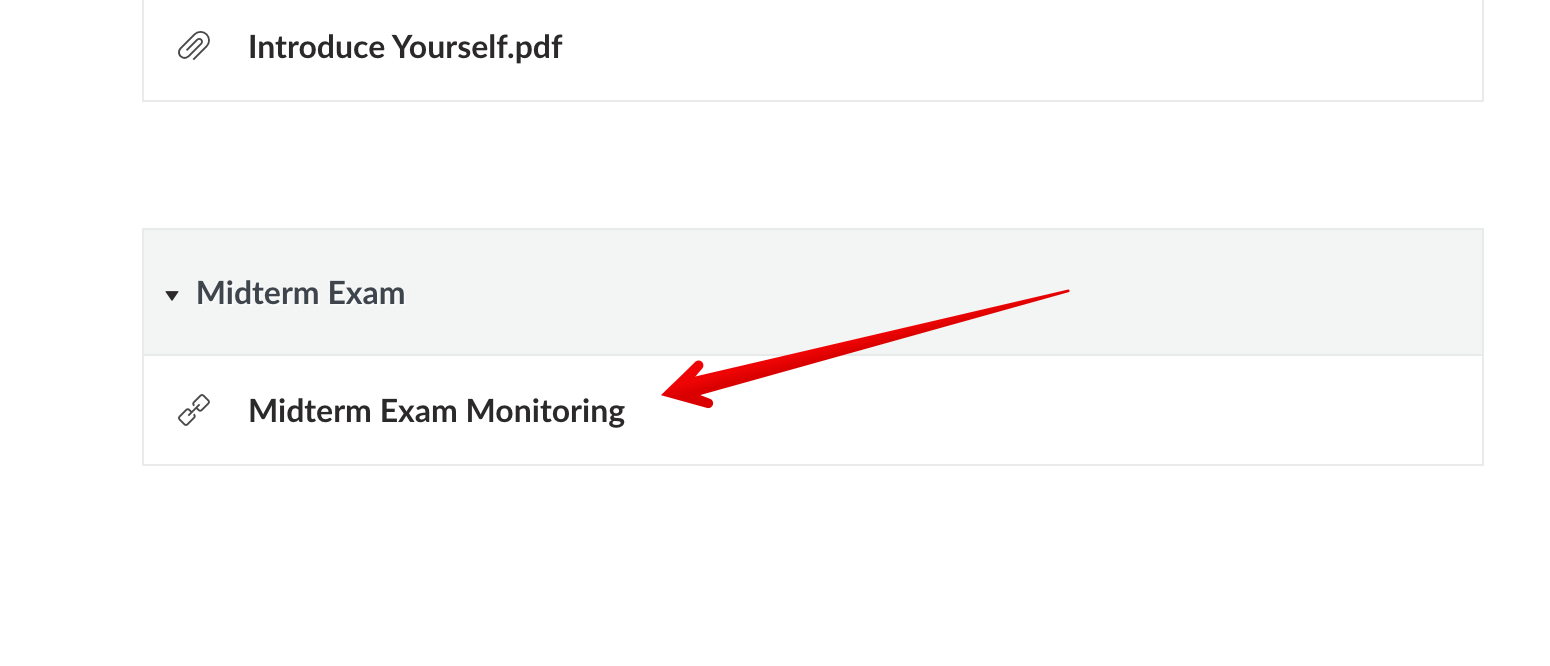
Smart Exam Monitor Setup Instructions Please note: Google Chrome is the required browser to use the Smart Exam Monitor. Students should ensure they clear their browser cache and restart their machine before launching SEM sessions Students can also view a short video walkthrough of the setup process. SEM exam sessions are accessed through an external tool link in Canvas or eClass:
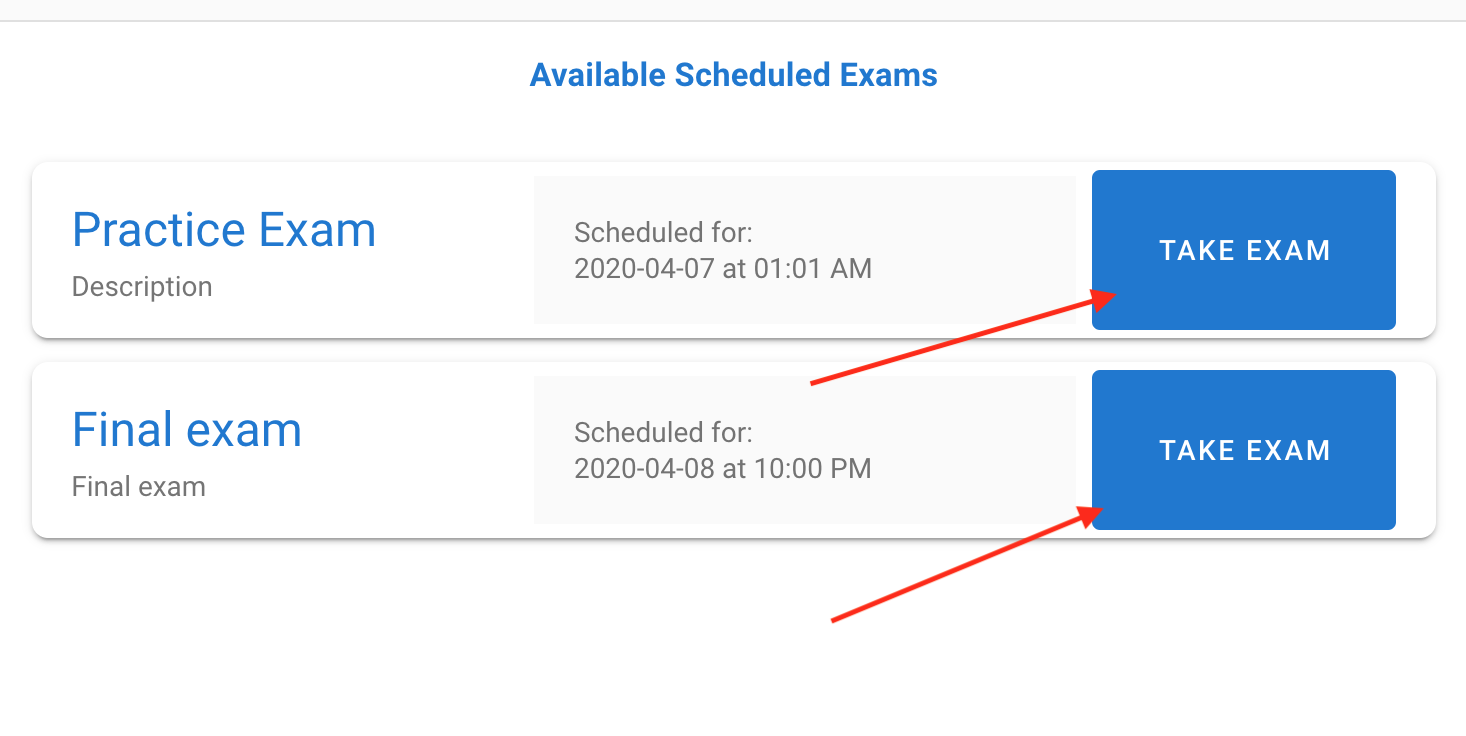
Students should select the exam required:
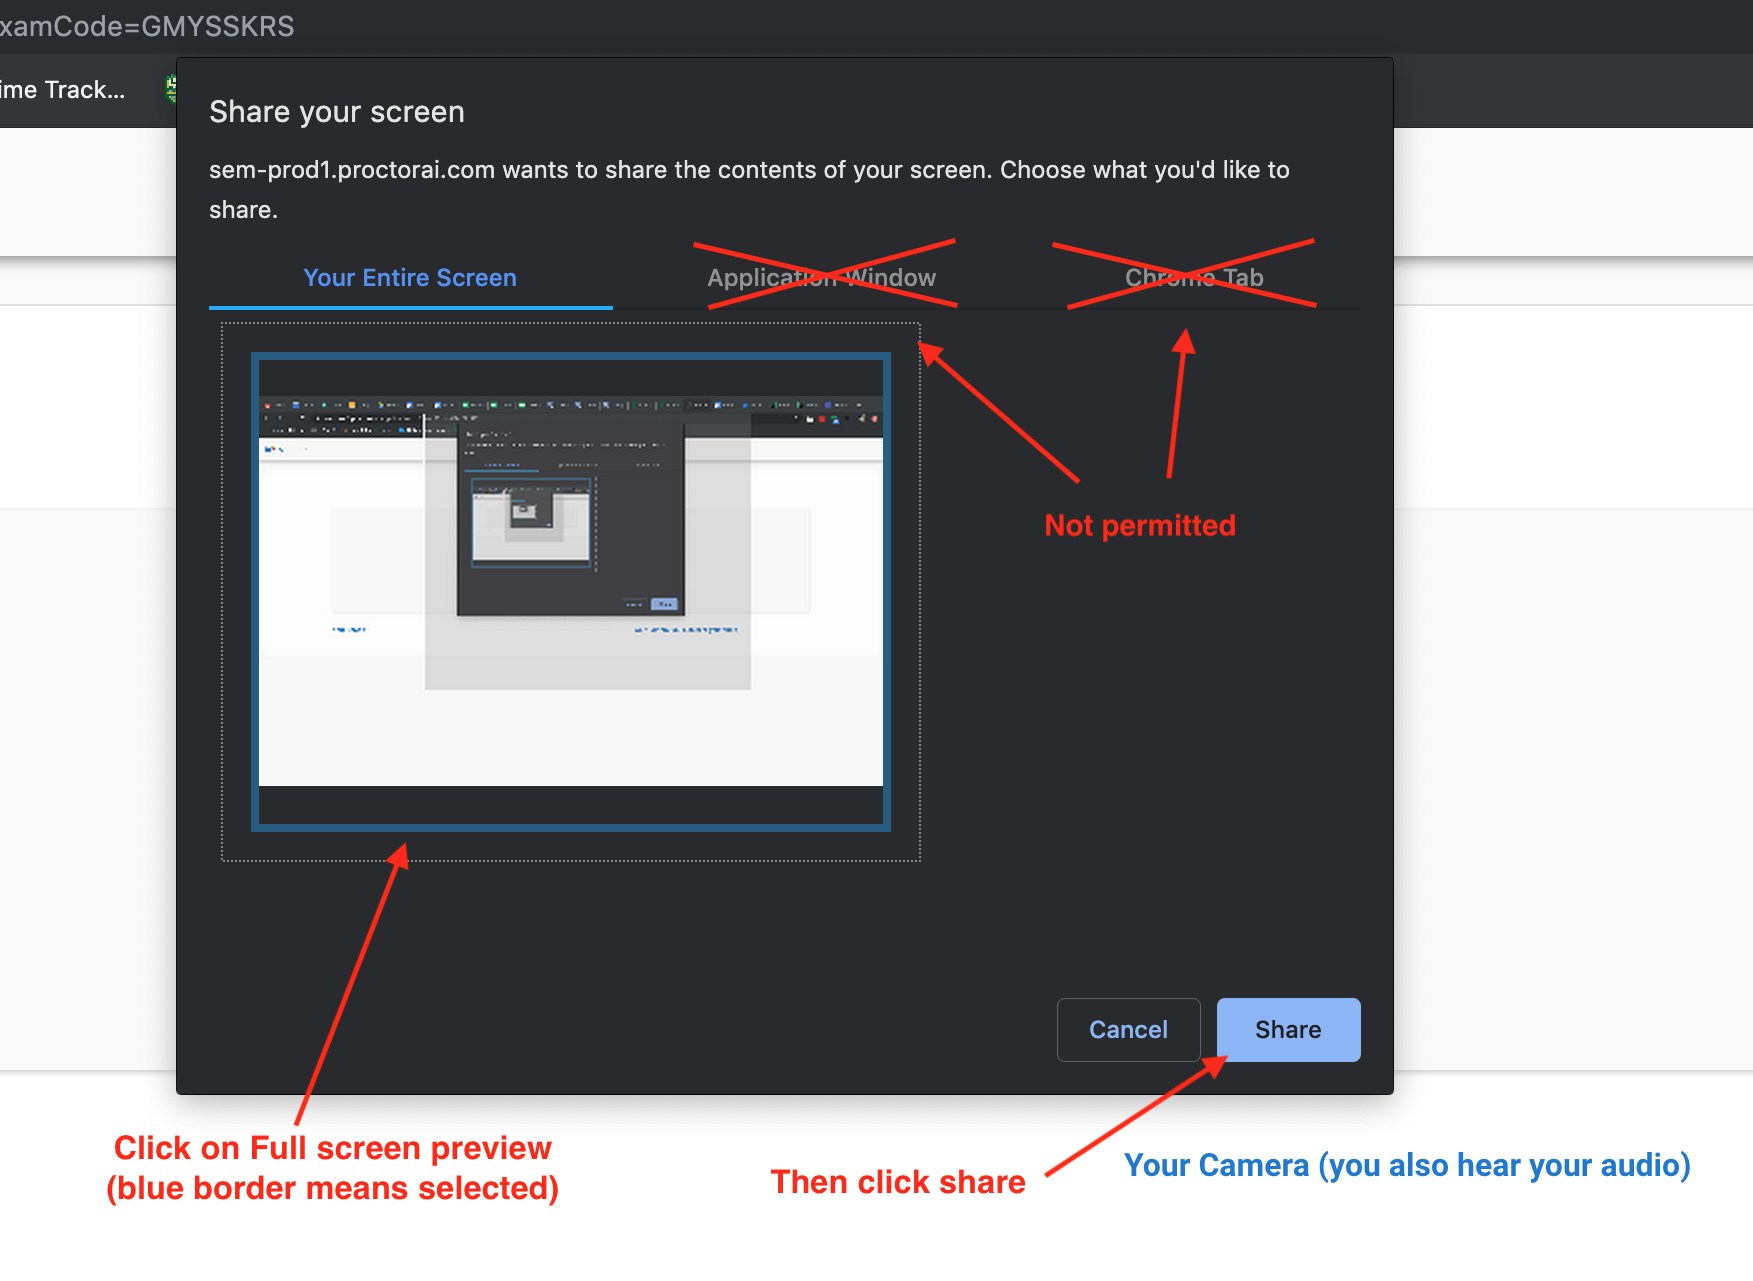
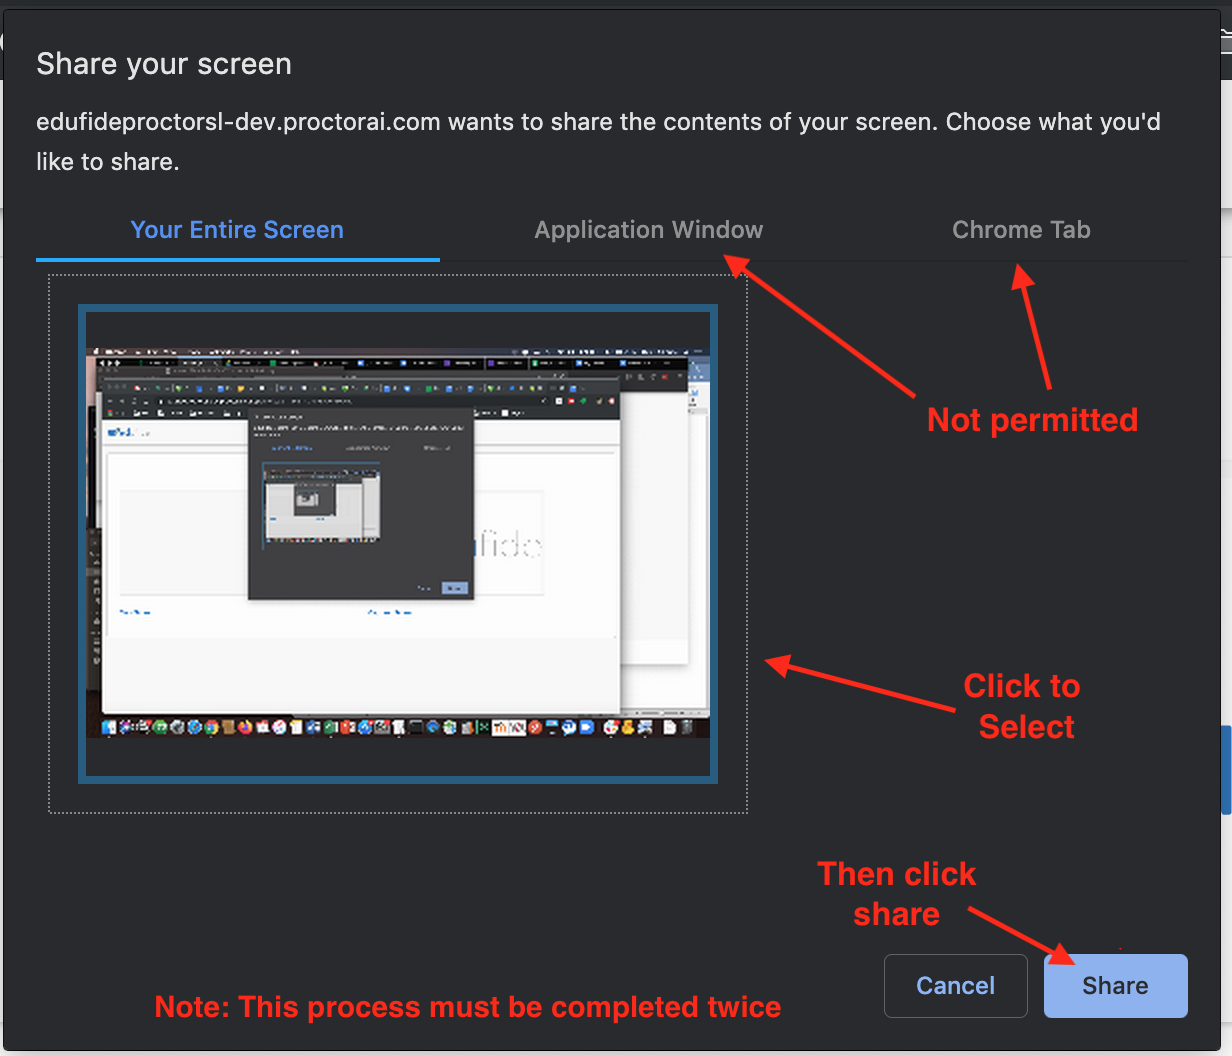
Before beginning a session, students must give the program permissions to access the screen and webcam on their device. The program first requires users to agree to the terms of use: Next you are required to give permission to share your screen. Users must select ‘Your entire screen’ and click Share:
Please note: If the Share button remains greyed out on this step, it may mean that the full screen option has not been selected. Users must click on the full screen preview to allow 'Share' to be selected. Next, SEM requires media permissions to use the webcam and microphone - users must select Allow (this step is remembered by your browser and may not be required if you have already taken exams using SEM):
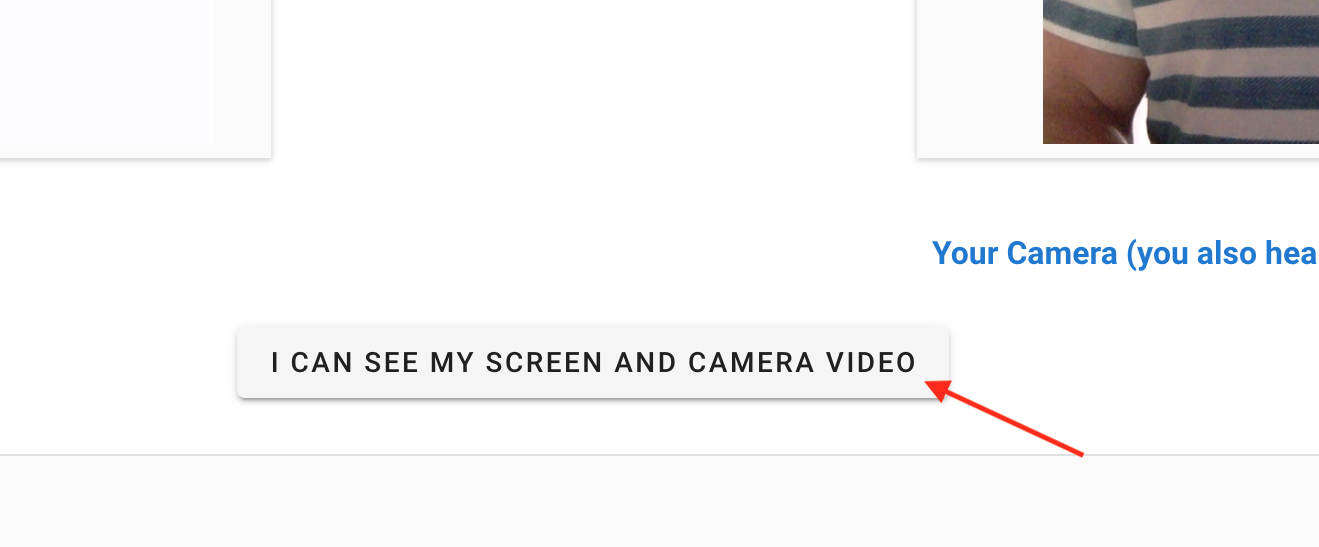
If screen sharing and webcam are functioning correctly students will see live previews of what SEM records during exams: the screen share on the left and the web camera on the right and can confirm by clicking I can see my screen and camera video:
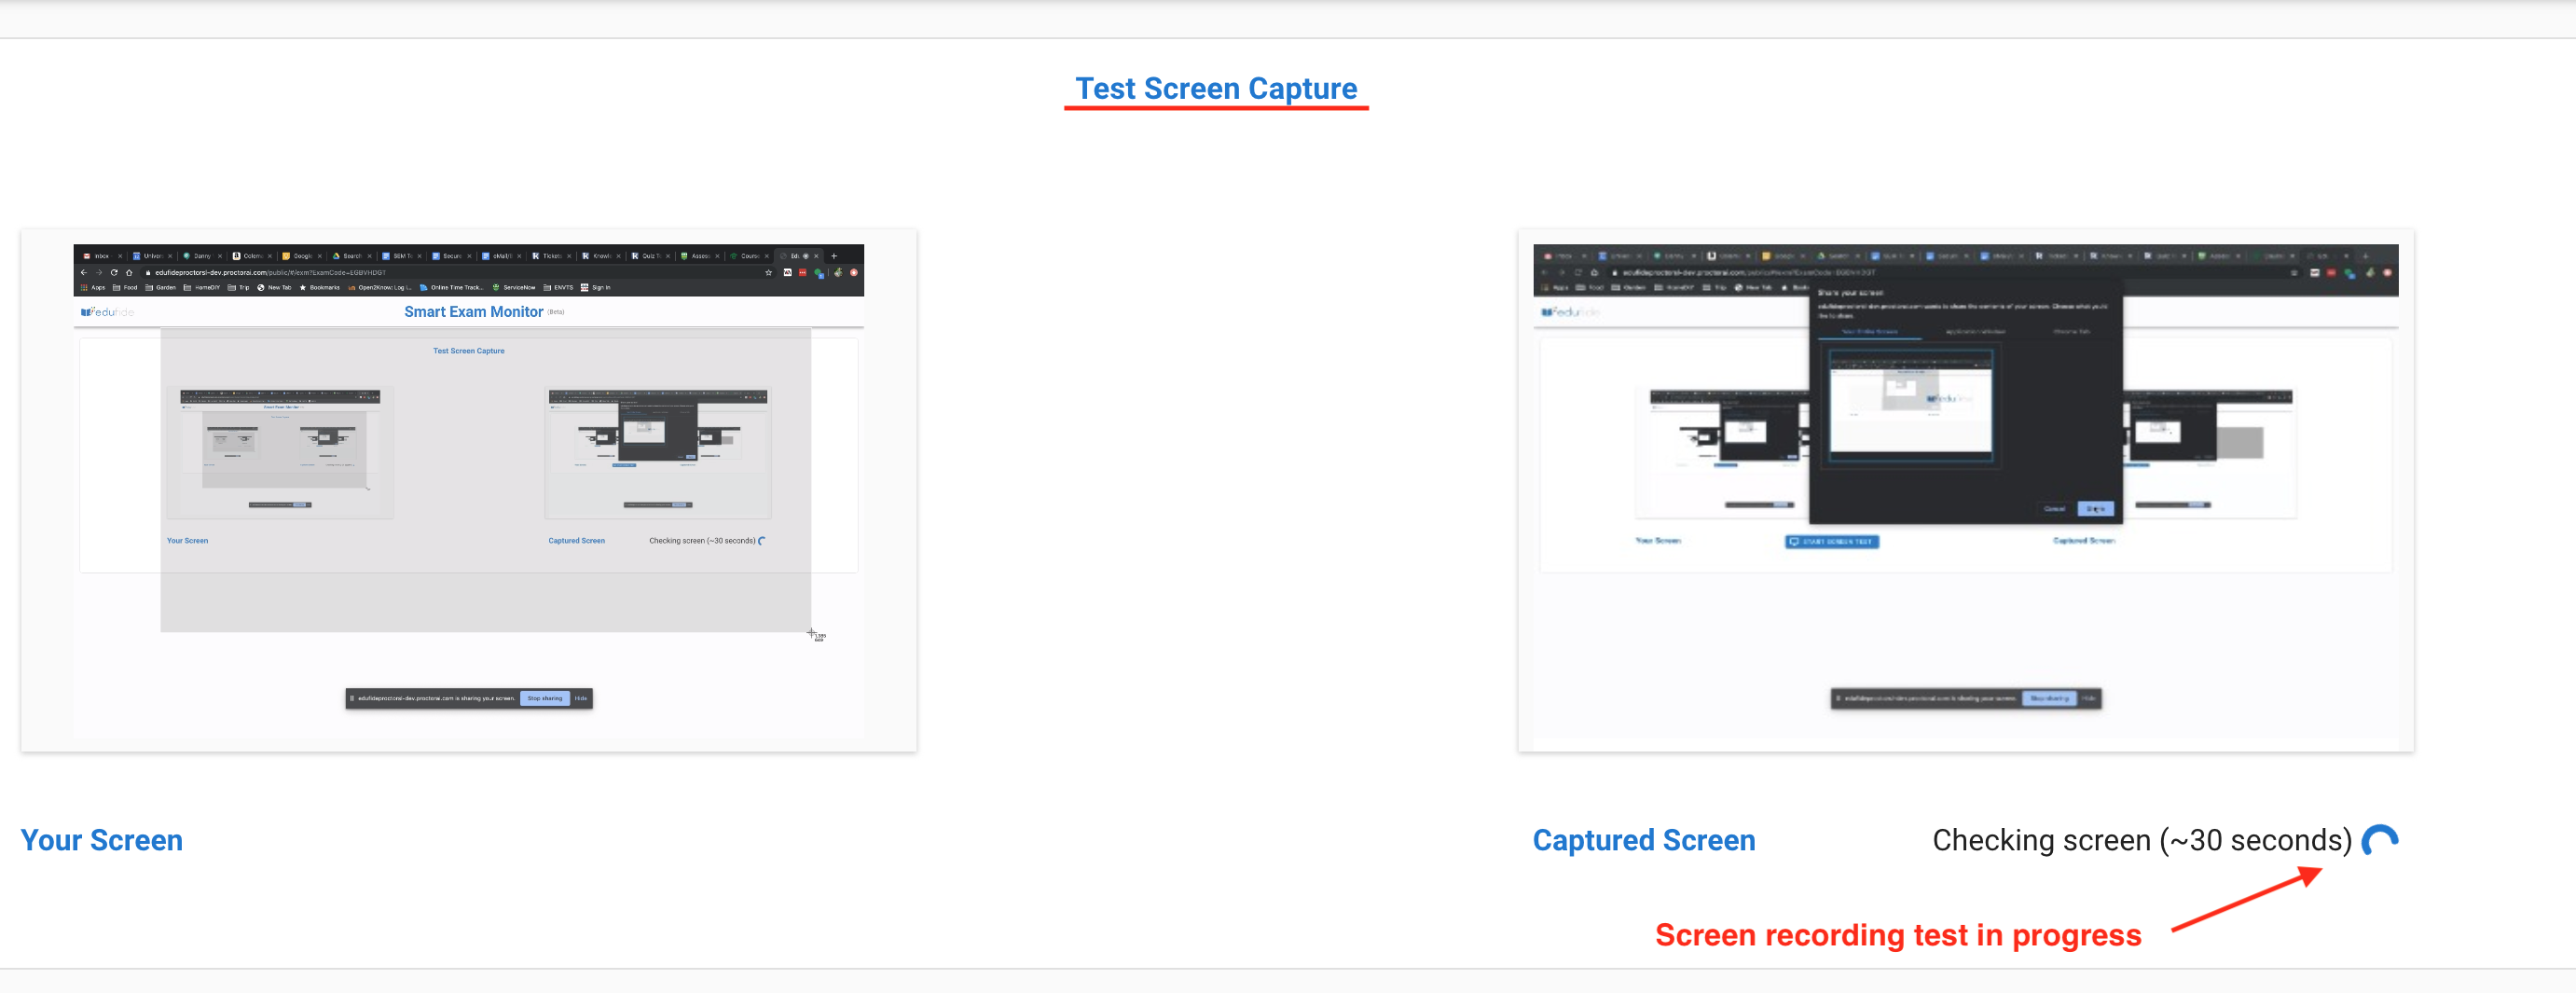
Students who are having issues with providing the correct screen, webcam, and microphone permissions to SEM should consult Granting Device Permissions for Remote Monitoring Applications. Once the permissions and basic functionality and the screen and webcam feeds are visible, SEM will then begin the exam check by recording the screen and checking it. Users will need to select and Share the screen again twice and wait 30 seconds while the software takes a recording:
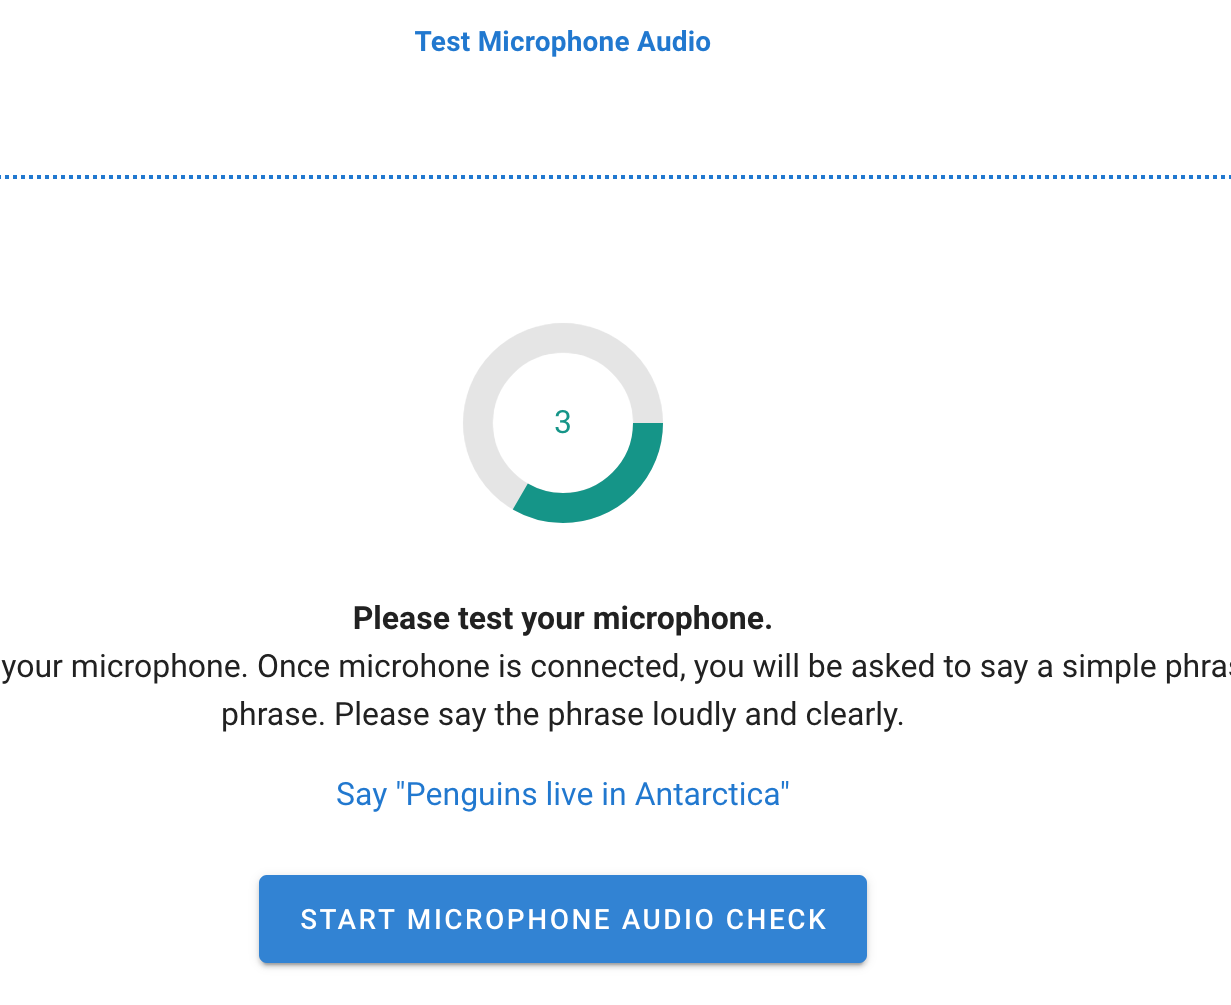
The SEM program will next complete a test recording using the microphone.
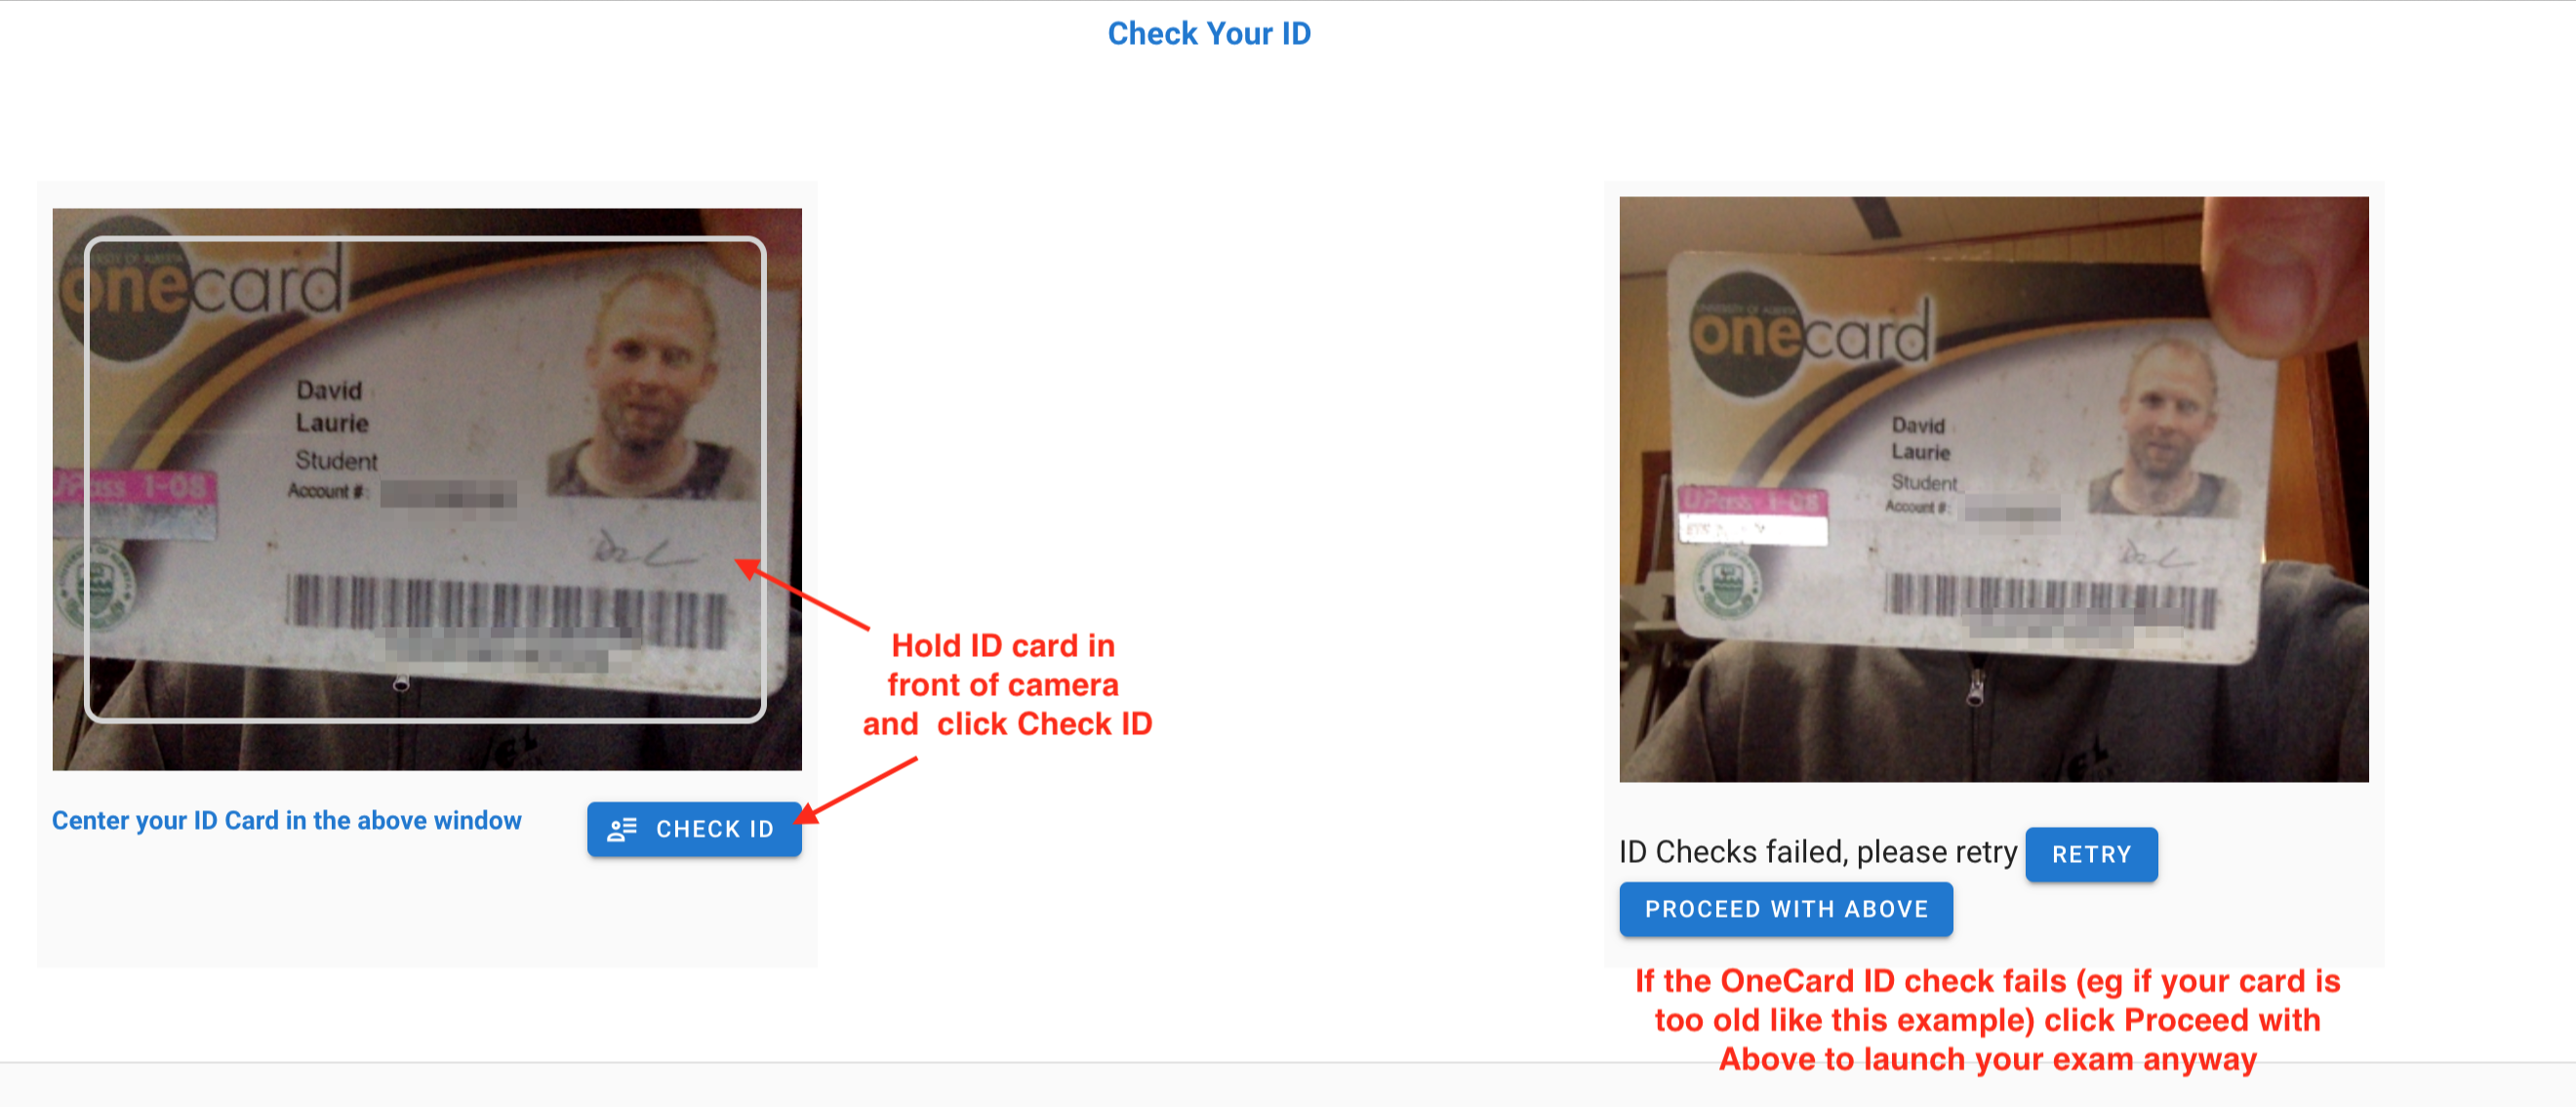
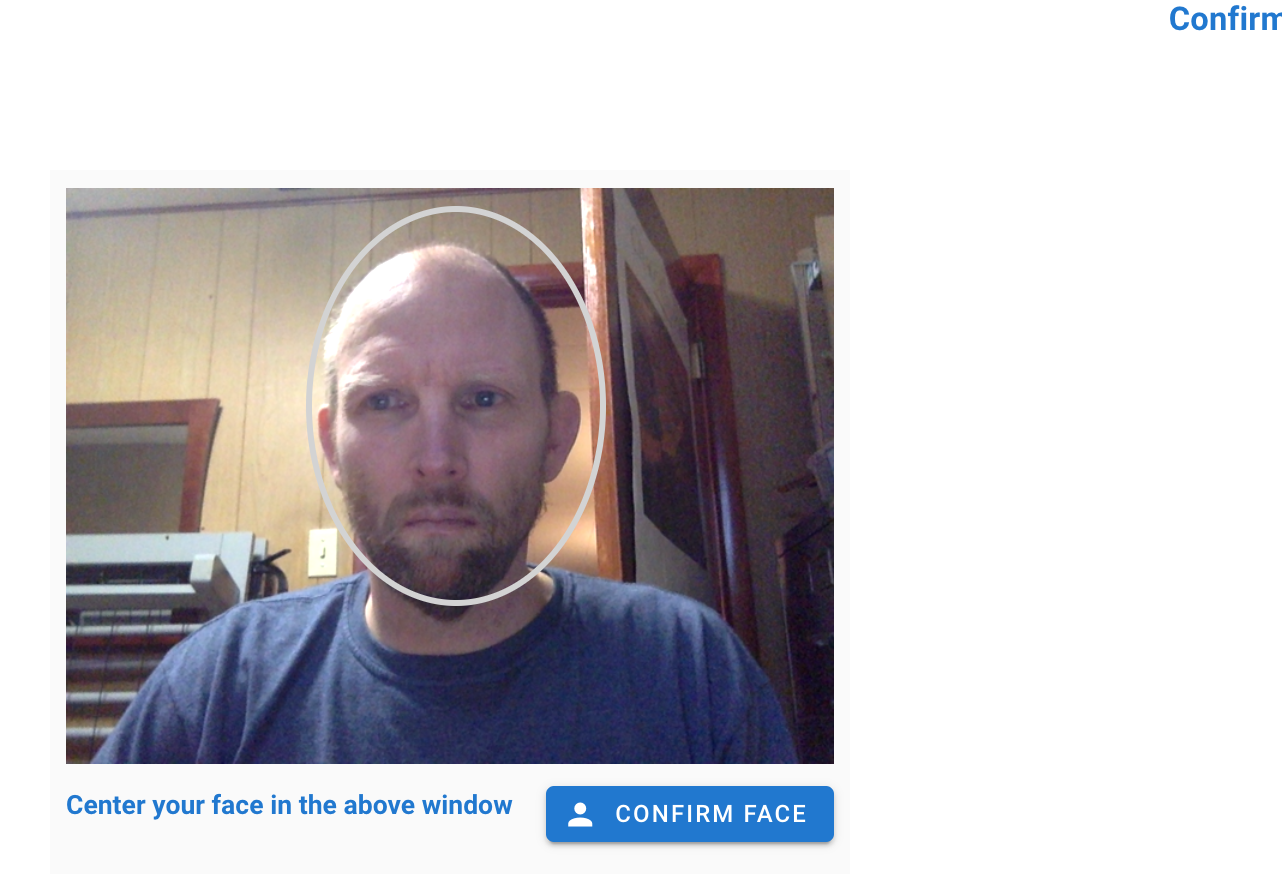
Students need to say the phrase “Penguins live in Antarctica”: Last, students must use their webcam to confirm their identity and the integrity of their testing environment. There are 3 steps for this validation: 1. The webcam will record a picture of your photo ID - center your OneCard in the left hand window and click Confirm ID. If you have a U of A Virtual OneCard, this validation step will work fine if you hold your mobile device up to your webcam with the Virtual OneCard displayed. Note: If your picture ID check fails (for example an expired OneCard as in the example above or if your OneCard is lost and you have used another form of photo ID), you will be given an option to proceed with existing photo ID saved. You will be allowed to complete your exam and your instructor will receive a flag to validate your ID manually. 2. You will next need to take a photo identifying yourself. This will be matched against your OneCard photo.
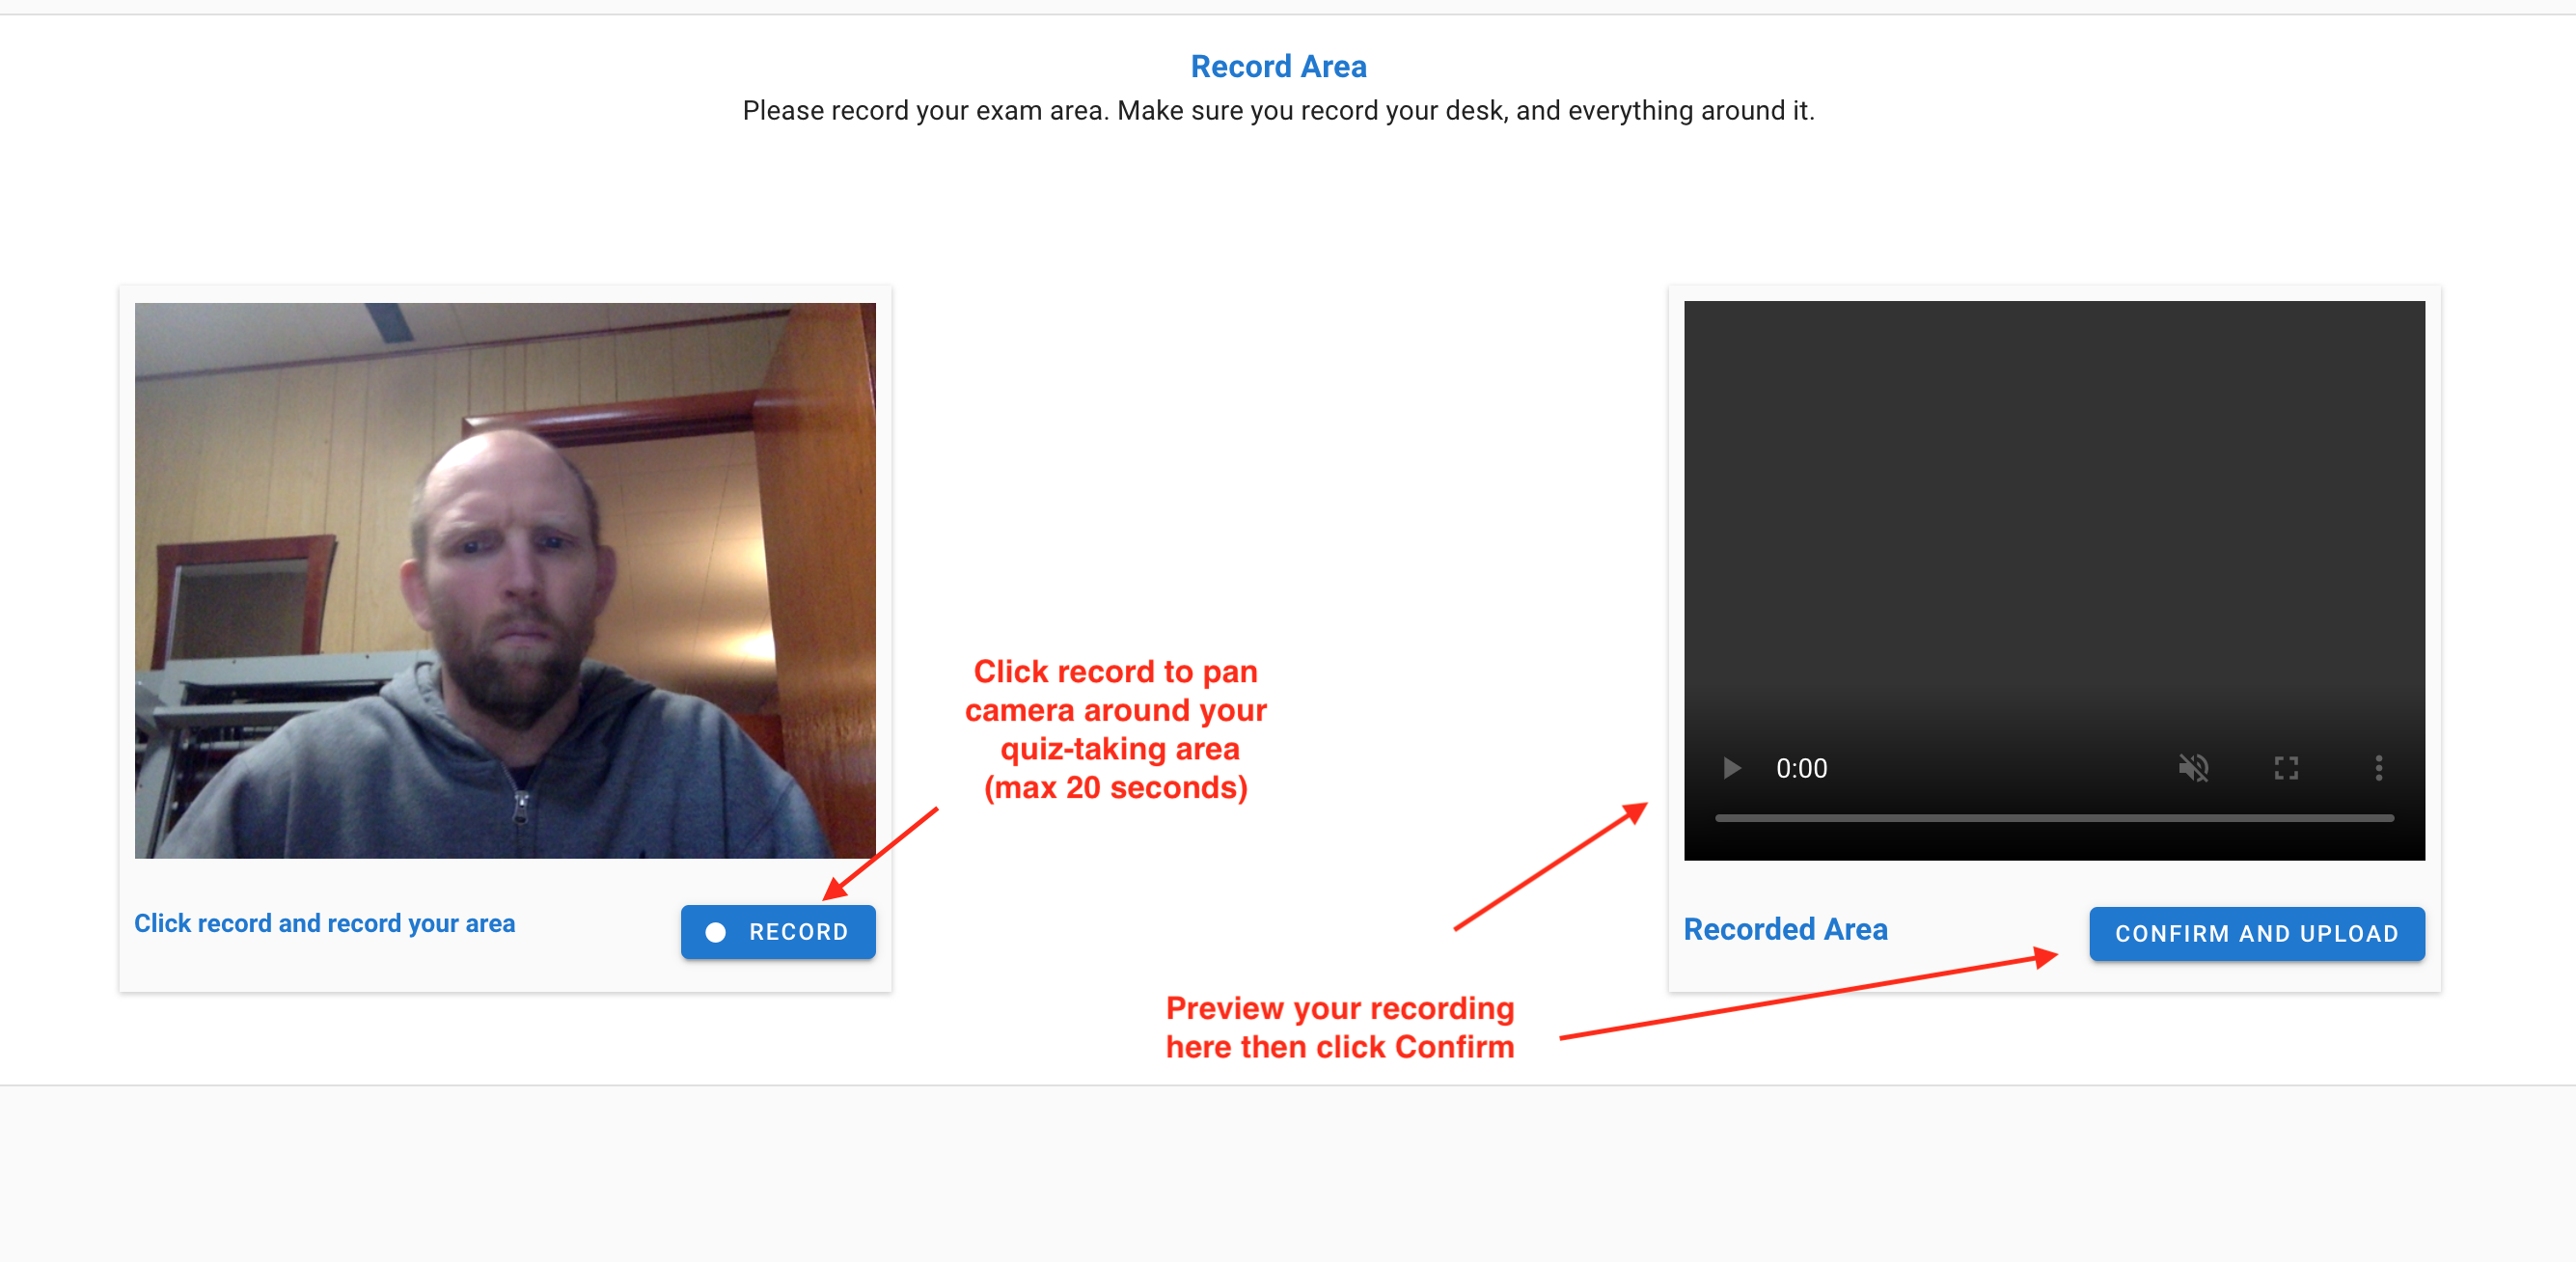
Note: If your Face Match check fails (for example if it is too dissimilar from your Photo ID screenshot), you will be given an option to proceed with the existing face photo saved. You should click proceed as you are still allowed to complete your exam and your instructor will receive a flag to validate your photo manually. 3. Last you will have 20 seconds to record your surroundings. You should make sure to capture the surface you are working on and the area immediately behind the monitor. Once you have a recording, it will be previewed back to you. You should confirm your full test-taking environment is recorded and then click Confirm and upload (this may take up to a minute to upload):
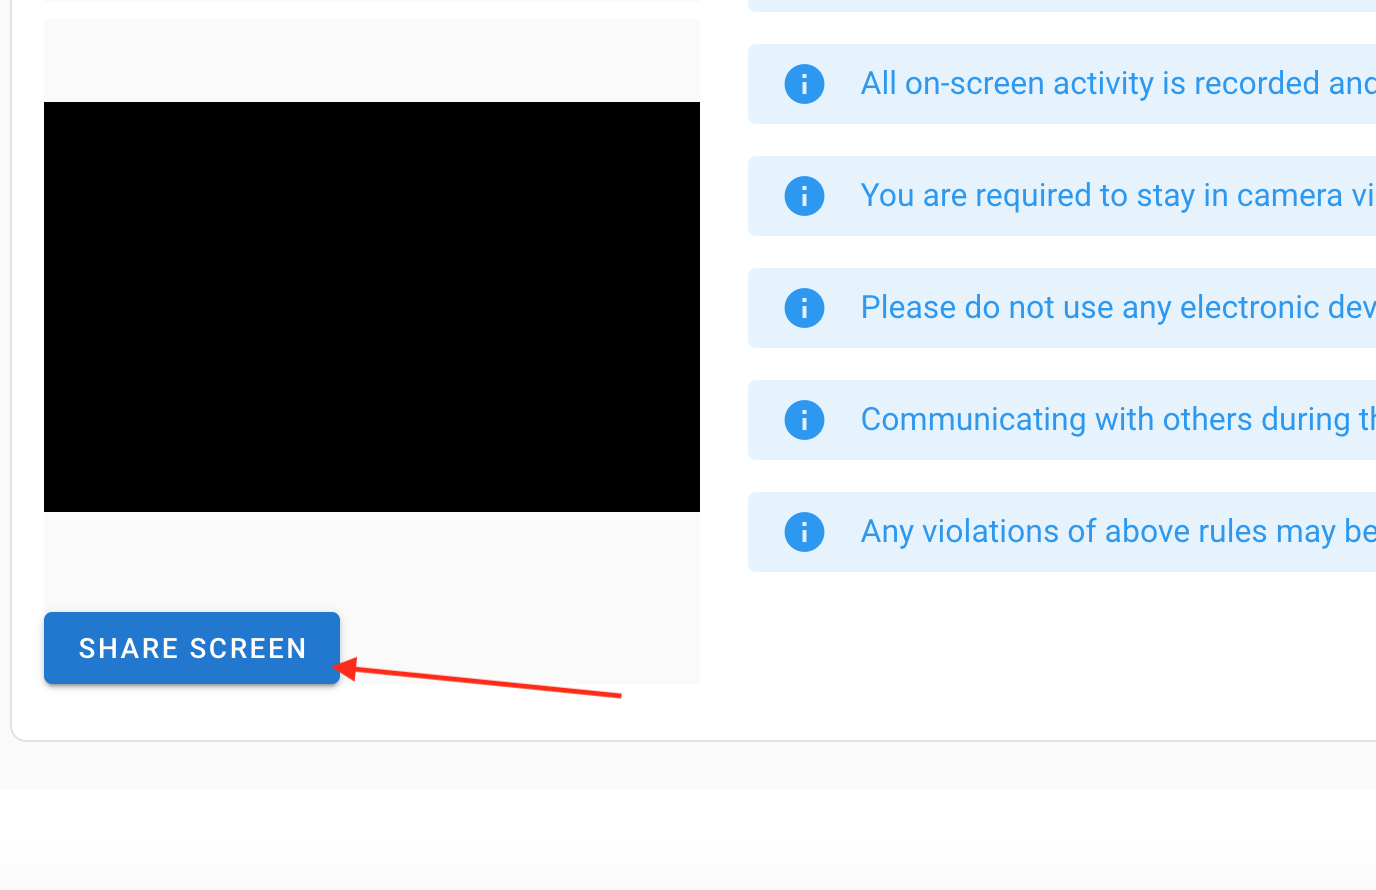
Students are responsible for ensuring that their screen recording is complete and accurate. If users accidentally click Stop sharing, they will receive a notification from SEM that screen sharing is stopped and they can click on the button at the bottom right of the SEM Launch page to re-launch screen sharing:
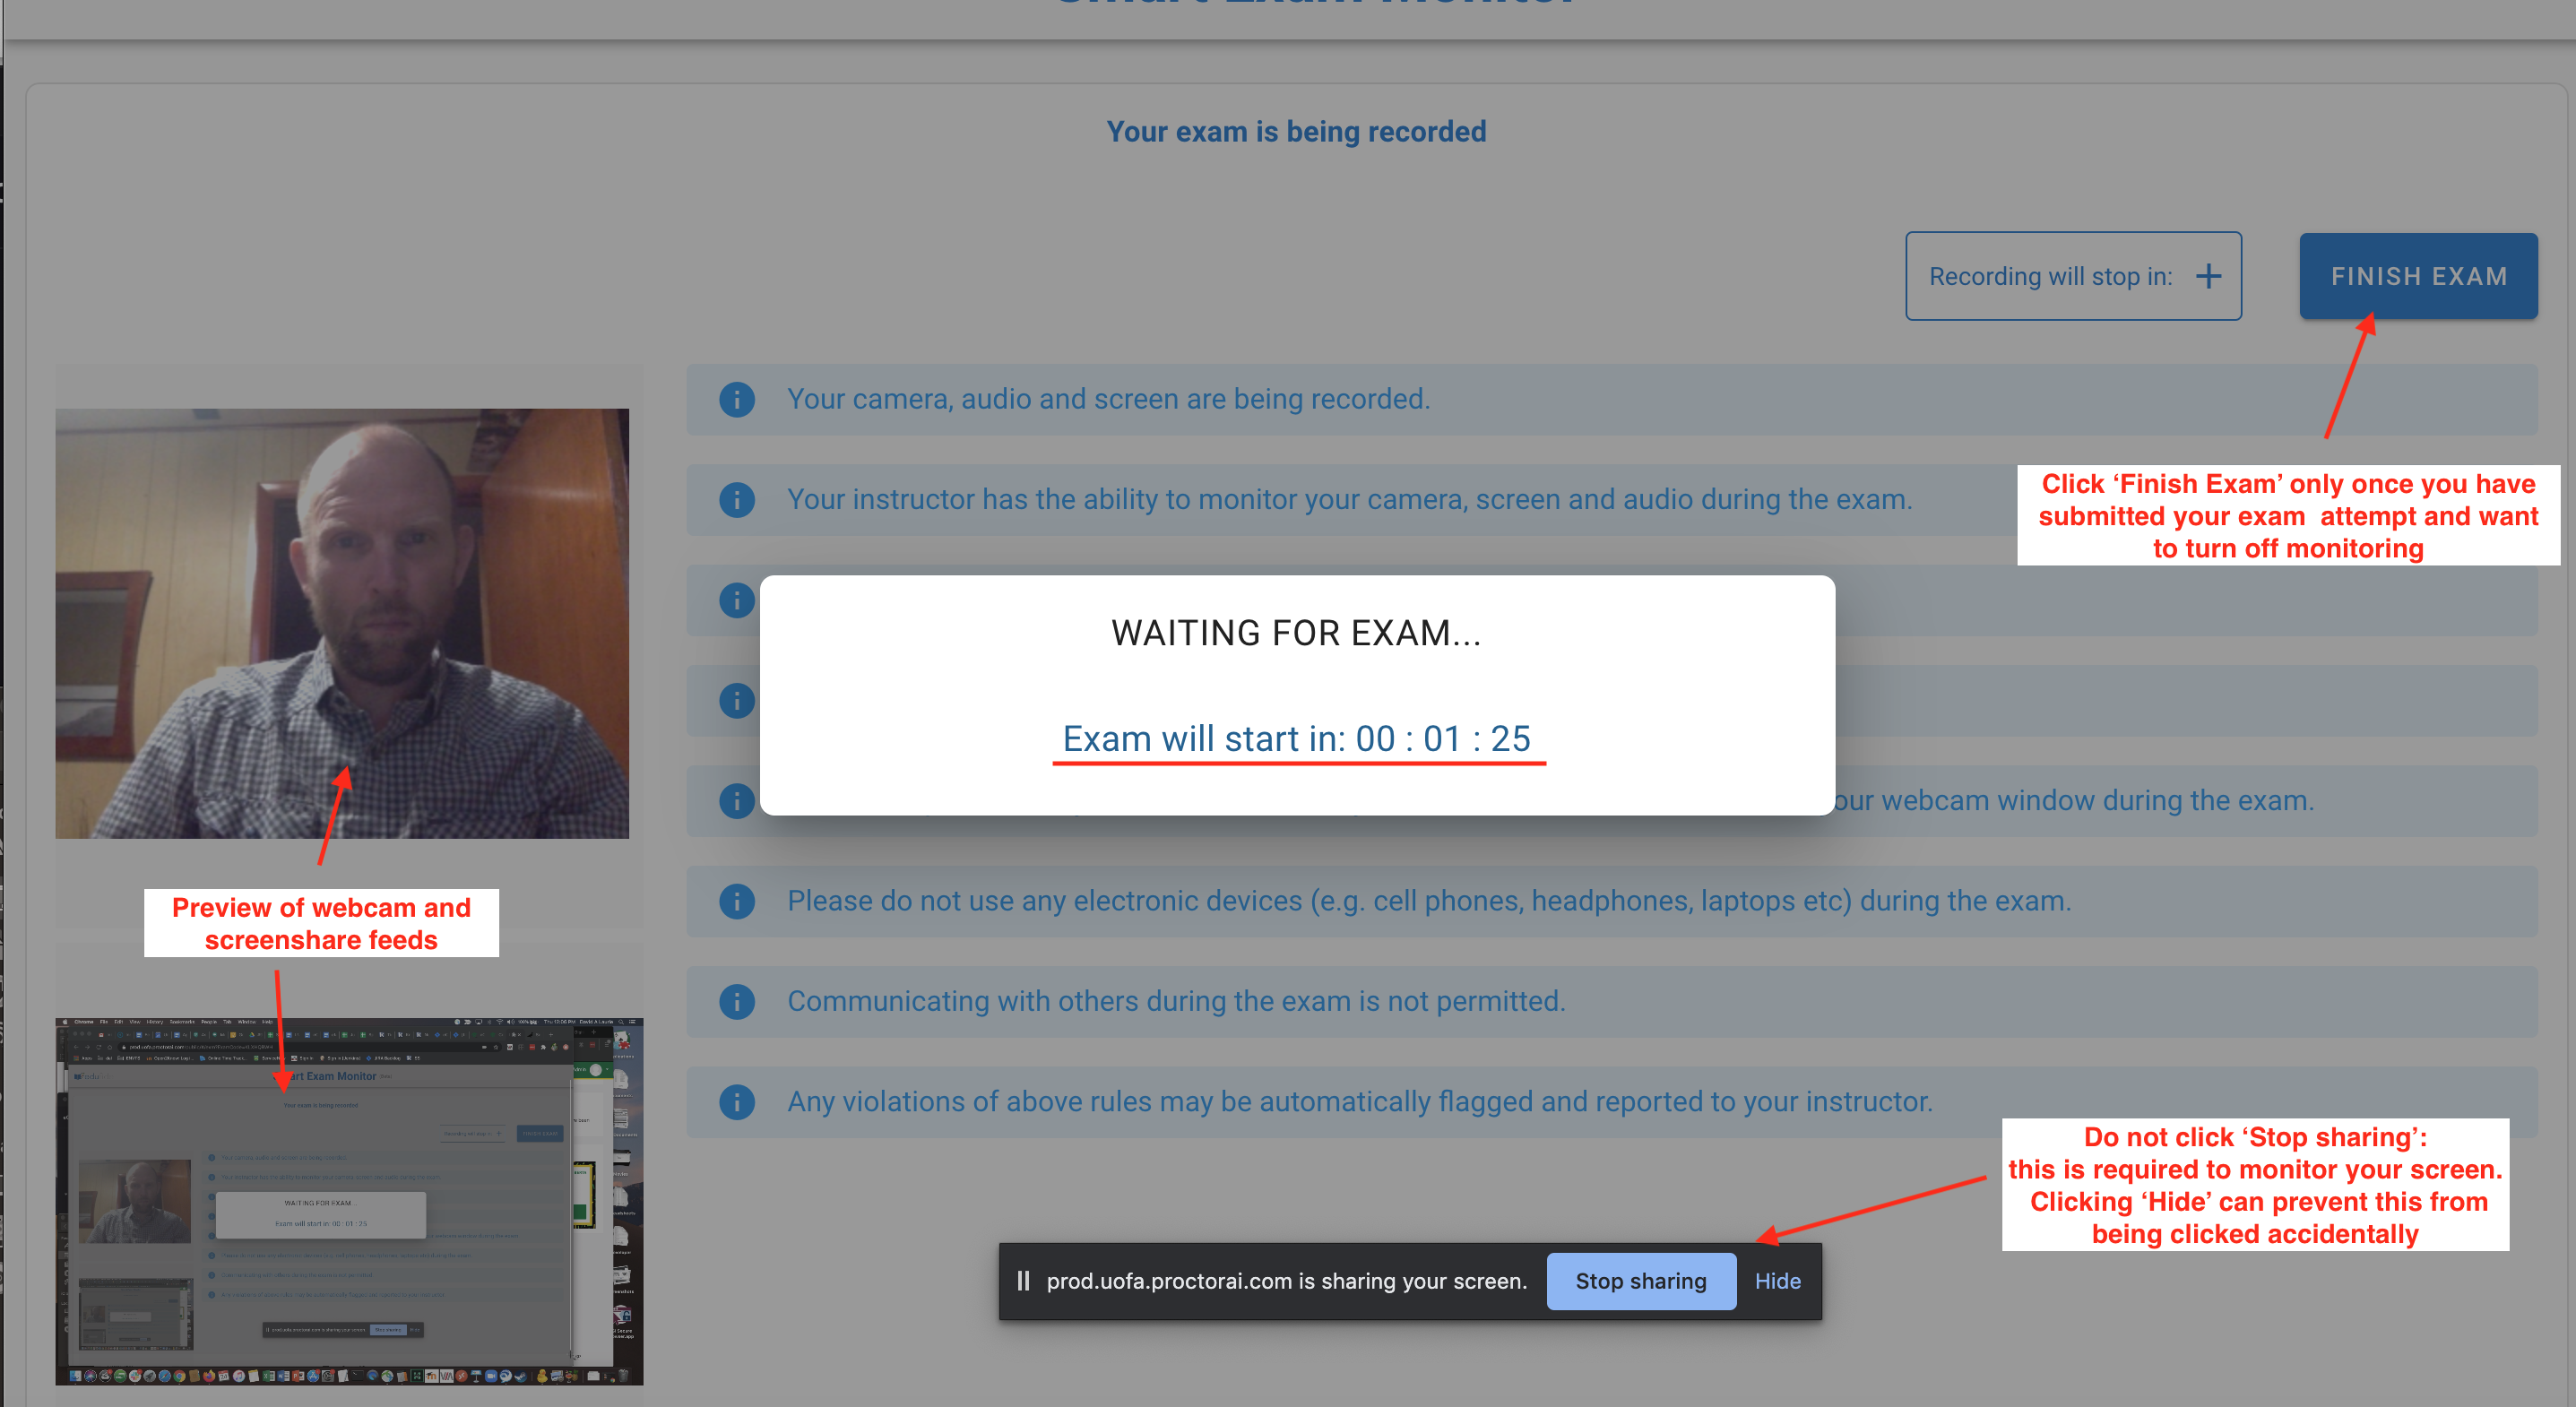
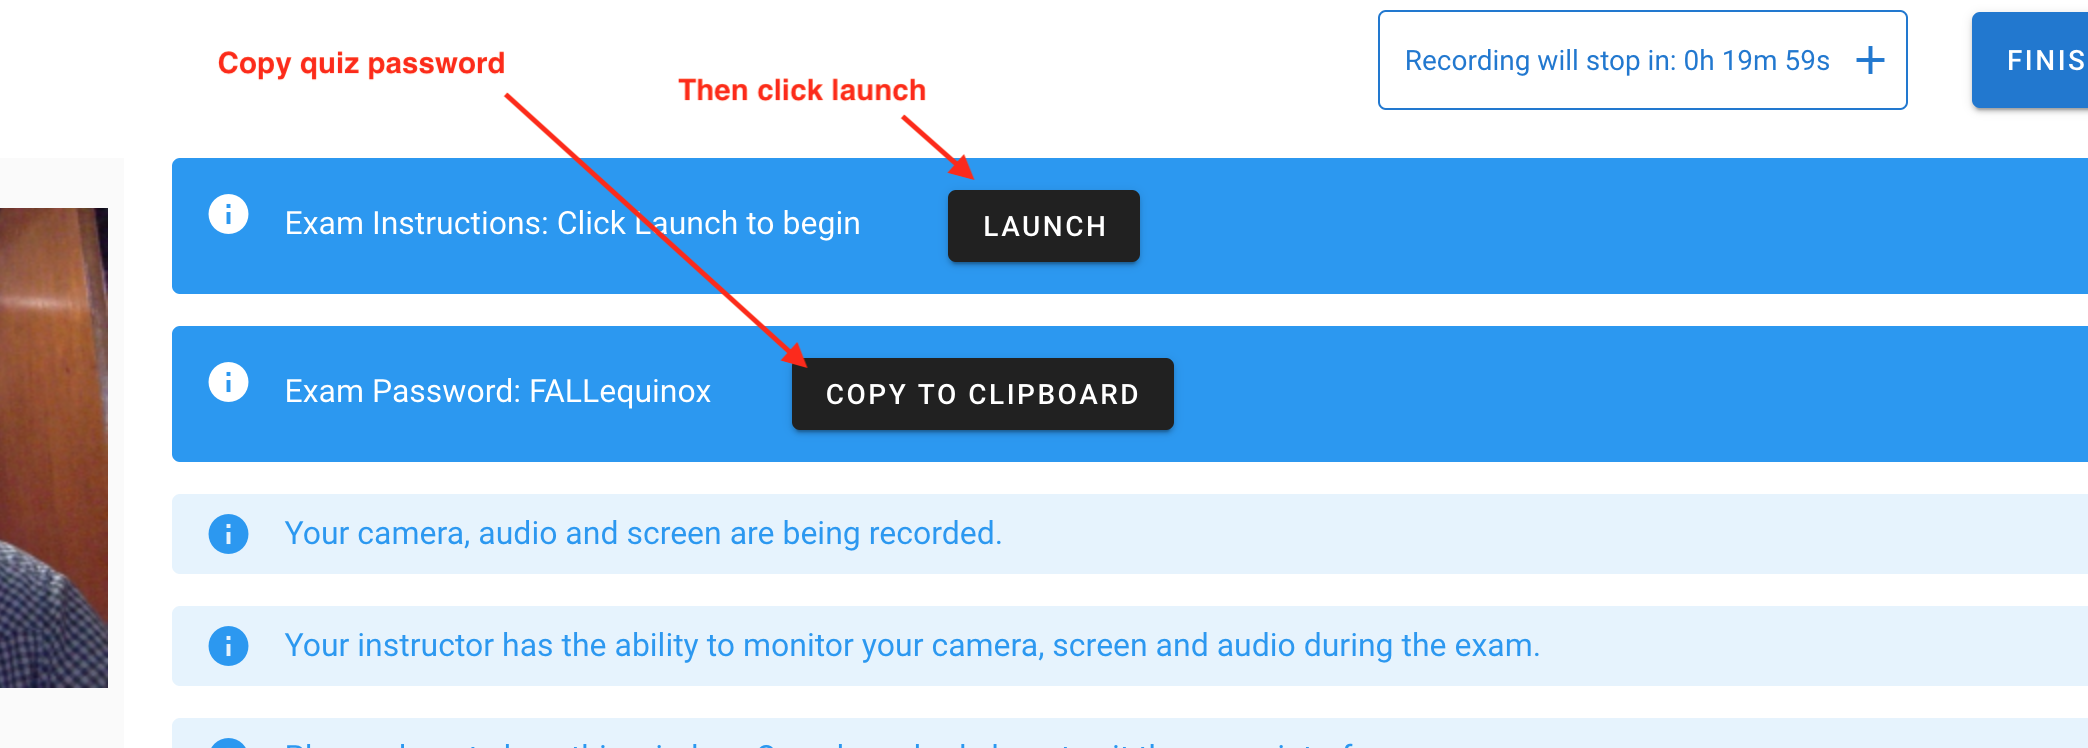
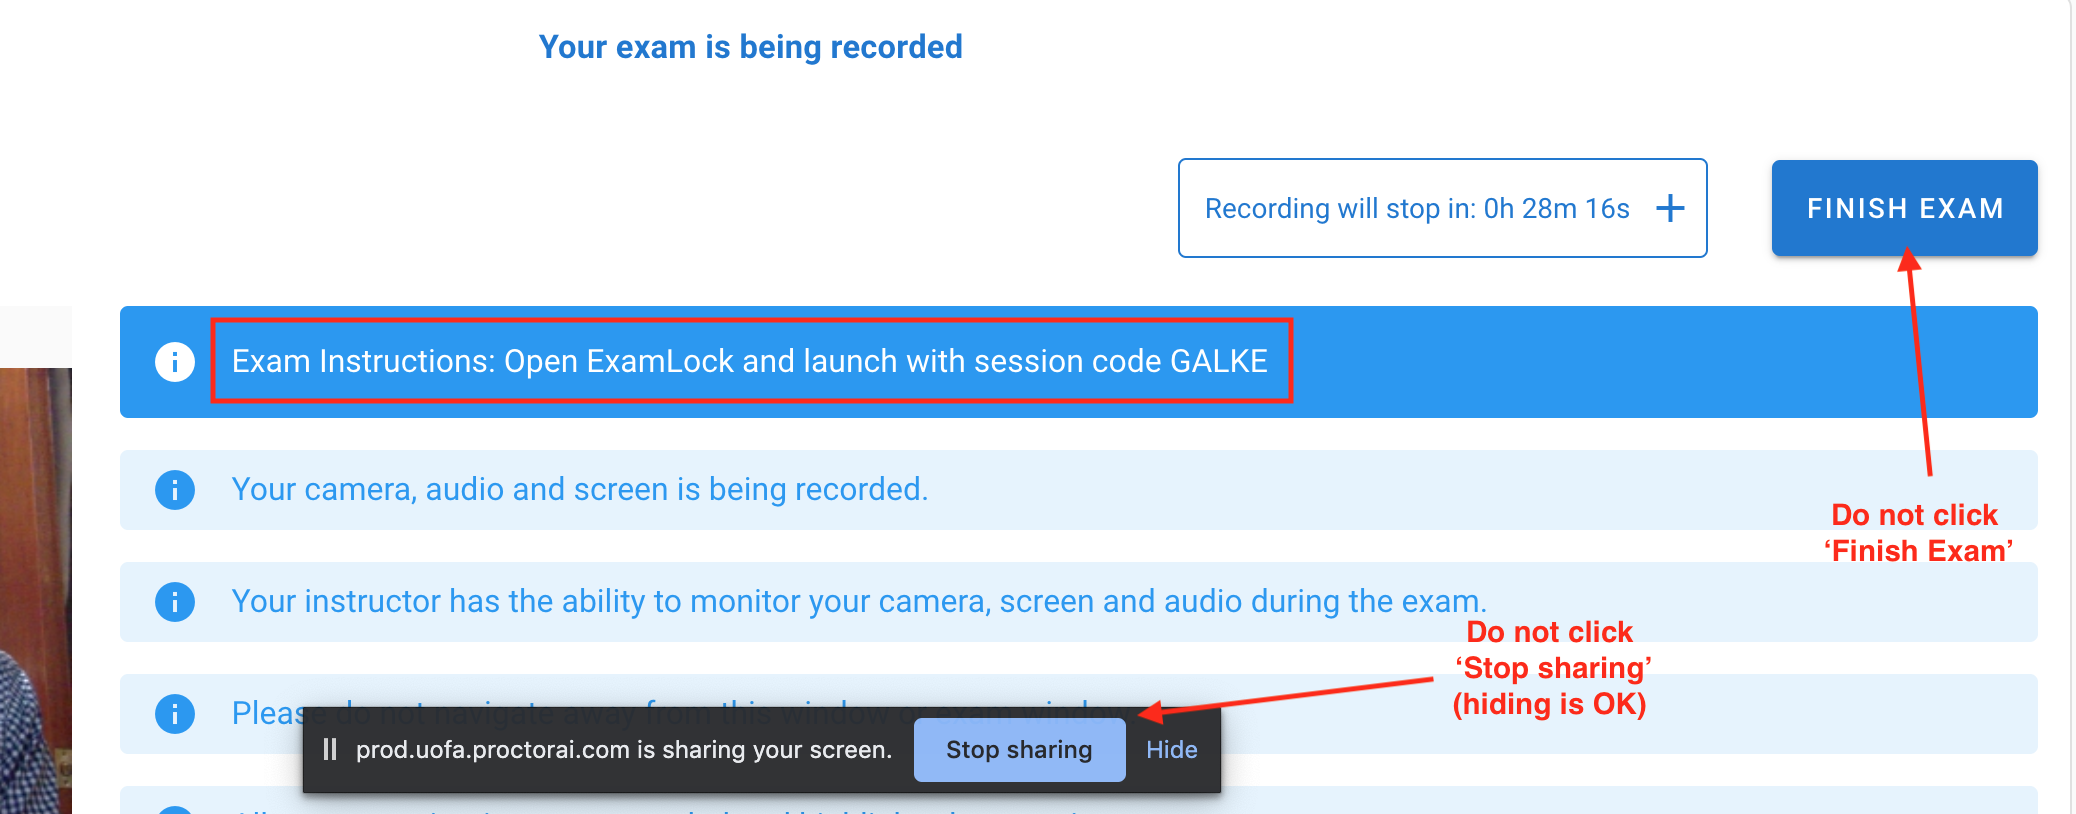
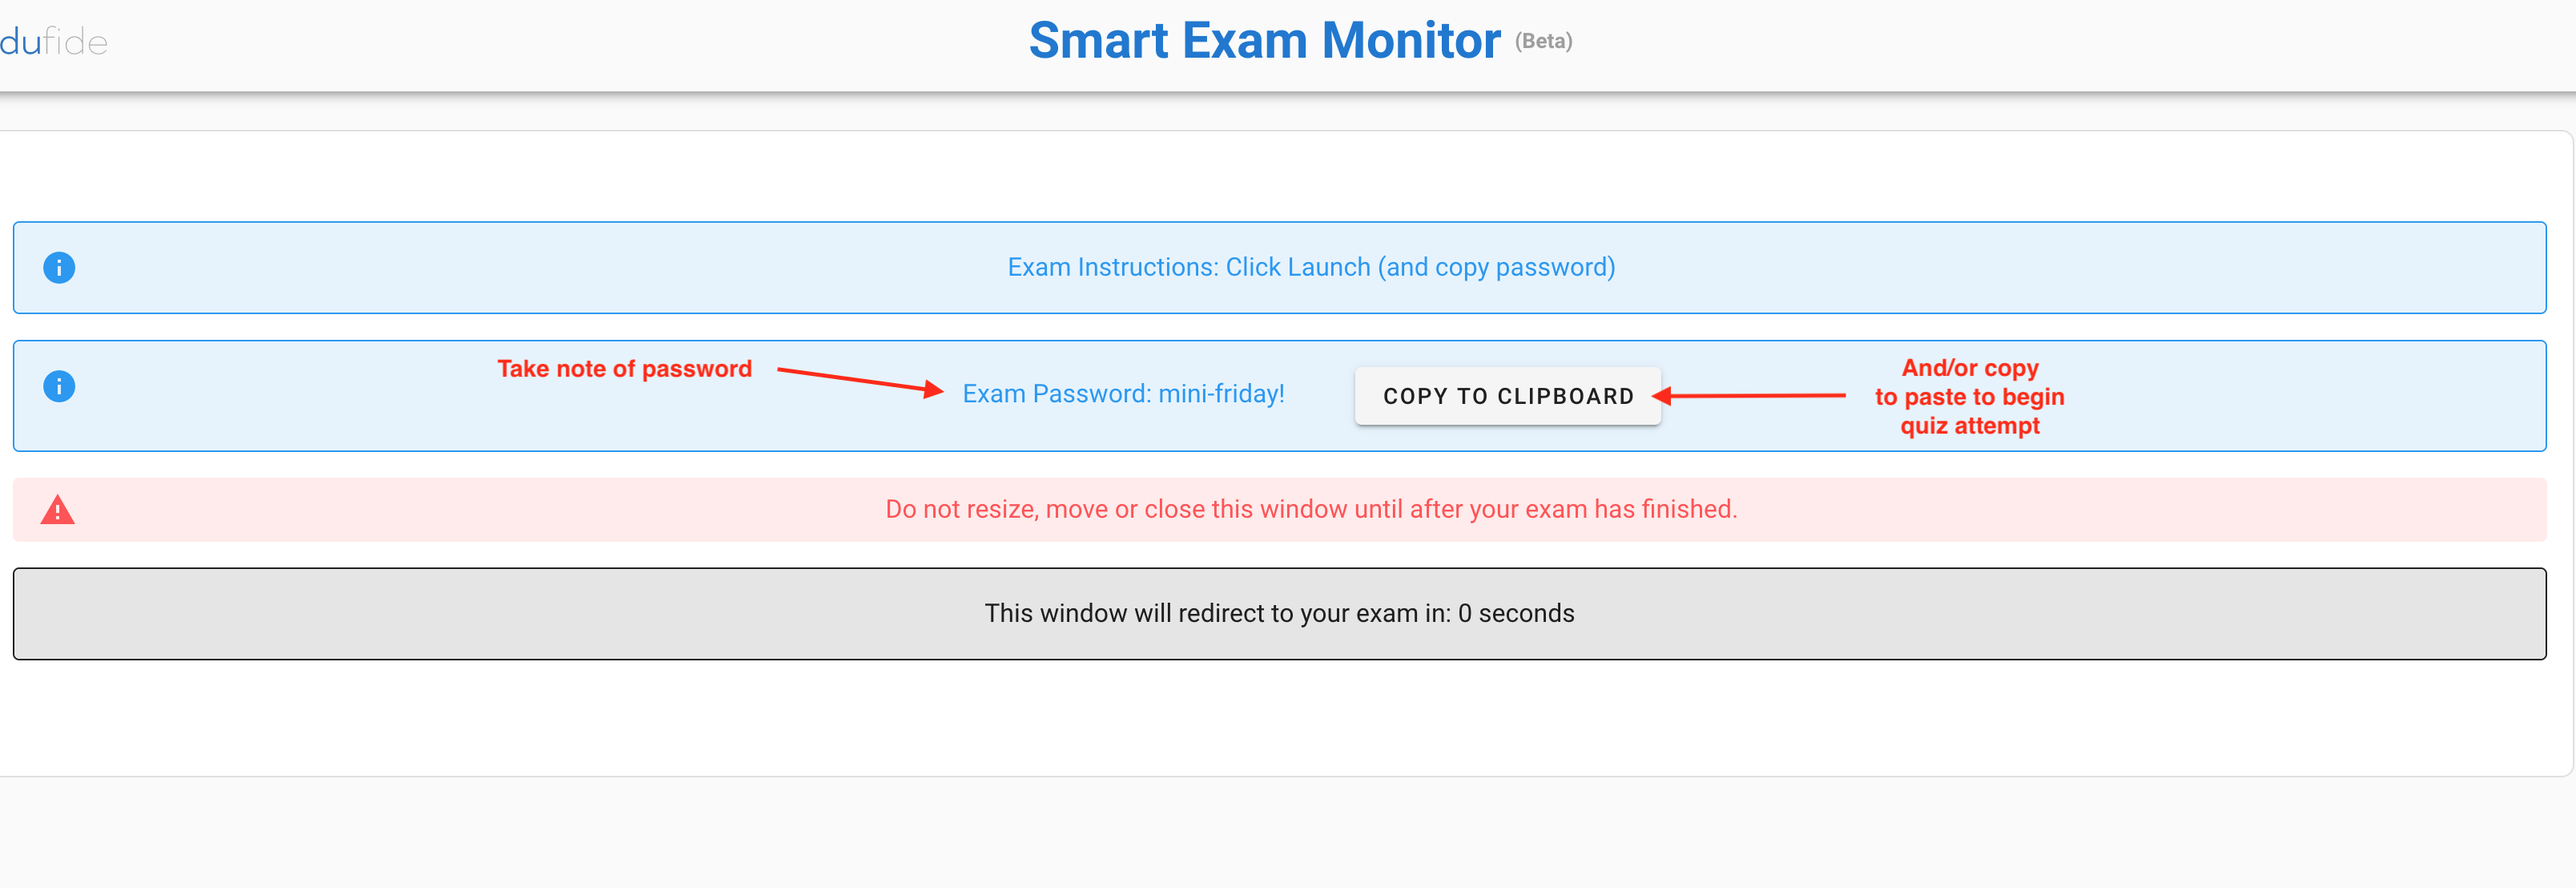
After the exam start time is reached, you will see instructions for completing the exam. At this point, the exam instructions you receive will depend on the specific mechanism your instructor has chosen for quiz delivery and you should follow the instructions provided to you. Important note: Some exam delivery options may require you to navigate to specific tools, resources, or applications to complete your exam (as specified by your instructor) and SEM will allow this, however, you must not close the Smart Exam Monitor browser tab, click Finish exam, or click 'Stop sharing'. This will be flagged for your instructor and may invalidate your exam submission. - For basic quizzes, there will be a Launch button to begin the exam and a password may be provided with the option to copy it to your clipboard. You can then paste the password on the Quiz Attempt Start page:
- For ExamLock quizzes, the session code should be provided and you will need to launch the Examlock application and enter the code.
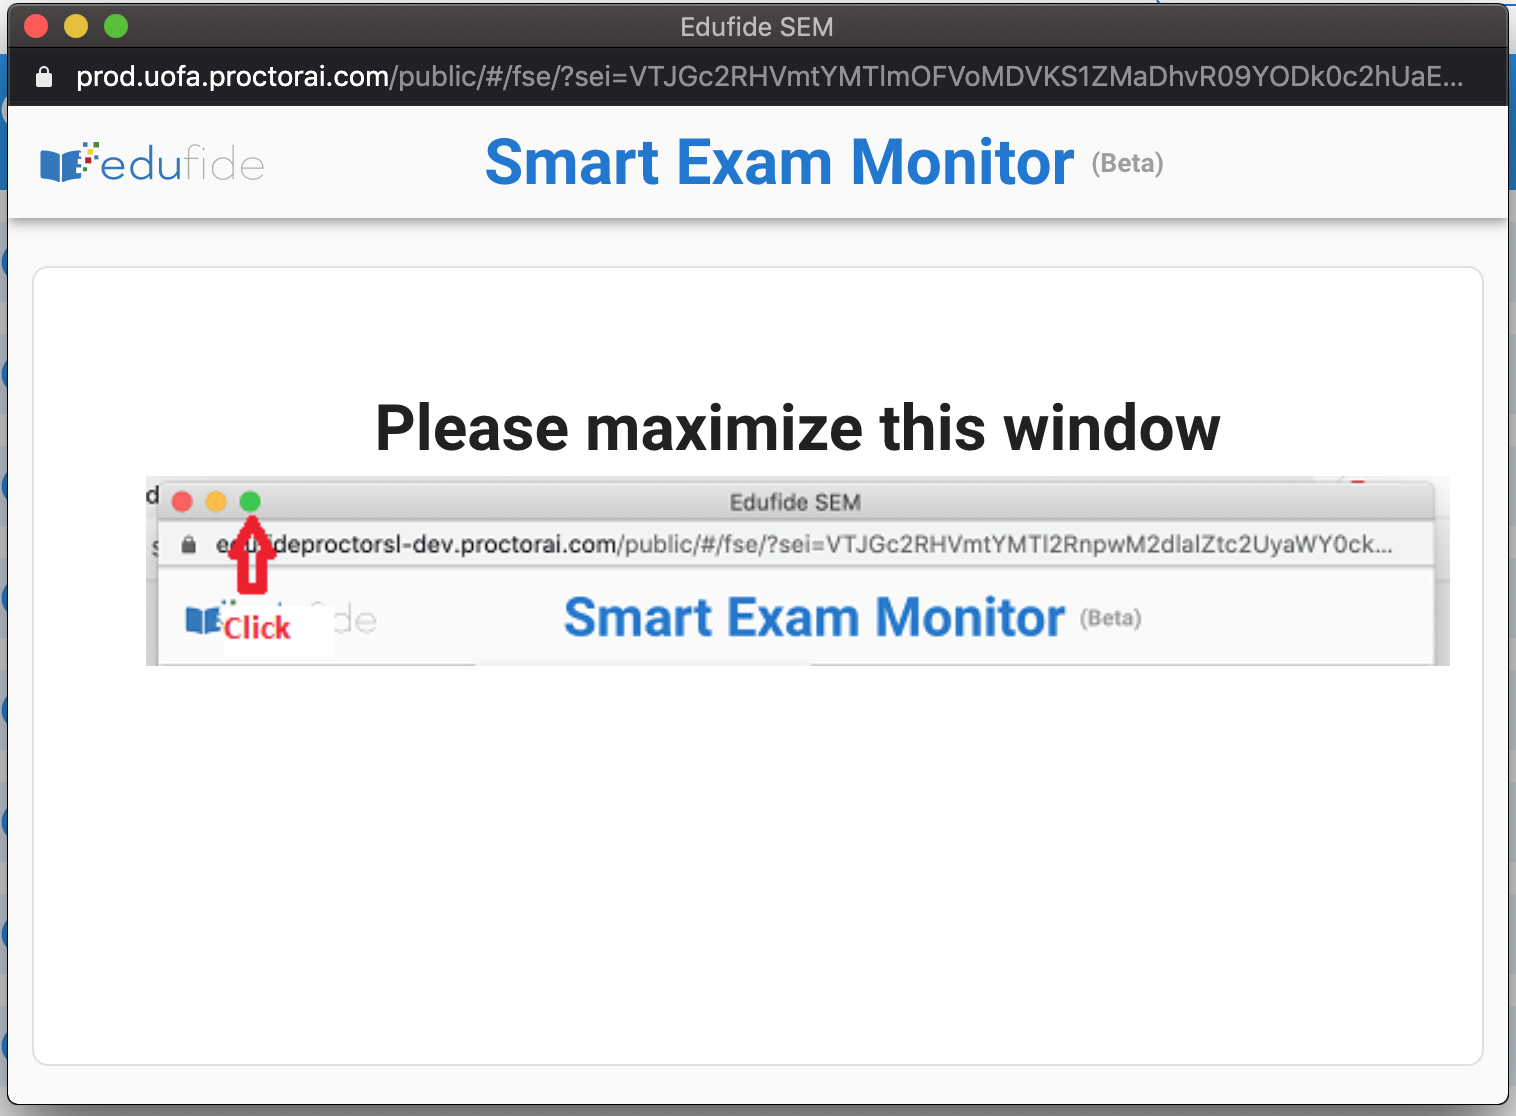
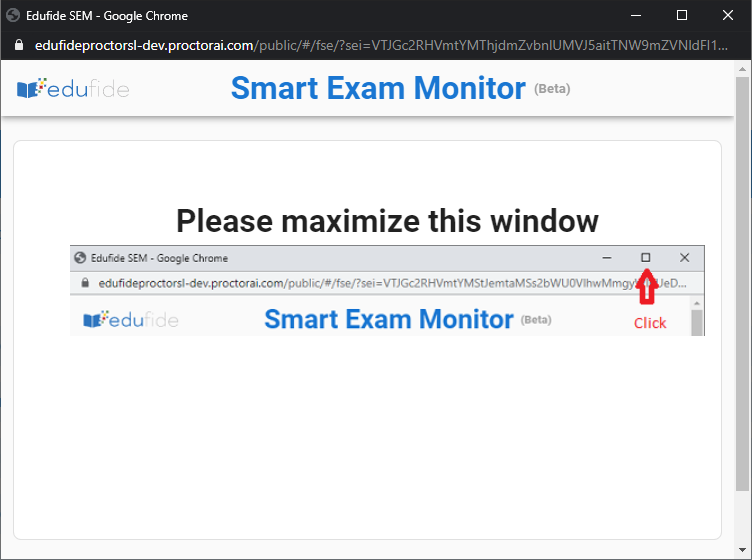
- Some quizzes will launch a new window to enable full-screen mode for the duration of an exam. Exams configured this way will launch a new browser tab that must be maximized to continue. Instructions are provided for maximizing the window for the operating system you are using either Mac:
or Windows:
If students have configured their browsers to force pop-ups into full-screen tabs, the step above may not be required. Note for Windows users: Your taskbar MUST be located at the bottom of the screen for the maximized window to work. If it is located at the top or to the left or right, right-click on the taskbar and click on Taskbar settings, and then set 'Taskbar location on screen' to Bottom. Once maximized, the window will automatically launch the quiz. If there is a password required for the quiz, you should take note of it (or copy it) to launch the quiz. Navigating away from the full screen exam window will be flagged as an academic integrity violation.
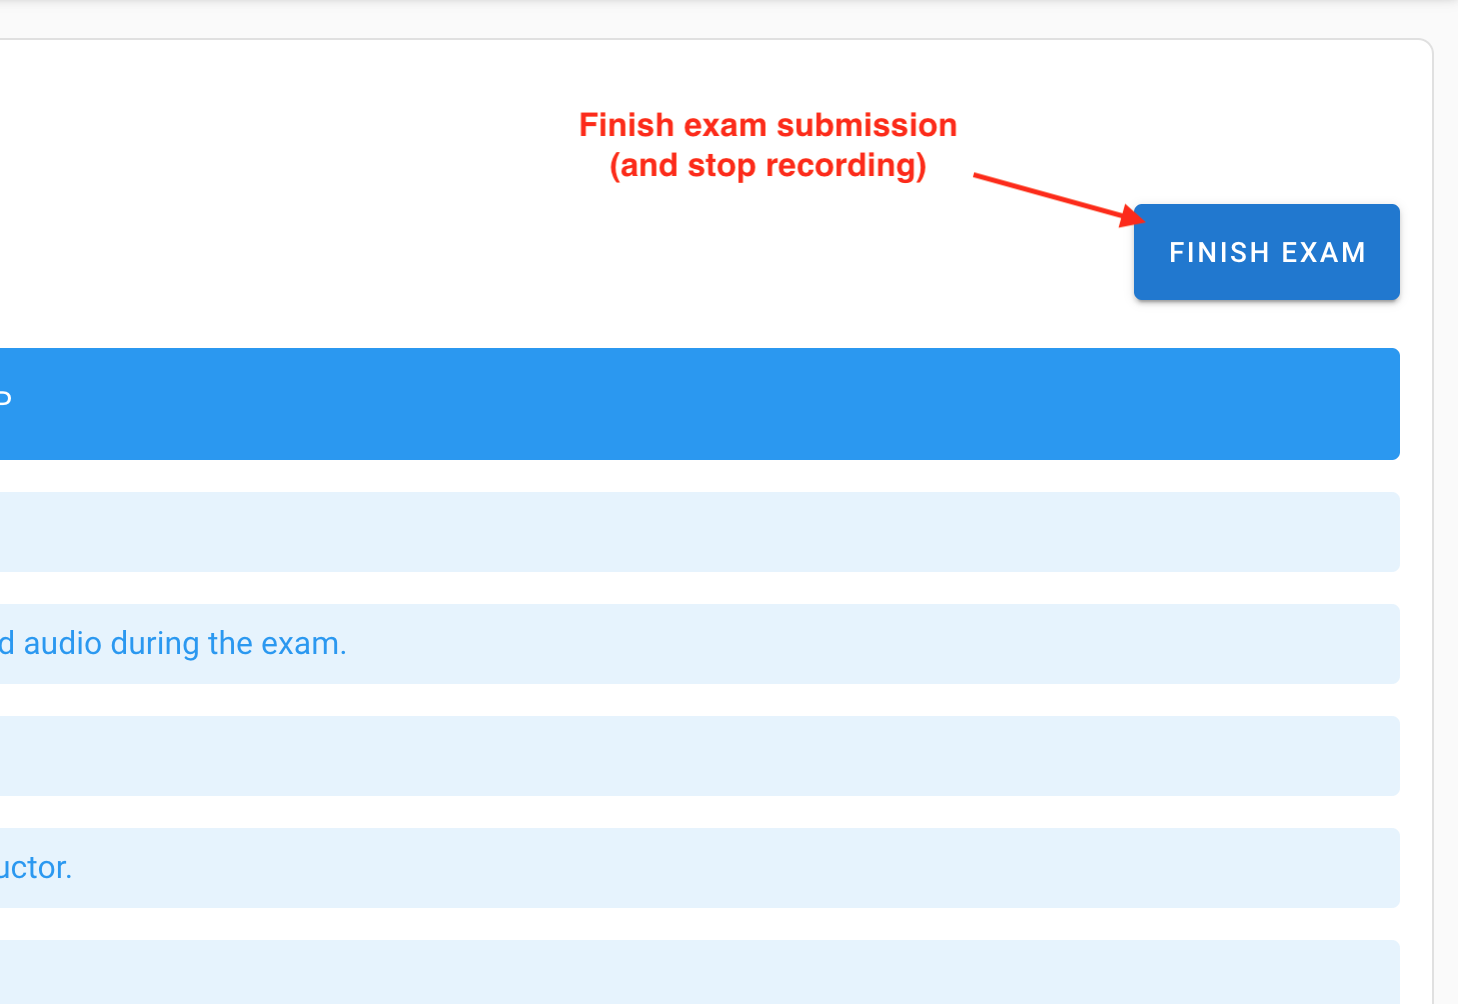
Once you have completed the exam and completed the submission in Canvas, eClass (or ExamLock), navigate back to the SEM browser tab and click Finish Exam at the top right:
| ||
|
|
||

