|
This article describes how instructors can share videos they have uploaded into YuJa with colleagues inside or outside the U of A. In most cases, as long as YuJa has been added to a course (as shown in this article) and/or the videos are published to a course channel, no special steps are required to display videos to students. This article will also explain how to share existing videos with students in a different course or a new term's iteration of a course. Instructors working in teaching teams who require other users to edit videos or create and upload new caption files will also find instructions for creating shared folders.
The starting point for this article is to have at least one video uploaded into YuJa and appear in a user's 'My Media' area.
Sharing a single video via URL
You can share a video by sending a link, either publicly or privately via a generated URL.
- Go to your YuJa admin page and locate your video.
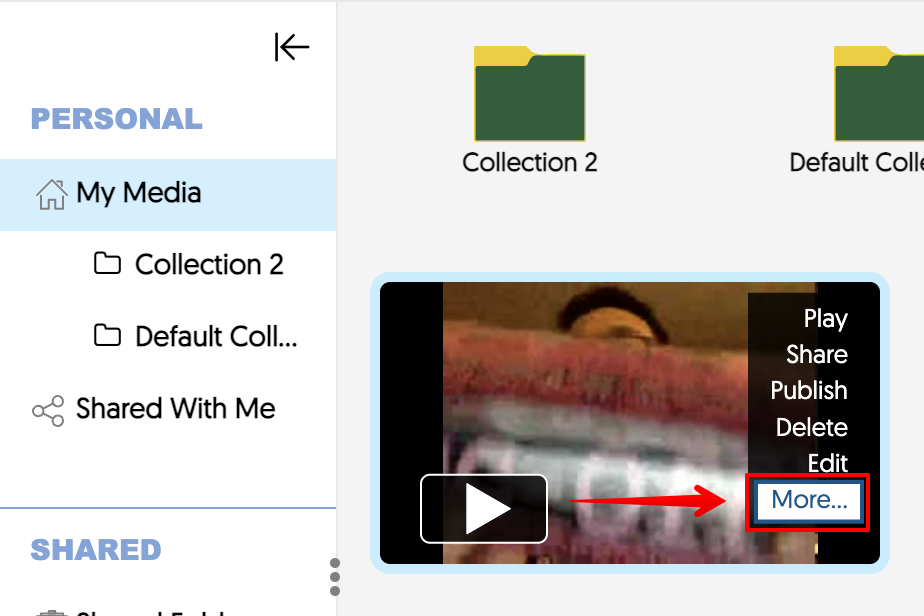
- Hover over the desired video and click 'More':
- In the window, click on the 'Links' category:
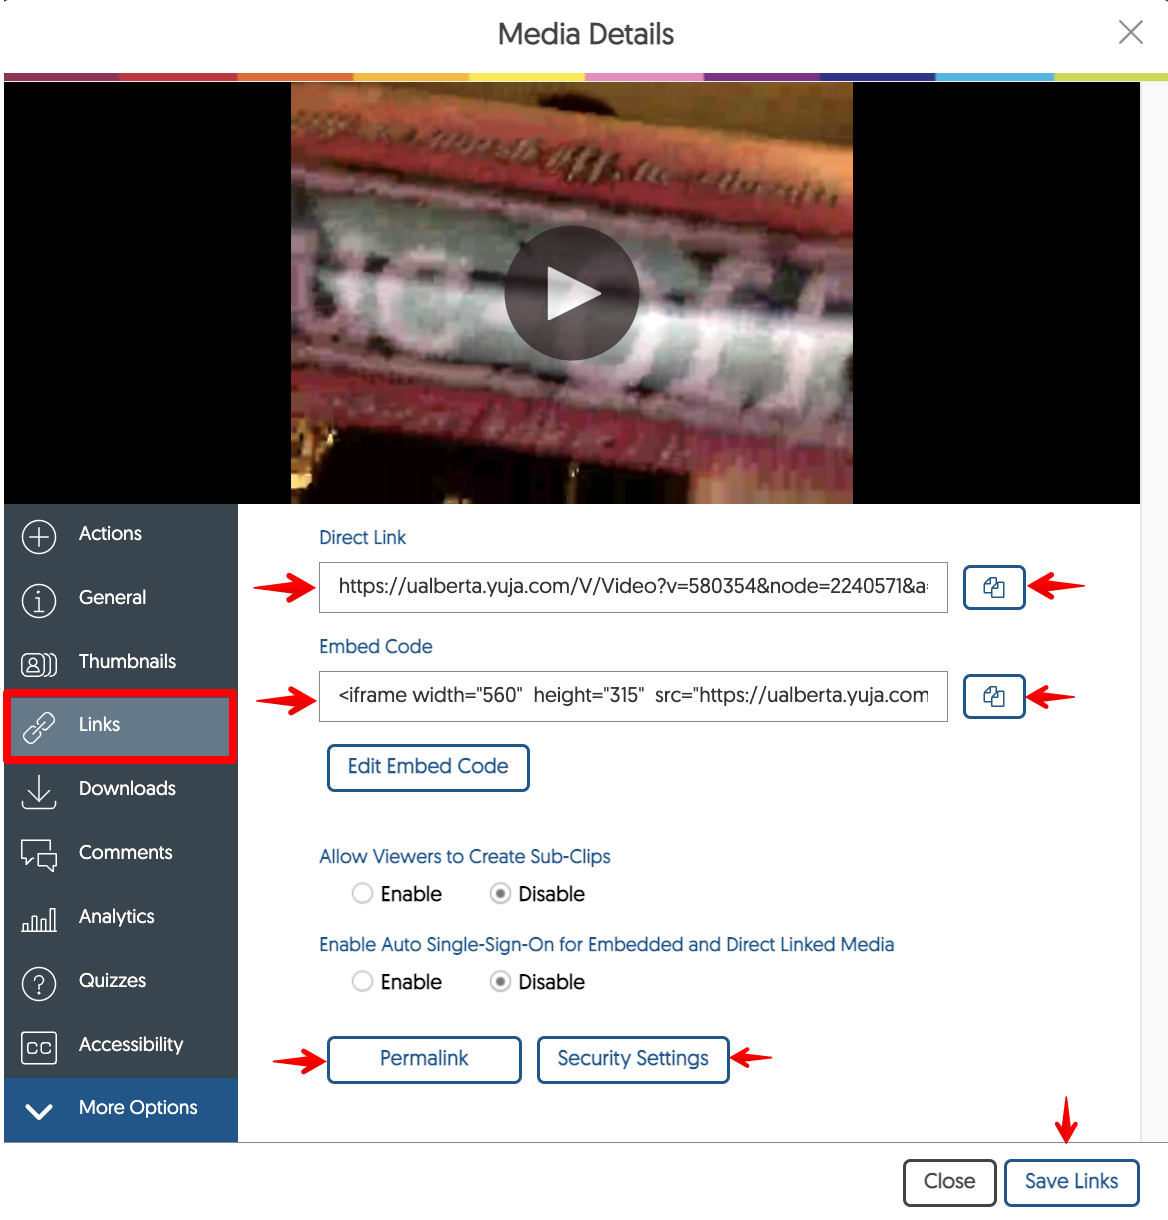
Here, you can copy the direct link to the video and paste it into a webpage or email to individuals. You can also copy an embed code for the video to add it to a webpage with a built-in player. Other options include obtaining a Permalink (an unchanging link that you can share in other resources).
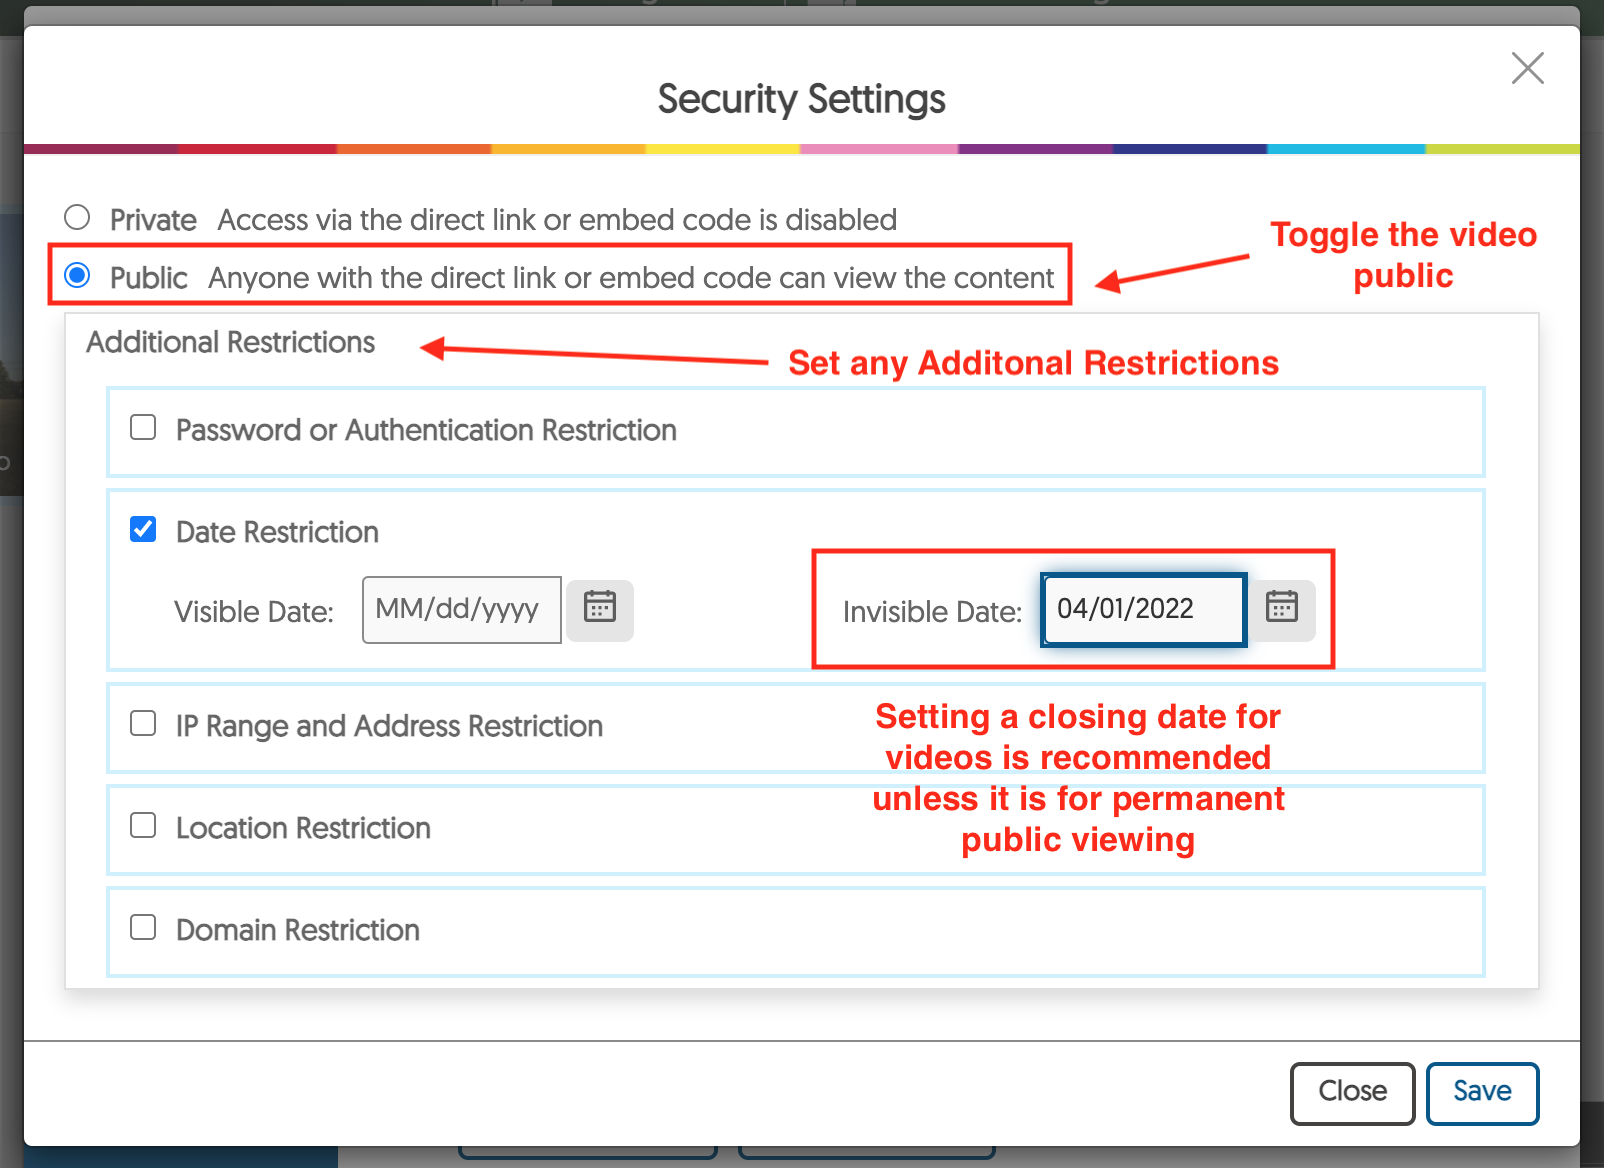
Note that you must adjust your Security Settings to ensure that your intended audience will be able to view the video - by default videos are only available to U of A authenticated users. It is possible to adjust privacy settings and enter restrictions based on password, authentication, dates, IP, geographical location, and/or domain:
Once you have copied the Direct Link (or the Embed Code or Permalink if preferred), you can paste this into your destination's content area. This could be any external website or into an email if sending directly to specific users.
It is also possible to add the URL link to a Canvas Module. Click the +plus sign next to the Module title. In the popup, click the Assignment dropdown and select External URL:

Add the URL, give it a title, and click Add Item:

Embedding Videos
When embedding videos, if Canvas is the destination, instead of pasting the embed code, the preferred method of embedding videos is to use the YuJa editor plugin button, which allows users to select any of their videos from the interface Media Chooser:

If the YuJa icon is hidden, click the plug icon to find it.
Note: Videos can be added from YuJa in any editor window in a Canvas Assignment, Quiz, Discussion or Page.
When the YuJa Media Chooser opens, click to highlight a video, then click Insert Content:
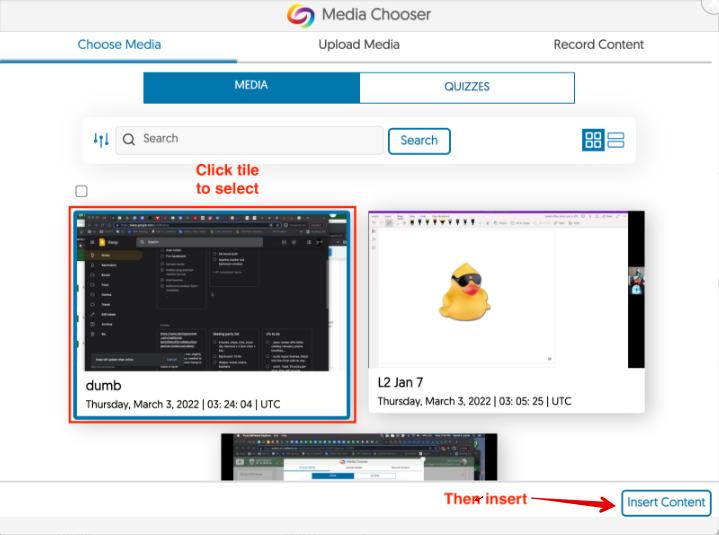
The video will be added to the editor window.
Publishing videos to another course channel
Existing videos in YuJa can be easily shared with other course channels by publishing. The system provides the ability for bulk publishing of any or all videos within the same folder in a single operation.
- Locate a folder of your videos that you wish to share then select the videos to share. Select videos by:
- Dragging a selection box around videos
- Clicking CTRL or CMD + Clicking on videos
- Clicking CTRL or CMD A to select all videos in the folder
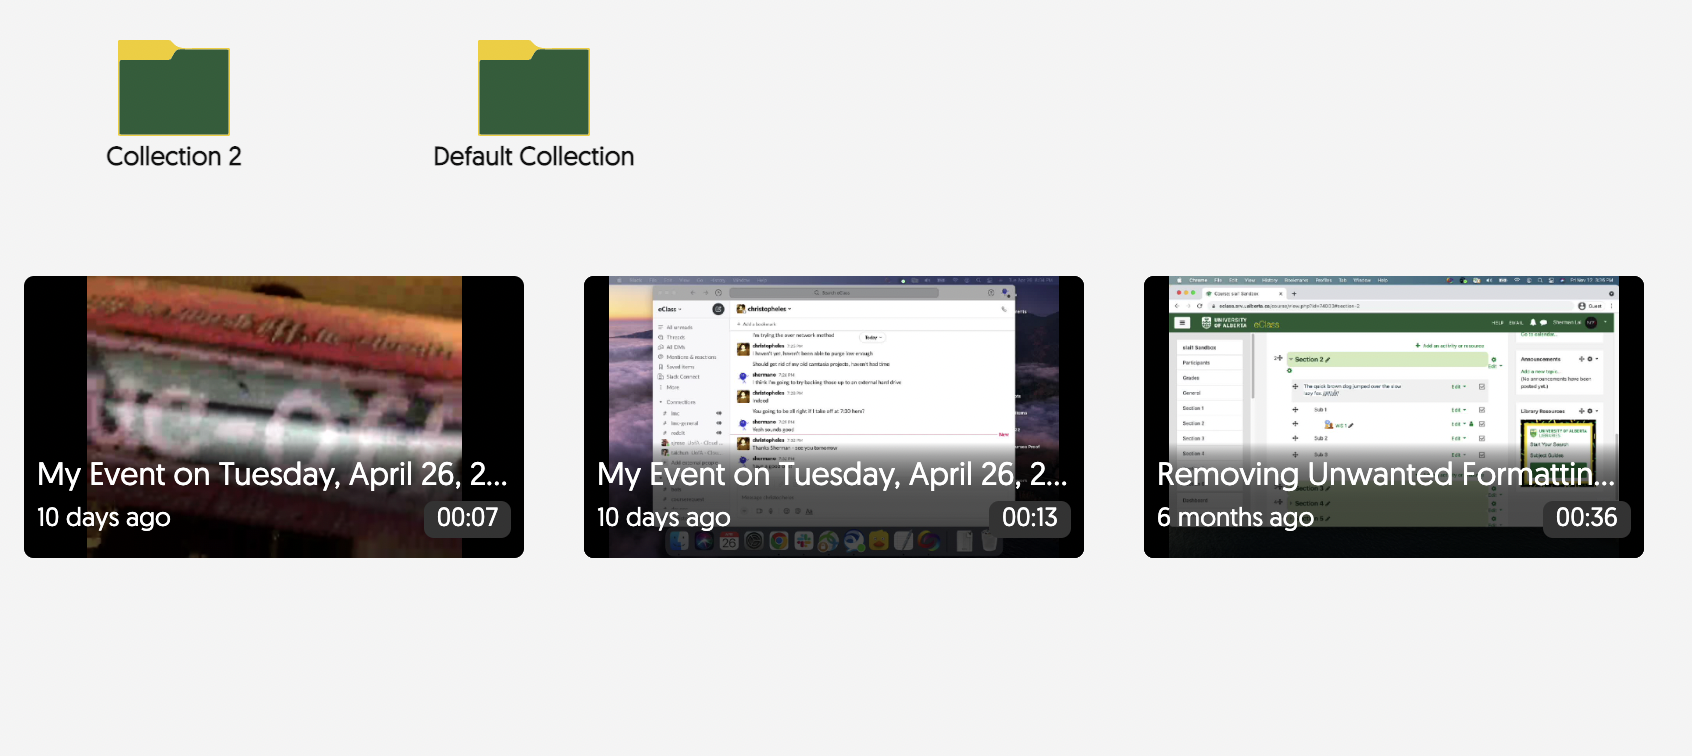
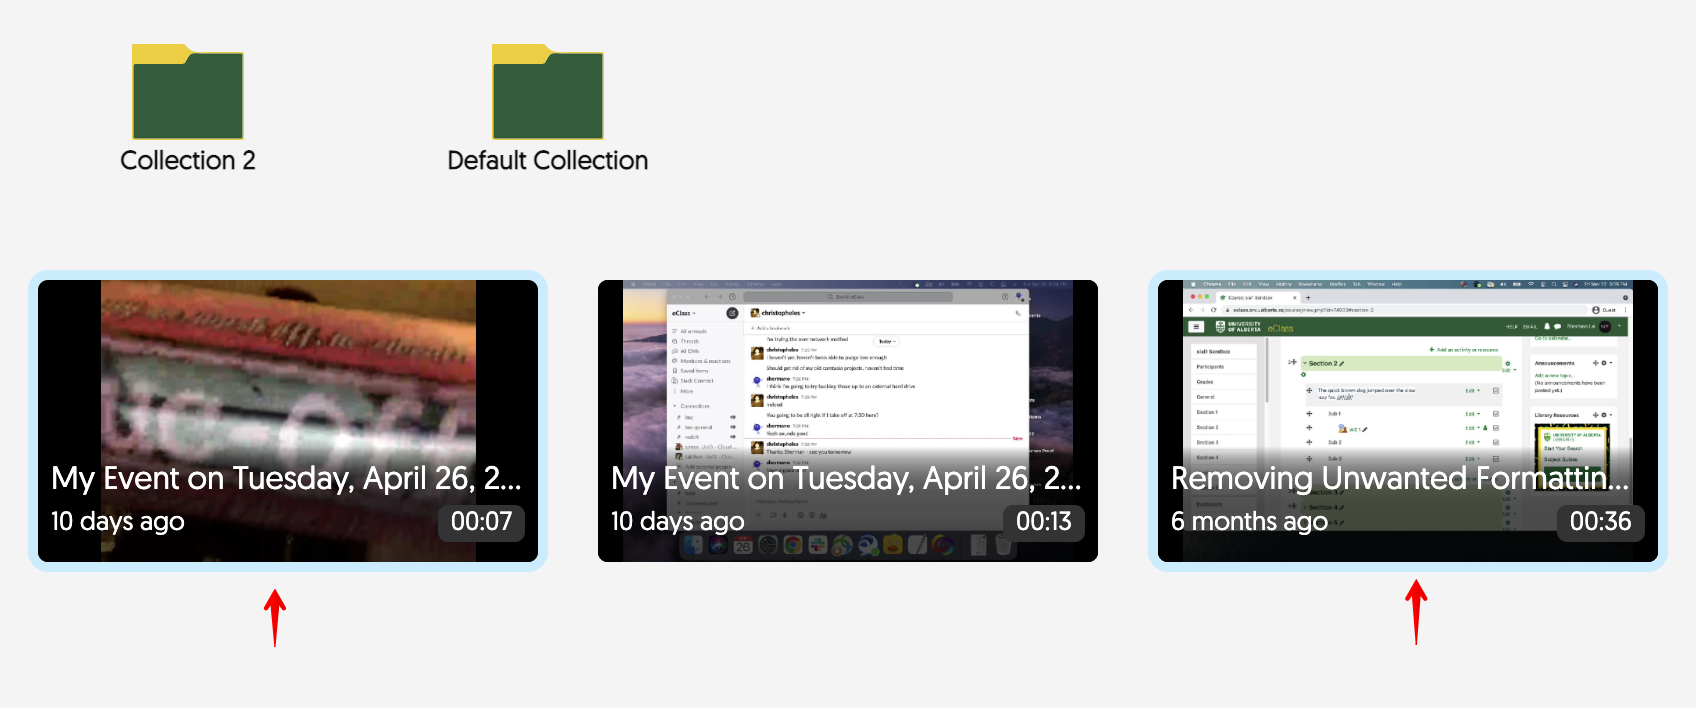
- Selected videos take on a light blue background - screenshot showing videos not selected:
Screenshot showing videos selected (faint blue border around videos selected):
Note: You may only bulk publish videos within folders to other locations; entire folders or collections cannot be published. If a folder is included in your selection, other options will not be available.
- After you make your selection, the 'More Actions' menu will change to show you more options to choose from. Click 'Bulk Publish':

- Here you may publish your items to any one of your courses. Search for, then choose your courses by clicking on them. Use the right arrow to add them to the 'Selected Channels' area:

- You can use "Additional Options" to select the date range videos will be available in the new channel.
- Click to highlight any wrongly added course and use the left arrow to remove it.
- Click Save, and you will see a progress popup indicating the sharing progress.
Sharing Folders
If a user needs a colleague (eg. a co-instructor or a TA) to be able to edit videos or add/change video transcript files, this can be accomplished by creating shared folders. To do this users should:
- Access their 'My media' page and click New Folder. Note that a user's 'Default Collection' folder cannot be shared with colleagues:
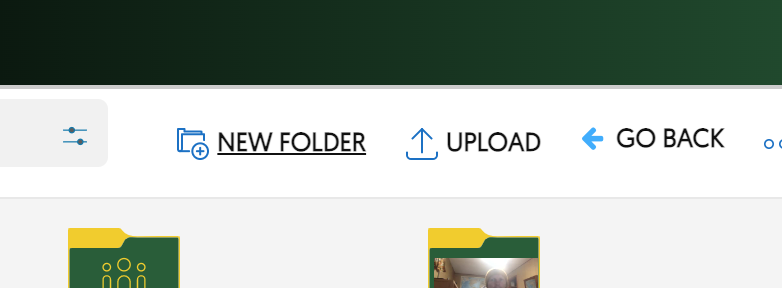
- Highlight the newly created folder by clicking on it and then from the top centre More Actions dropdown, click Share Folder:

- Search for a user by first and last name, then select them from the returned list. Click Share to share the folder:

- The user will then be listed below 'Who has access' and this change confirmed by clicking Save:

- Full access is granted by default; the permissions options include the more restricted Edit Access, Edit Caption Access, and Read Only. These can be changed for the individual user:

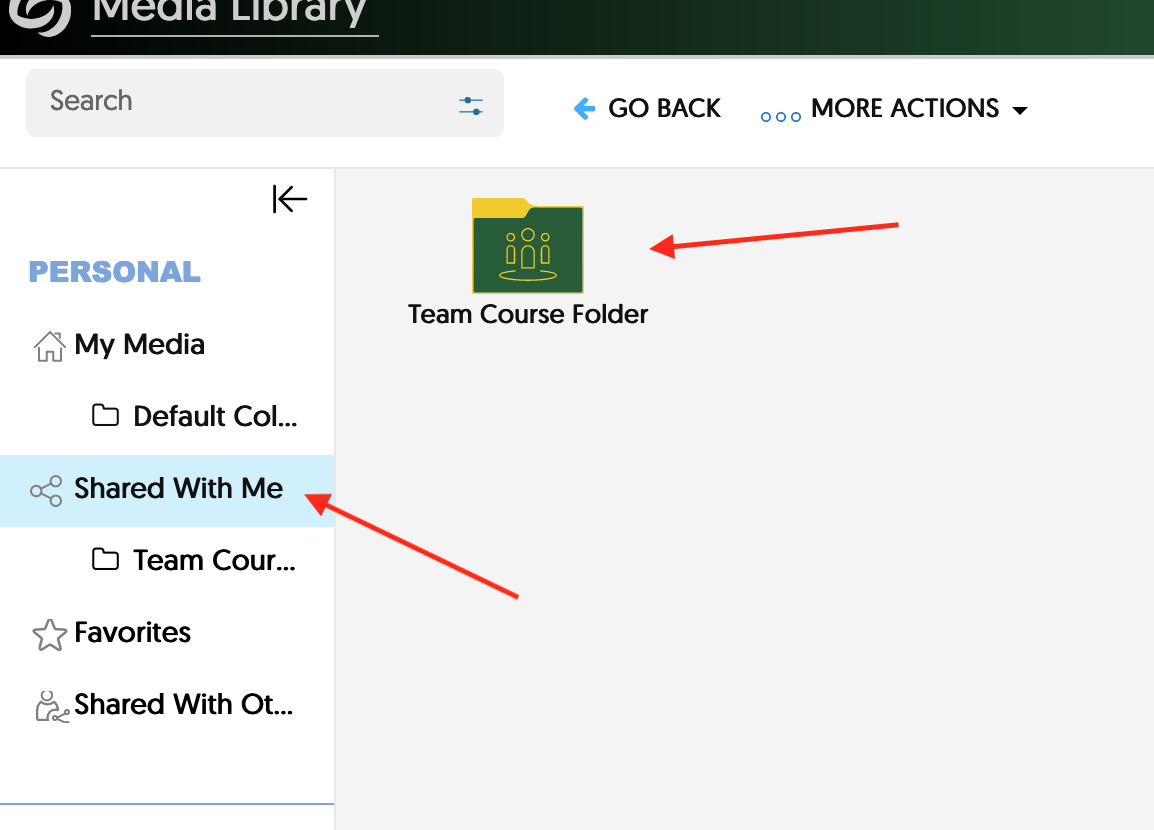
- Once a folder is shared with a user or users, they will receive an email alerting them to the link, and the folder will also appear under Shared with me in the left nav:
- Any videos added to shared folders will be editable, subject to the permissions settings.
Sharing Video Folders with Multiple Users
It is possible to share a folder with multiple users by sharing a link to the folder. if you have a mailing list you can send a link.
Once you have located the folder, click the three-dot dropdown and click on More:

In the window that opens, click Links:

You can copy the link to the folder that you are going to share by clicking the copy icon:

You will want to select the security options for sharing by clicking on Security:

Choose Public so that it can be shared by the link:

You can also set a password as one of the other restrictions. If everyone has a ualberta.ca account, you can set the default domain restriction (automatically populated), which will force residents to log in to YuJa.
Click Save, and say yes to sharing all videos and subfolders in the folder.
|  eClass and Canvas Support