|
Creating Sandbox and Co-Curricular Courses on Canvas
Last modified on 28 November 2024 02:19 PM
|
|
|
All instructors and staff can access the U of A’s Canvas instance at https://canvas.ualberta.ca. Users will need to sign in with their CCIDs to access their courses. All use of Canvas is governed by the Campus Computing Use policy. This article describes non-Bear Tracks courses: sandboxes and co-curriculars. Instructors can now request their credit courses on Canvas which will link them to Bear Tracks enrollment sections for the desired term. Contents:
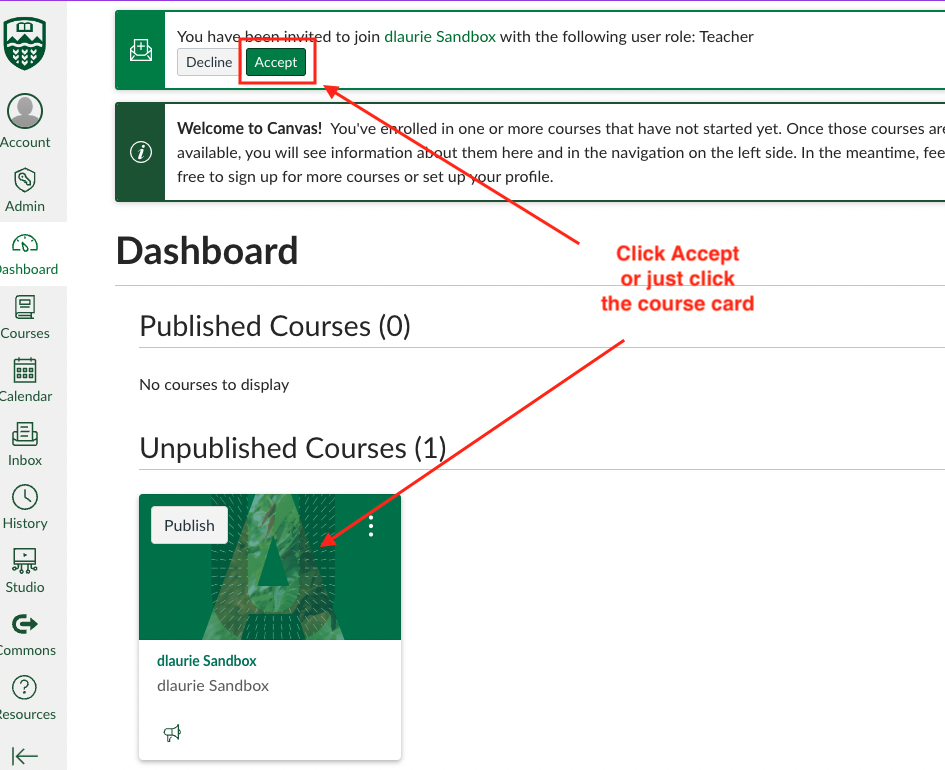
Canvas Sneak Peek SandboxesIn preparation for the Canvas Sneak Peek, instructors have automatically been provided a personal sandbox in Canvas that has the new U of A content template applied. This template content has been created by instructional designers and includes text placeholders and a bank of U of A graphics. The template is designed to model an effective layout for course delivery and provide instructors with prompts that make customizing course content easy and efficient. Instructors will find an invitation to join their sandbox on the Canvas Dashboard when they sign in which they can Accept or clear by simply entering the course:
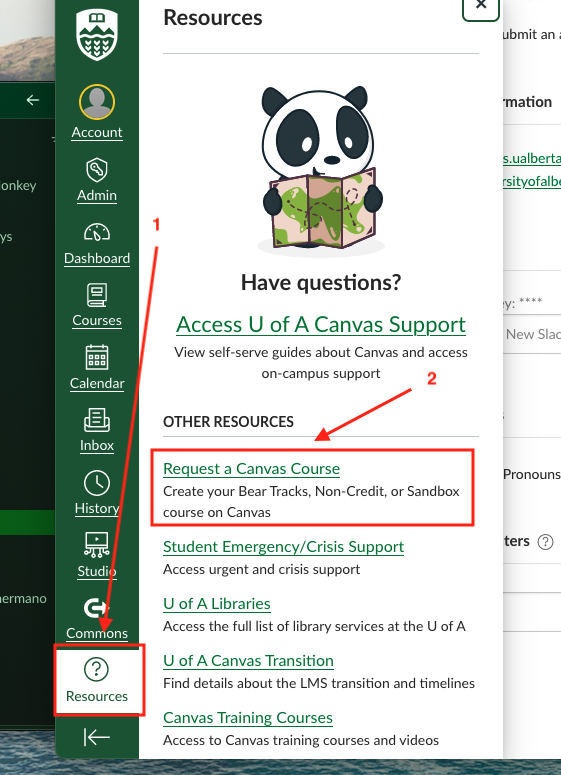
For guidance on using your Sandbox, please see Getting Started on Canvas. Creating Sandbox Courses on CanvasAny instructors or staff can request as many Canvas sandbox courses as they require using the standard Course Request System. This process can also be used to create any additional sandbox courses that instructors require for content development of Fall 2024 courses. Any content developed in a sandbox course can be imported into a credit section after the full Canvas release in Summer 2024. All Sandbox Courses contain the U of A's custom-designed template. Users who need a blank course can request a Co-curricular course. To request a sandbox, click on Request a Canvas Course under the 'Resources' tab from the Canvas global nav:
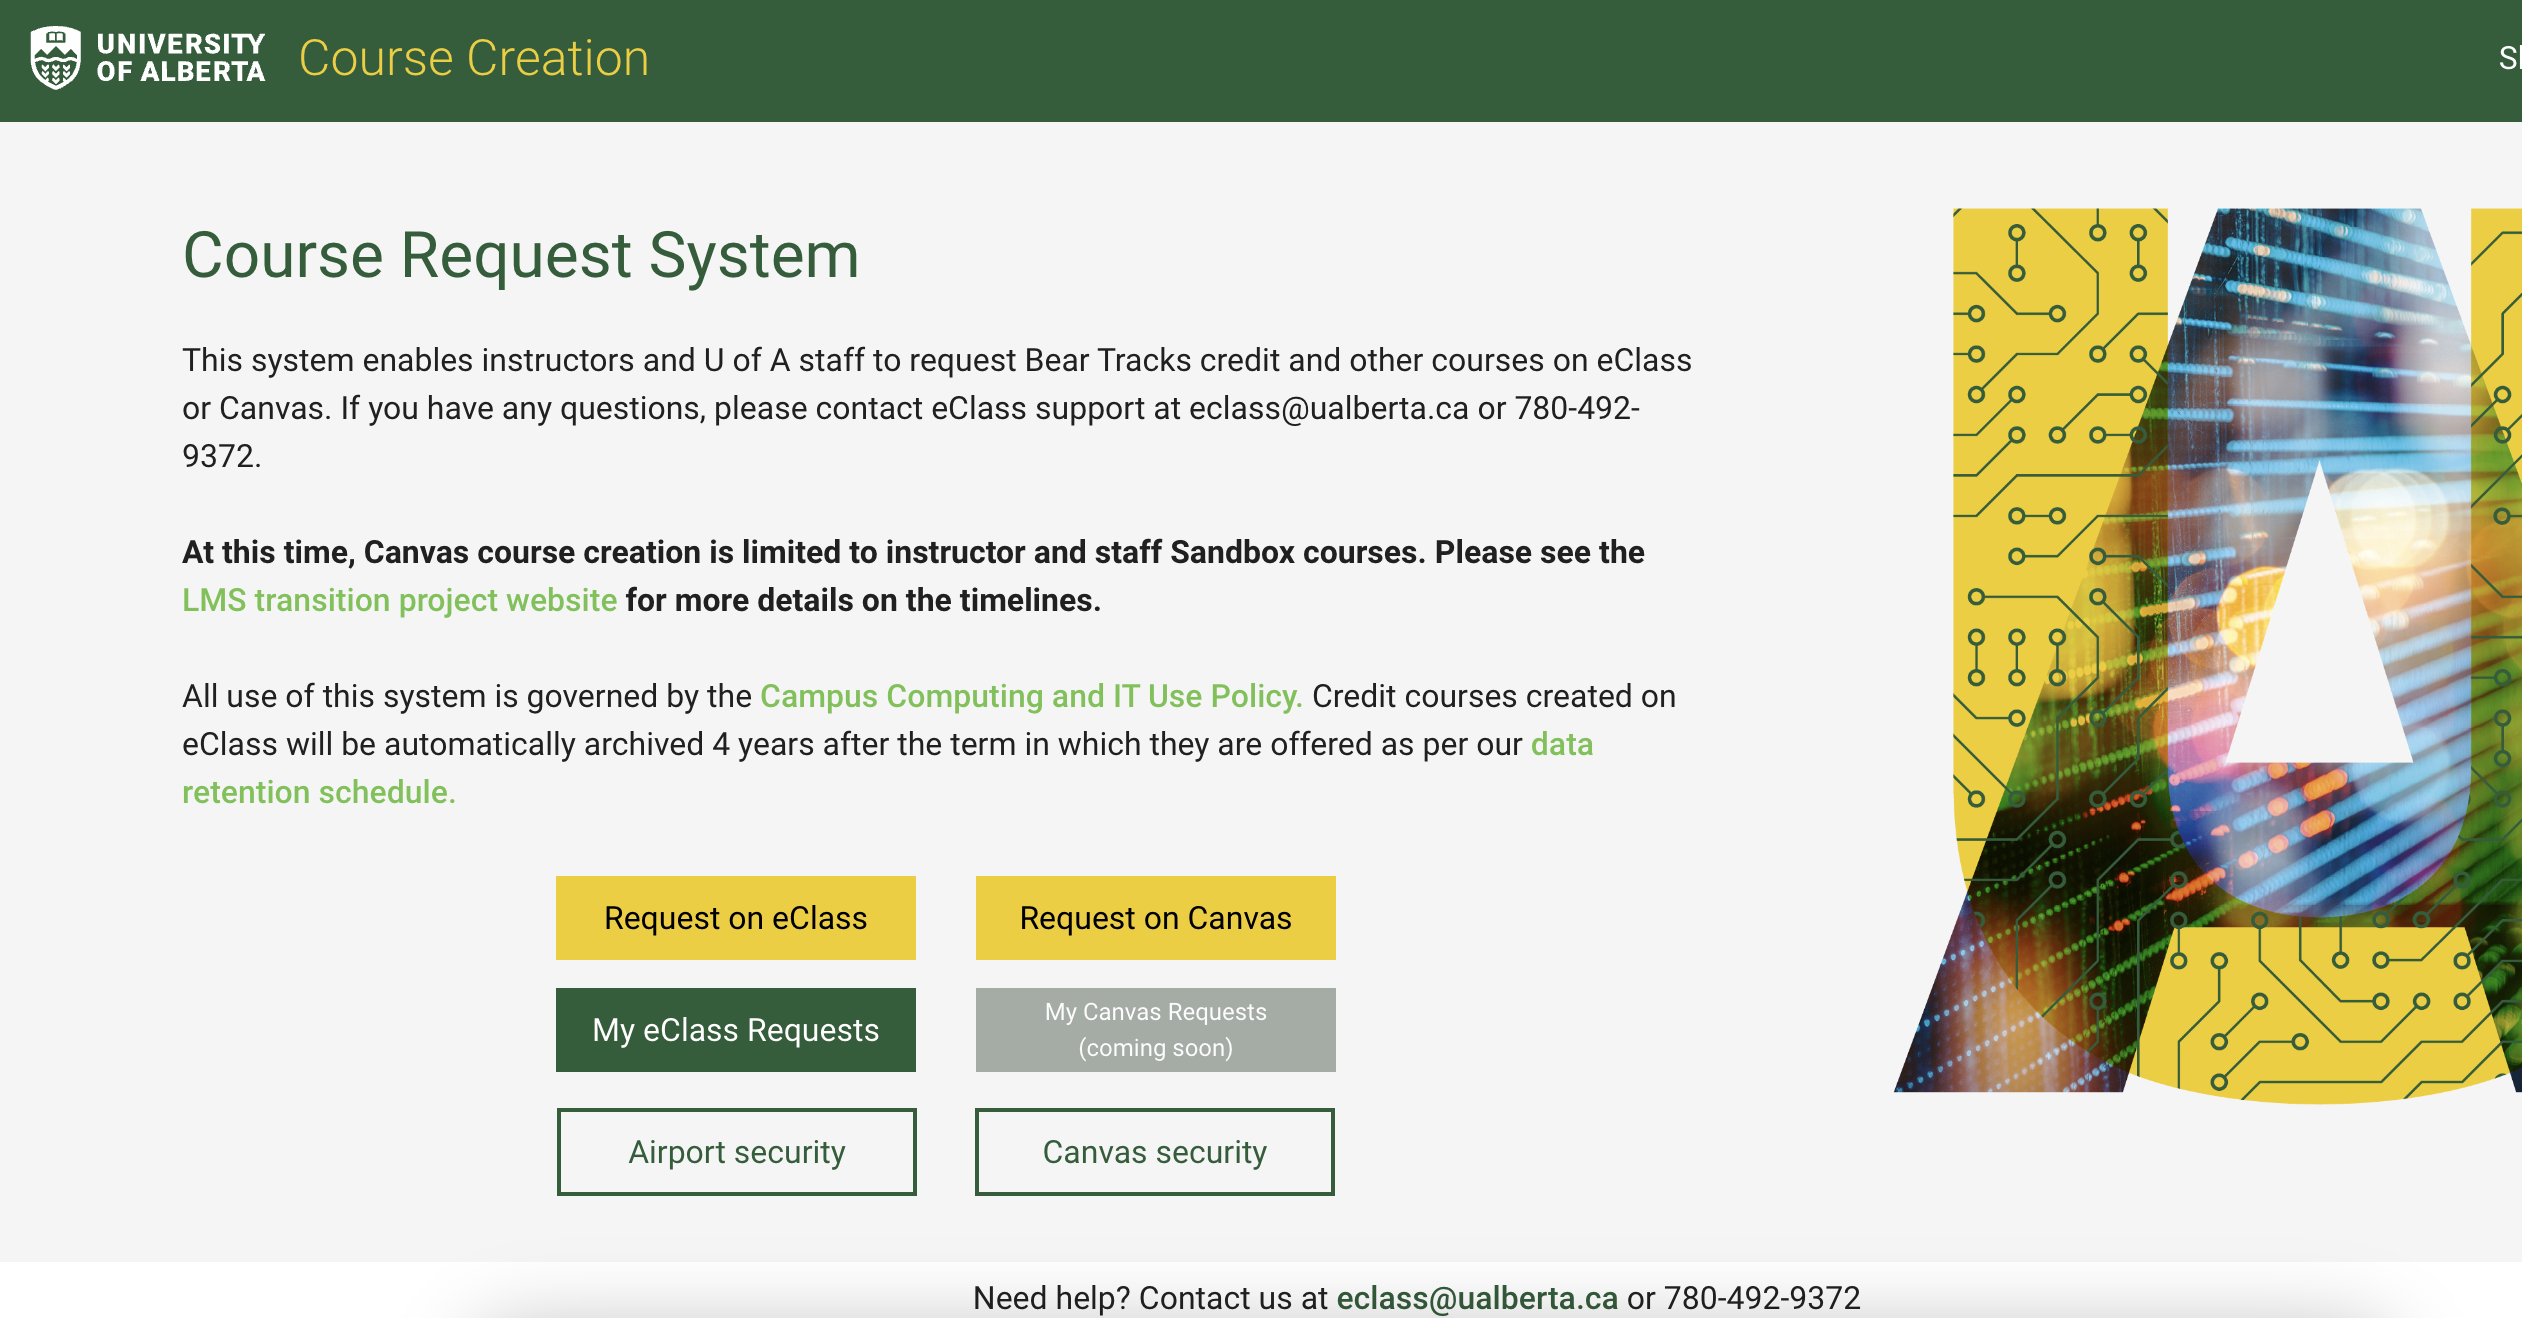
From the Course Request System landing page, select Request on Canvas:
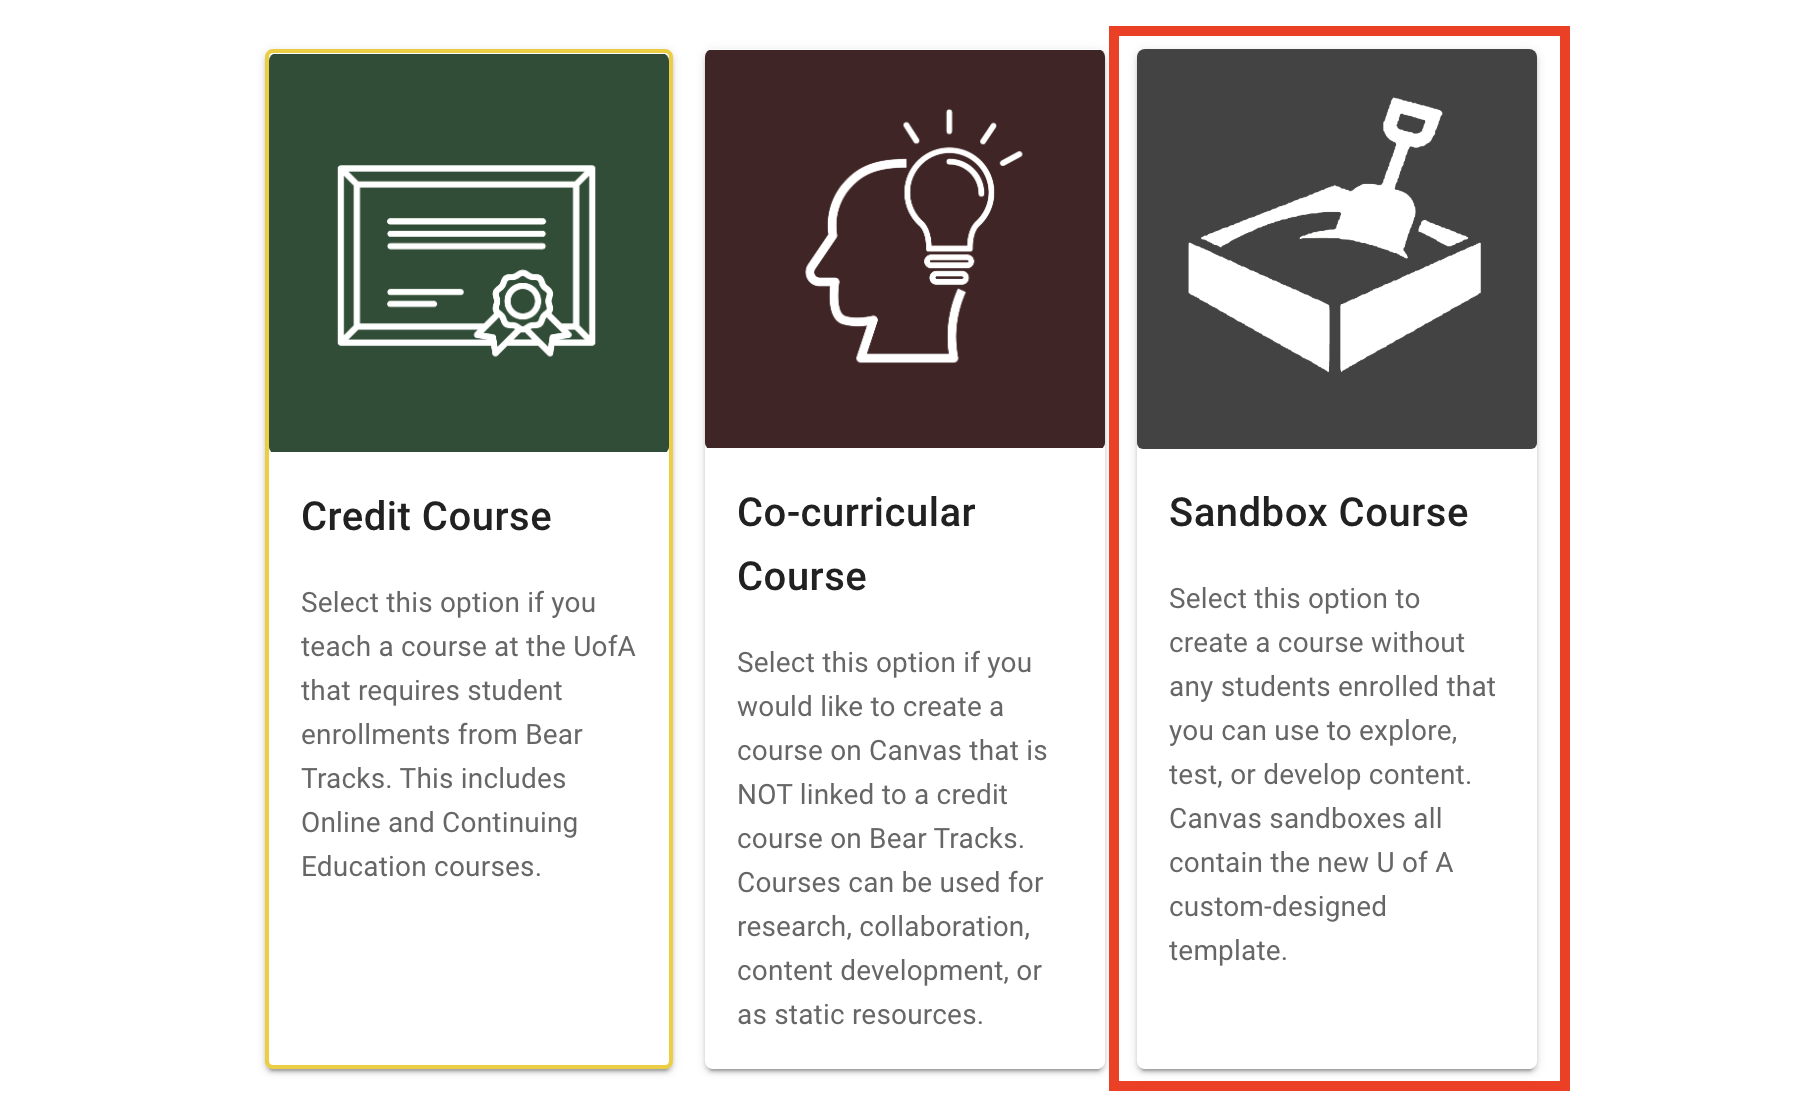
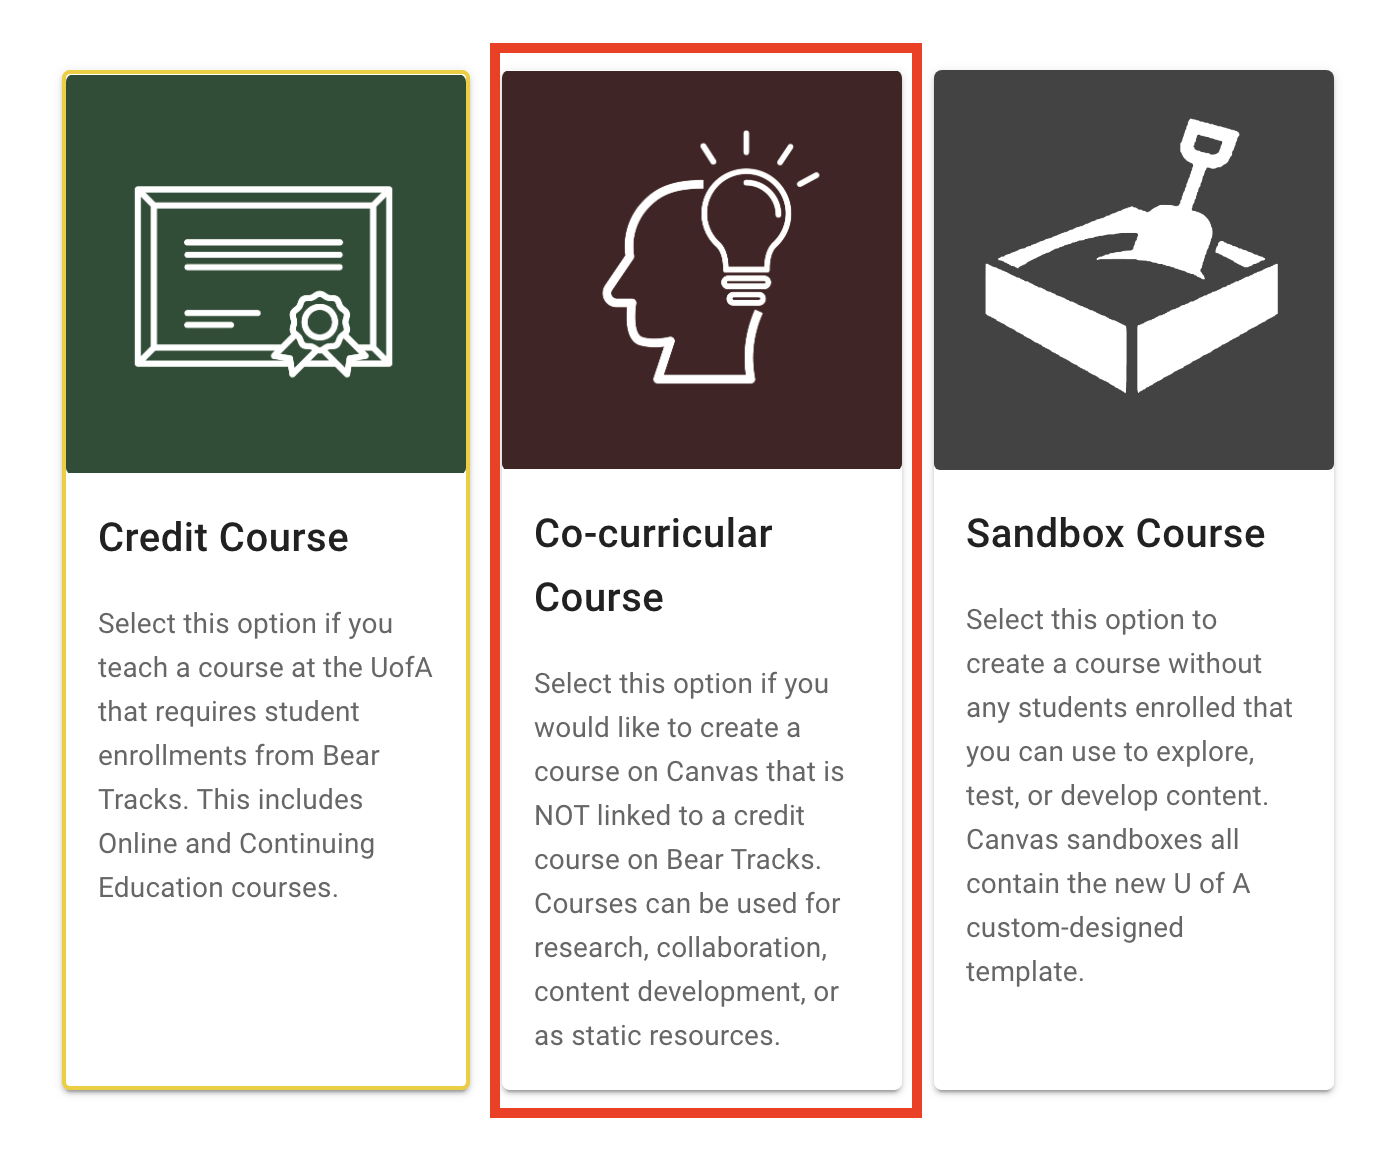
Then select the Sandbox Course option and click Next near the bottom right:
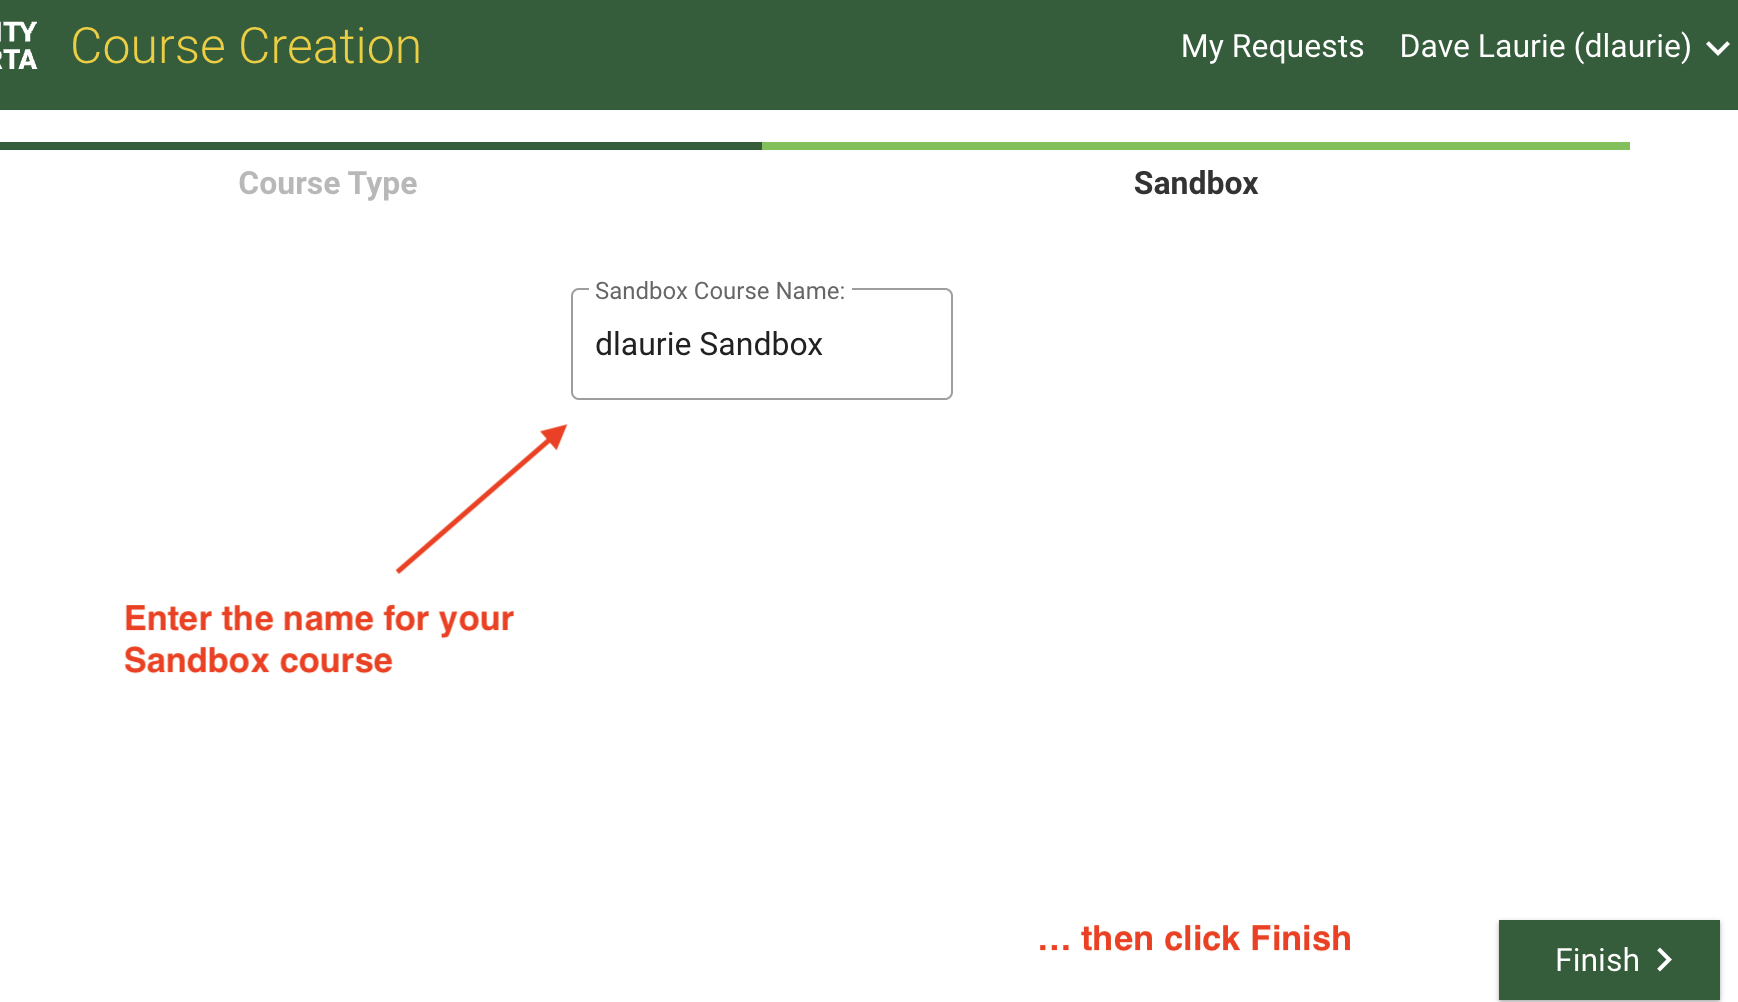
Users can then enter a name for the course in the textbox provided to complete their request:
Creating Co-Curricular Courses on CanvasAs of August 28, 2024, instructors and staff can now request Co-Curricular courses on Canvas using the request system. These courses are not automatically linked to any Bear Tracks enrollment sections and would be used for student cohort training needs, student pre-laboratory access training, internal faculty or staff training and professional development courses. At this time, manual enrolment of students will be required for these courses. To request co-curriculars, select that tile from the Canvas request landing page:
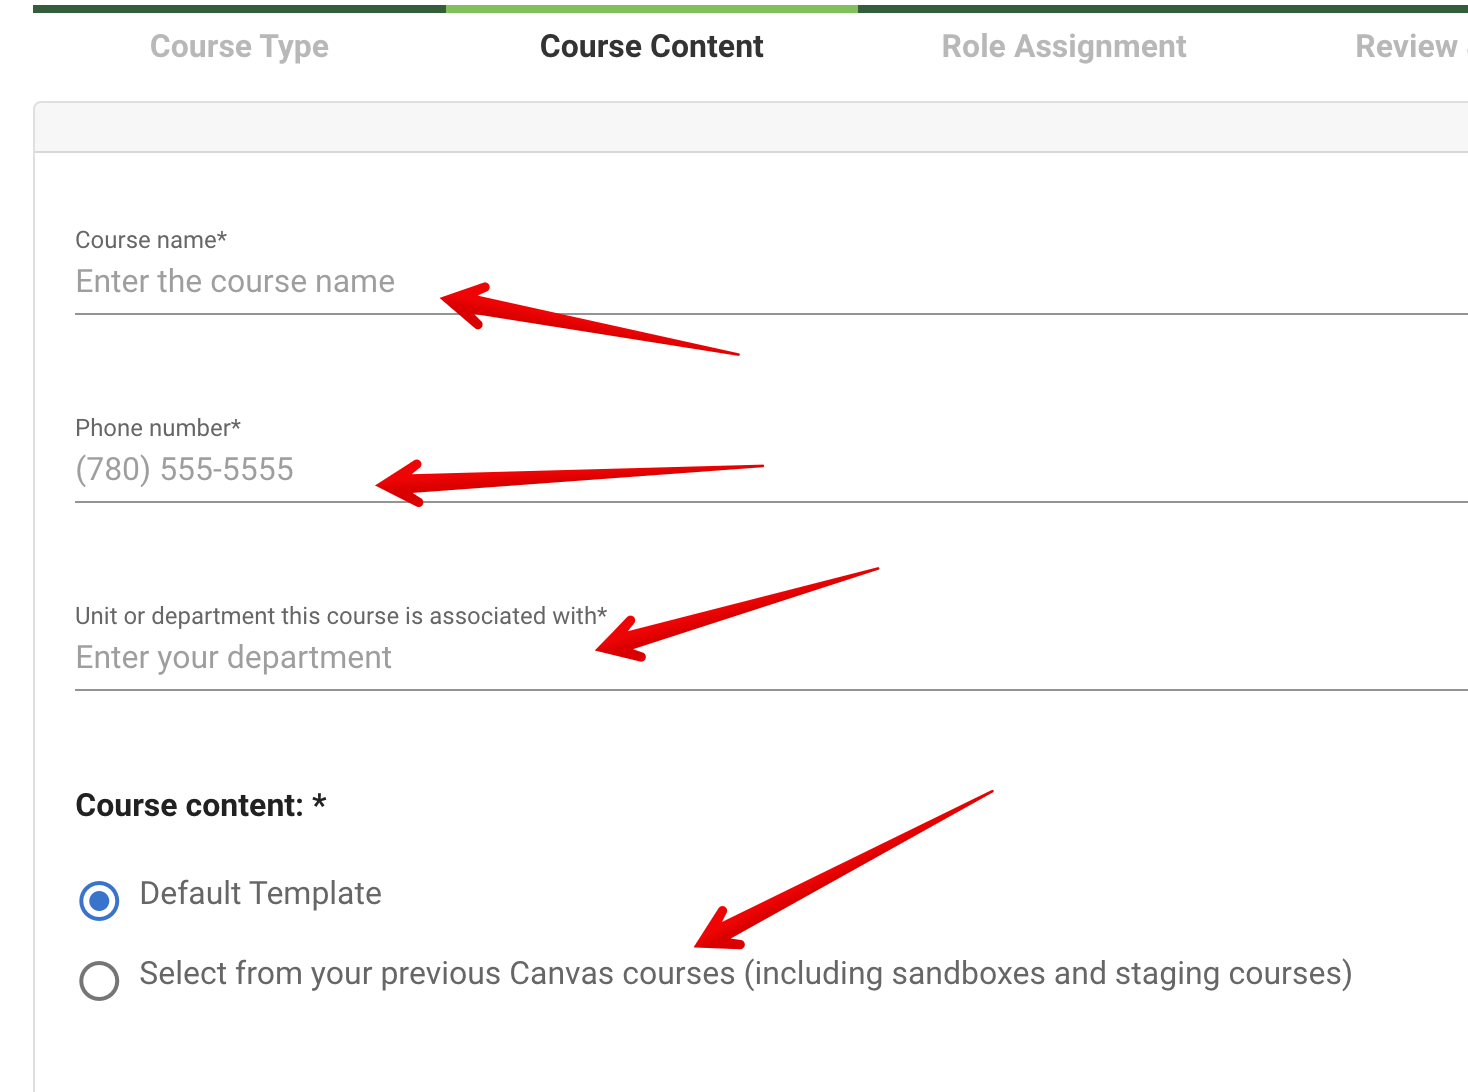
Enter the required information - a course title, a contact phone number in case of issues, and the affiliated college, faculty, department or unit; then specify the content source: the U of A Template, a blank course, or any existing Canvas course content to be initially copied into the course. (This would be the mechanism to copy in any content already created in a sandbox staging course or a course migrated by K16.)
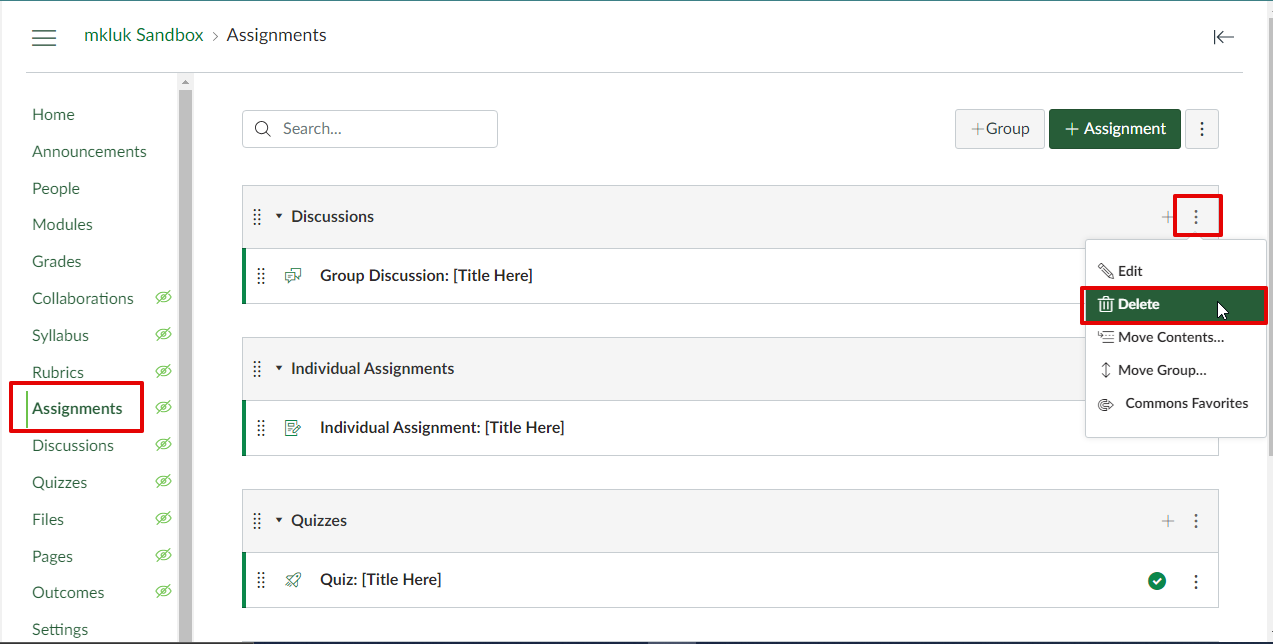
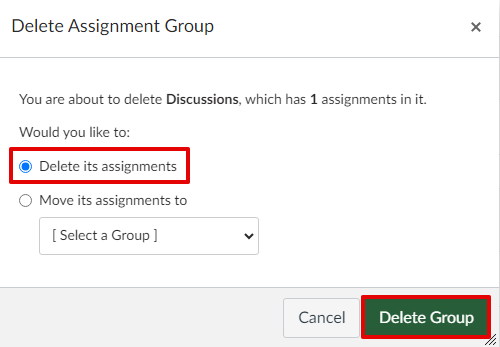
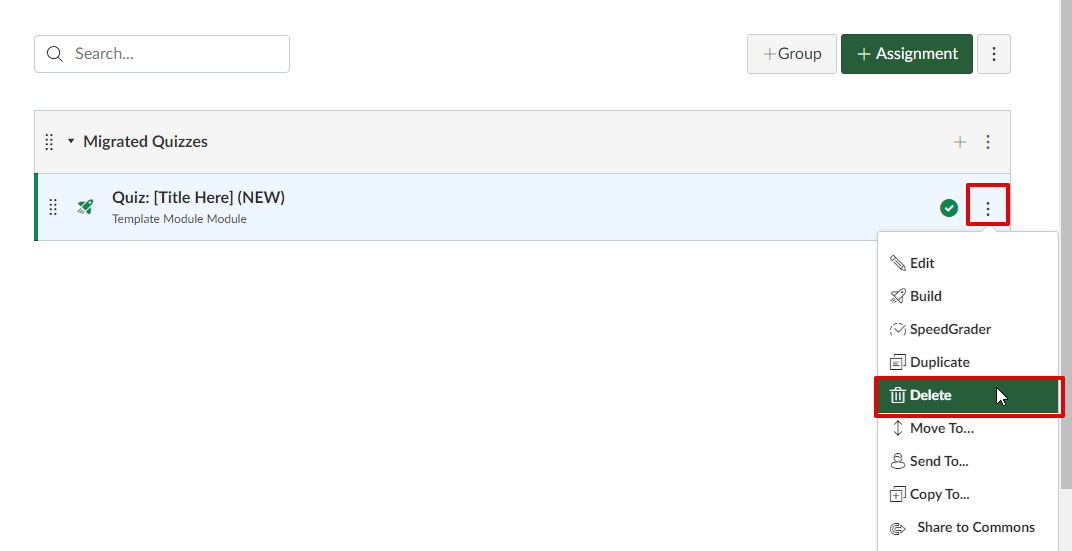
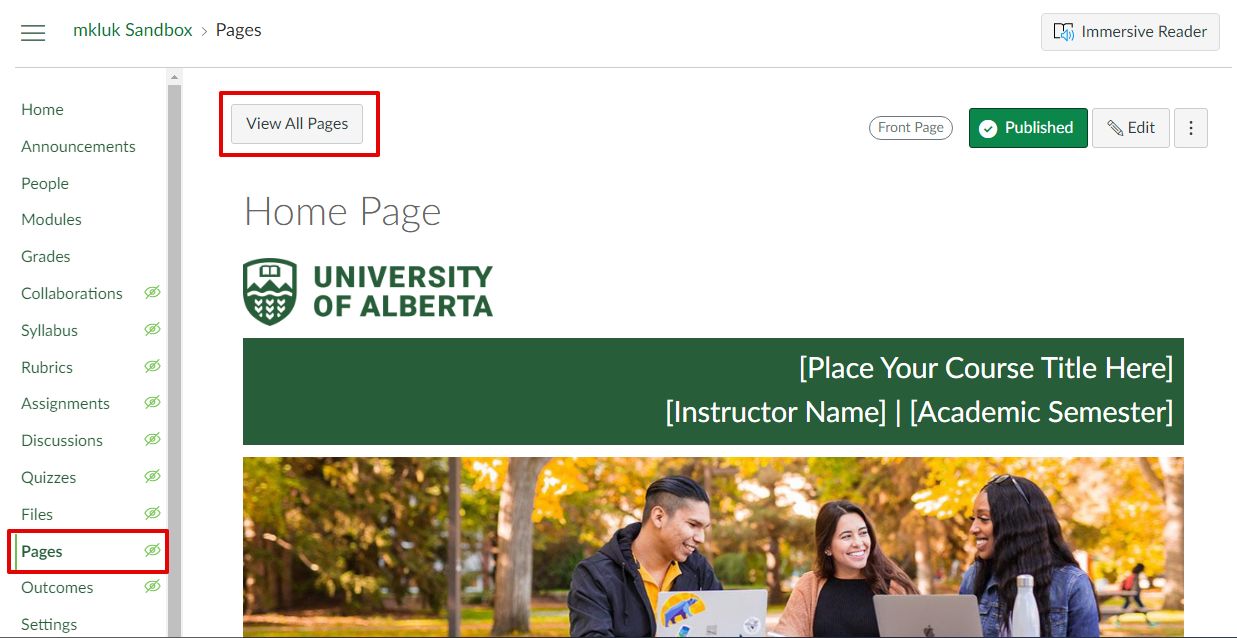
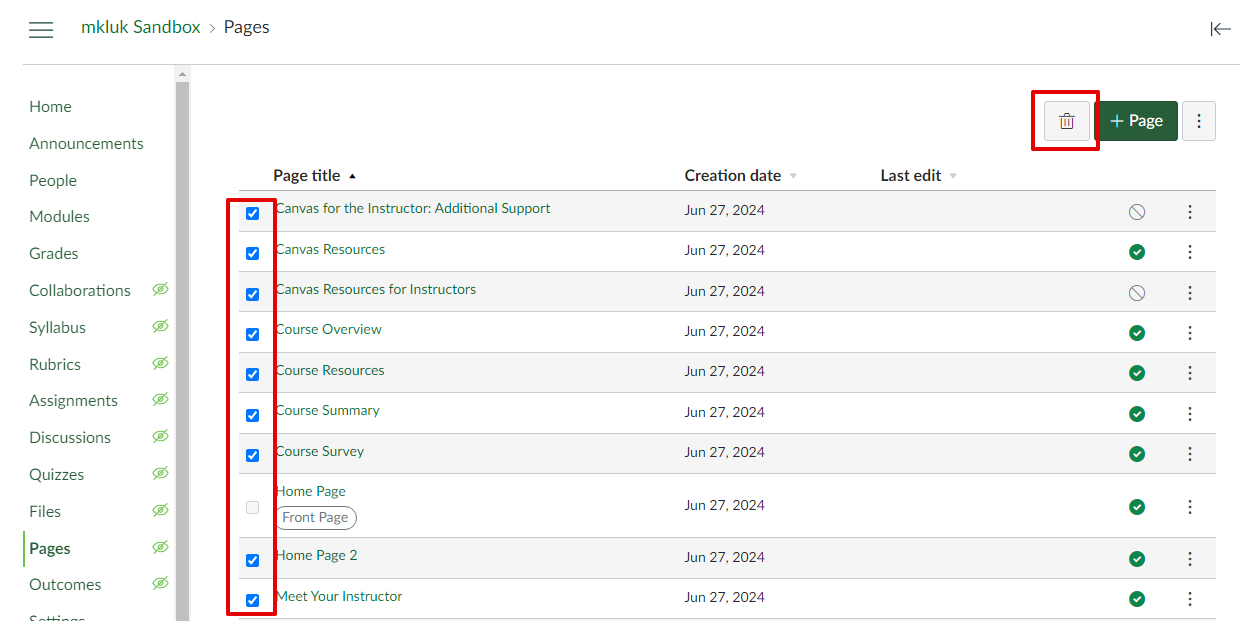
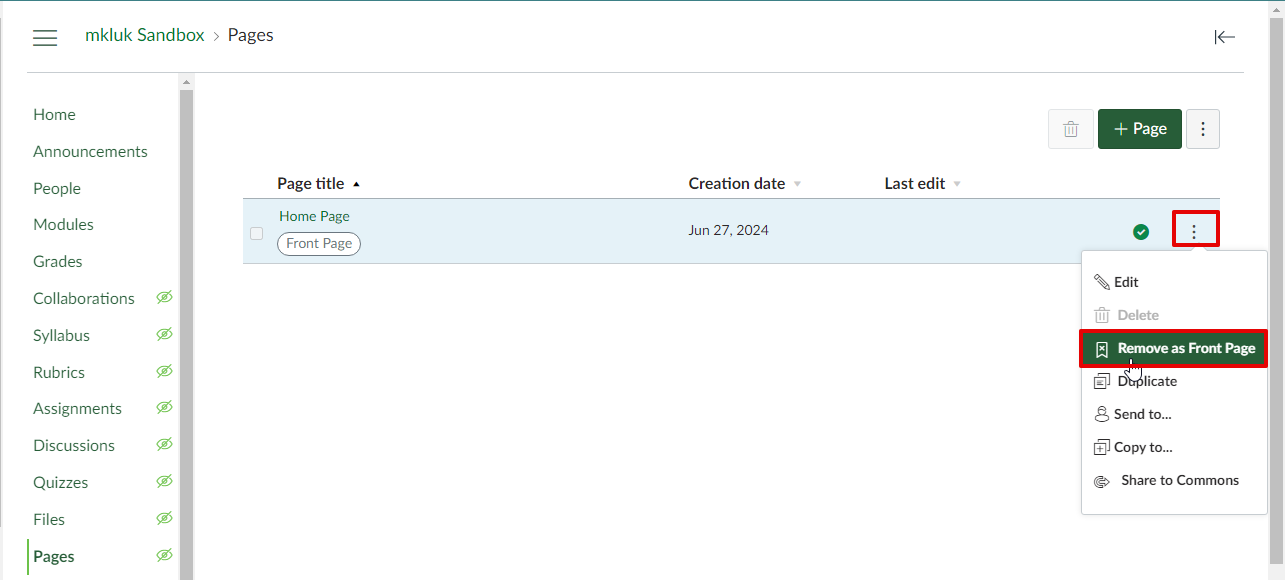
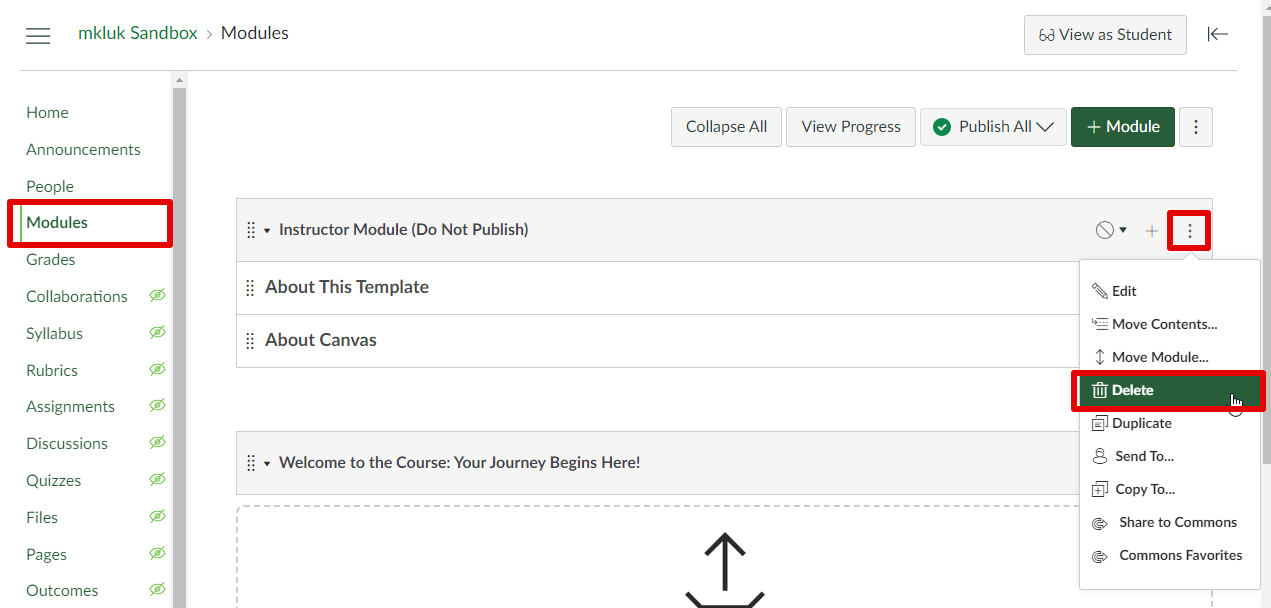
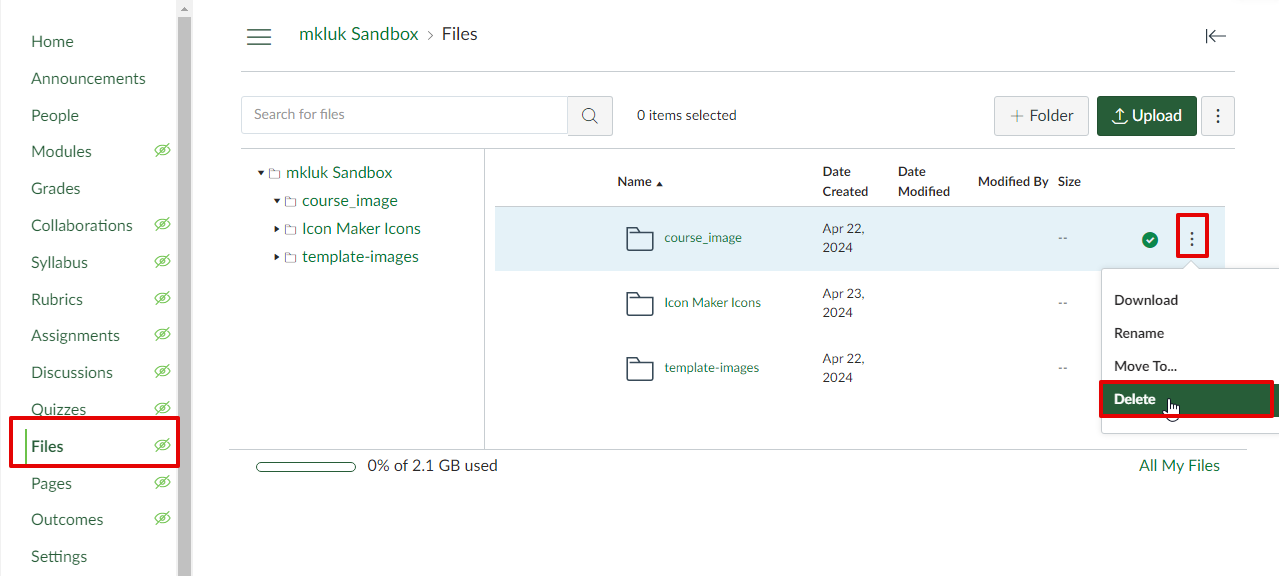
Deleting Template ContentIf you want to remove the template content from a sandbox or co-curricular course, you will have to delete it manually. This process should take about 5 minutes. It is also now possible to simply request a new blank co-curricular course to meet this need (see above.)
| |
|
|

