|
Uploading Final Grades from Canvas into Bear Tracks
Last modified on 17 June 2025 02:22 PM
|
|
|
This article lists the steps instructors need to follow to export their gradebook from Canvas, reformat it correctly, and then import it into Bear Tracks. To use this process, users must be enrolled in BearTracks/Campus Solutions as the instructor of record for a credit course and enrolled in Canvas as a Teacher in the same course. New in April 2025, instructors can now use a custom tool in their Canvas course to prepare a csv spreadsheet for import into Bear Tracks (instead of manually exporting grades and merging that file with a csv export from Bear Tracks as shown in items 1 - 4.) Instructions for using this tool are available in bullet 5 below. Update June 2025: the Bear Tracks grade export tool has gone through a first round of improvements from issues identified in beta testing, including a shift in how the tool is accessed in the course settings. This tool is now the recommended process for transferring Canvas grades into Bear Tracks but the instructions (in items 3 - 4) for exporting csv files from both systems and merging them have been left in place below in case instructors need to maintain spreadsheets outside the LMS to perform complex grade calculations. Contents:
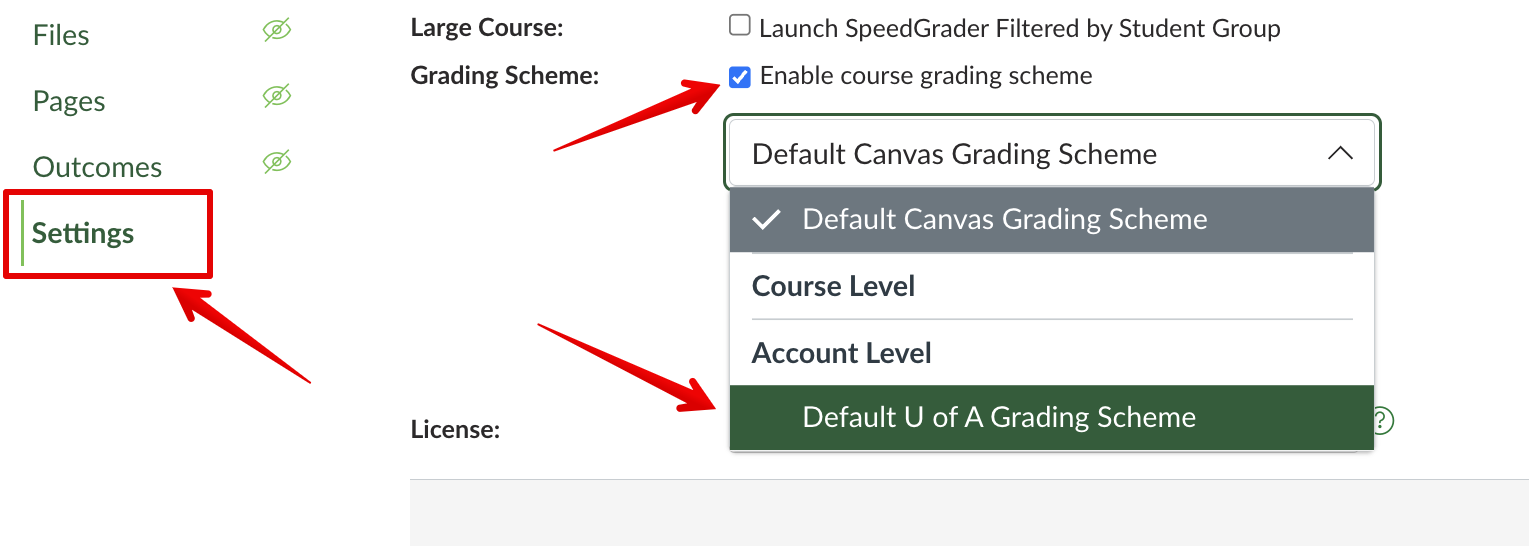
Getting StartedBefore Canvas can export course totals as letter grades, the gradebook needs to be set up to use letter grades. This is configured in the main course settings (not in the gradebook) by enabling a Grading Scheme:
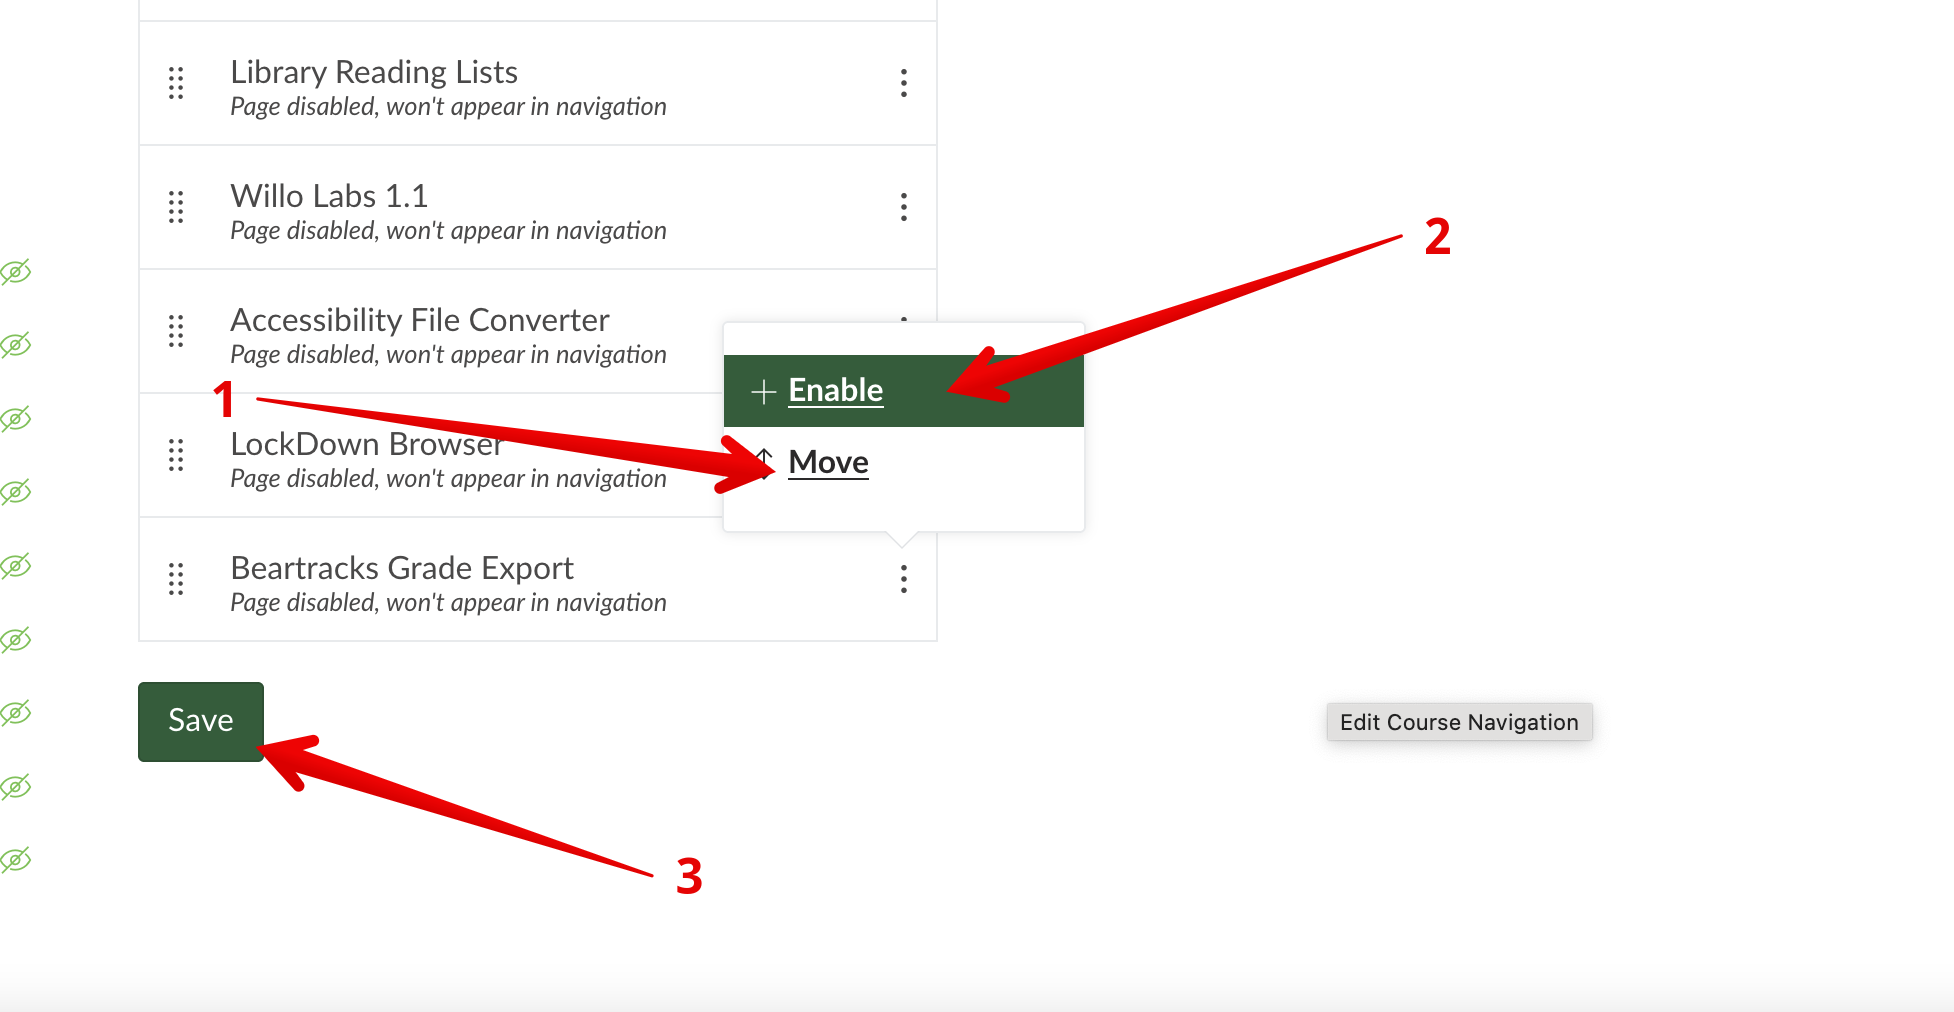
Instructors must ensure that the letter grade scheme meets their college, faculty, program, department, and/or personal needs (with additional guidance available in Using the Canvas Gradebook.) Please note that there is no requirement that instructors use the Canvas gradebook to record and compute grades or to transfer them from there into Bear Tracks. In cases where there are smaller numbers of students it might make more sense to use Canvas to record and compute scores but then just enter them into Bear Tracks manually. Alternatively if very complex grade calculations are required, the Canvas gradebook may not be able meet instructor's needs so it may make more sense to export scores directly into a spreadsheet, make calculations there, and then reformat for Bear Tracks import. Using the Bear Tracks Grade Export (BETA) toolThe Bear Tracks Grade Export tool creates a pre-formatted csv spreadsheet containing all required grades and student information for upload into Bear Tracks for a course. In combined courses, the correct primary component section is added for every section. Note that instructors MUST validate their letter grading scheme and proof check the grades in the produced spreadsheet before uploading into Bear Tracks. To use the tool to create your Bear Tracks grades csv, navigate to the course settings, then to the course sub-settings menu at the top right, and click on Bear Tracks Grade Export (BETA):
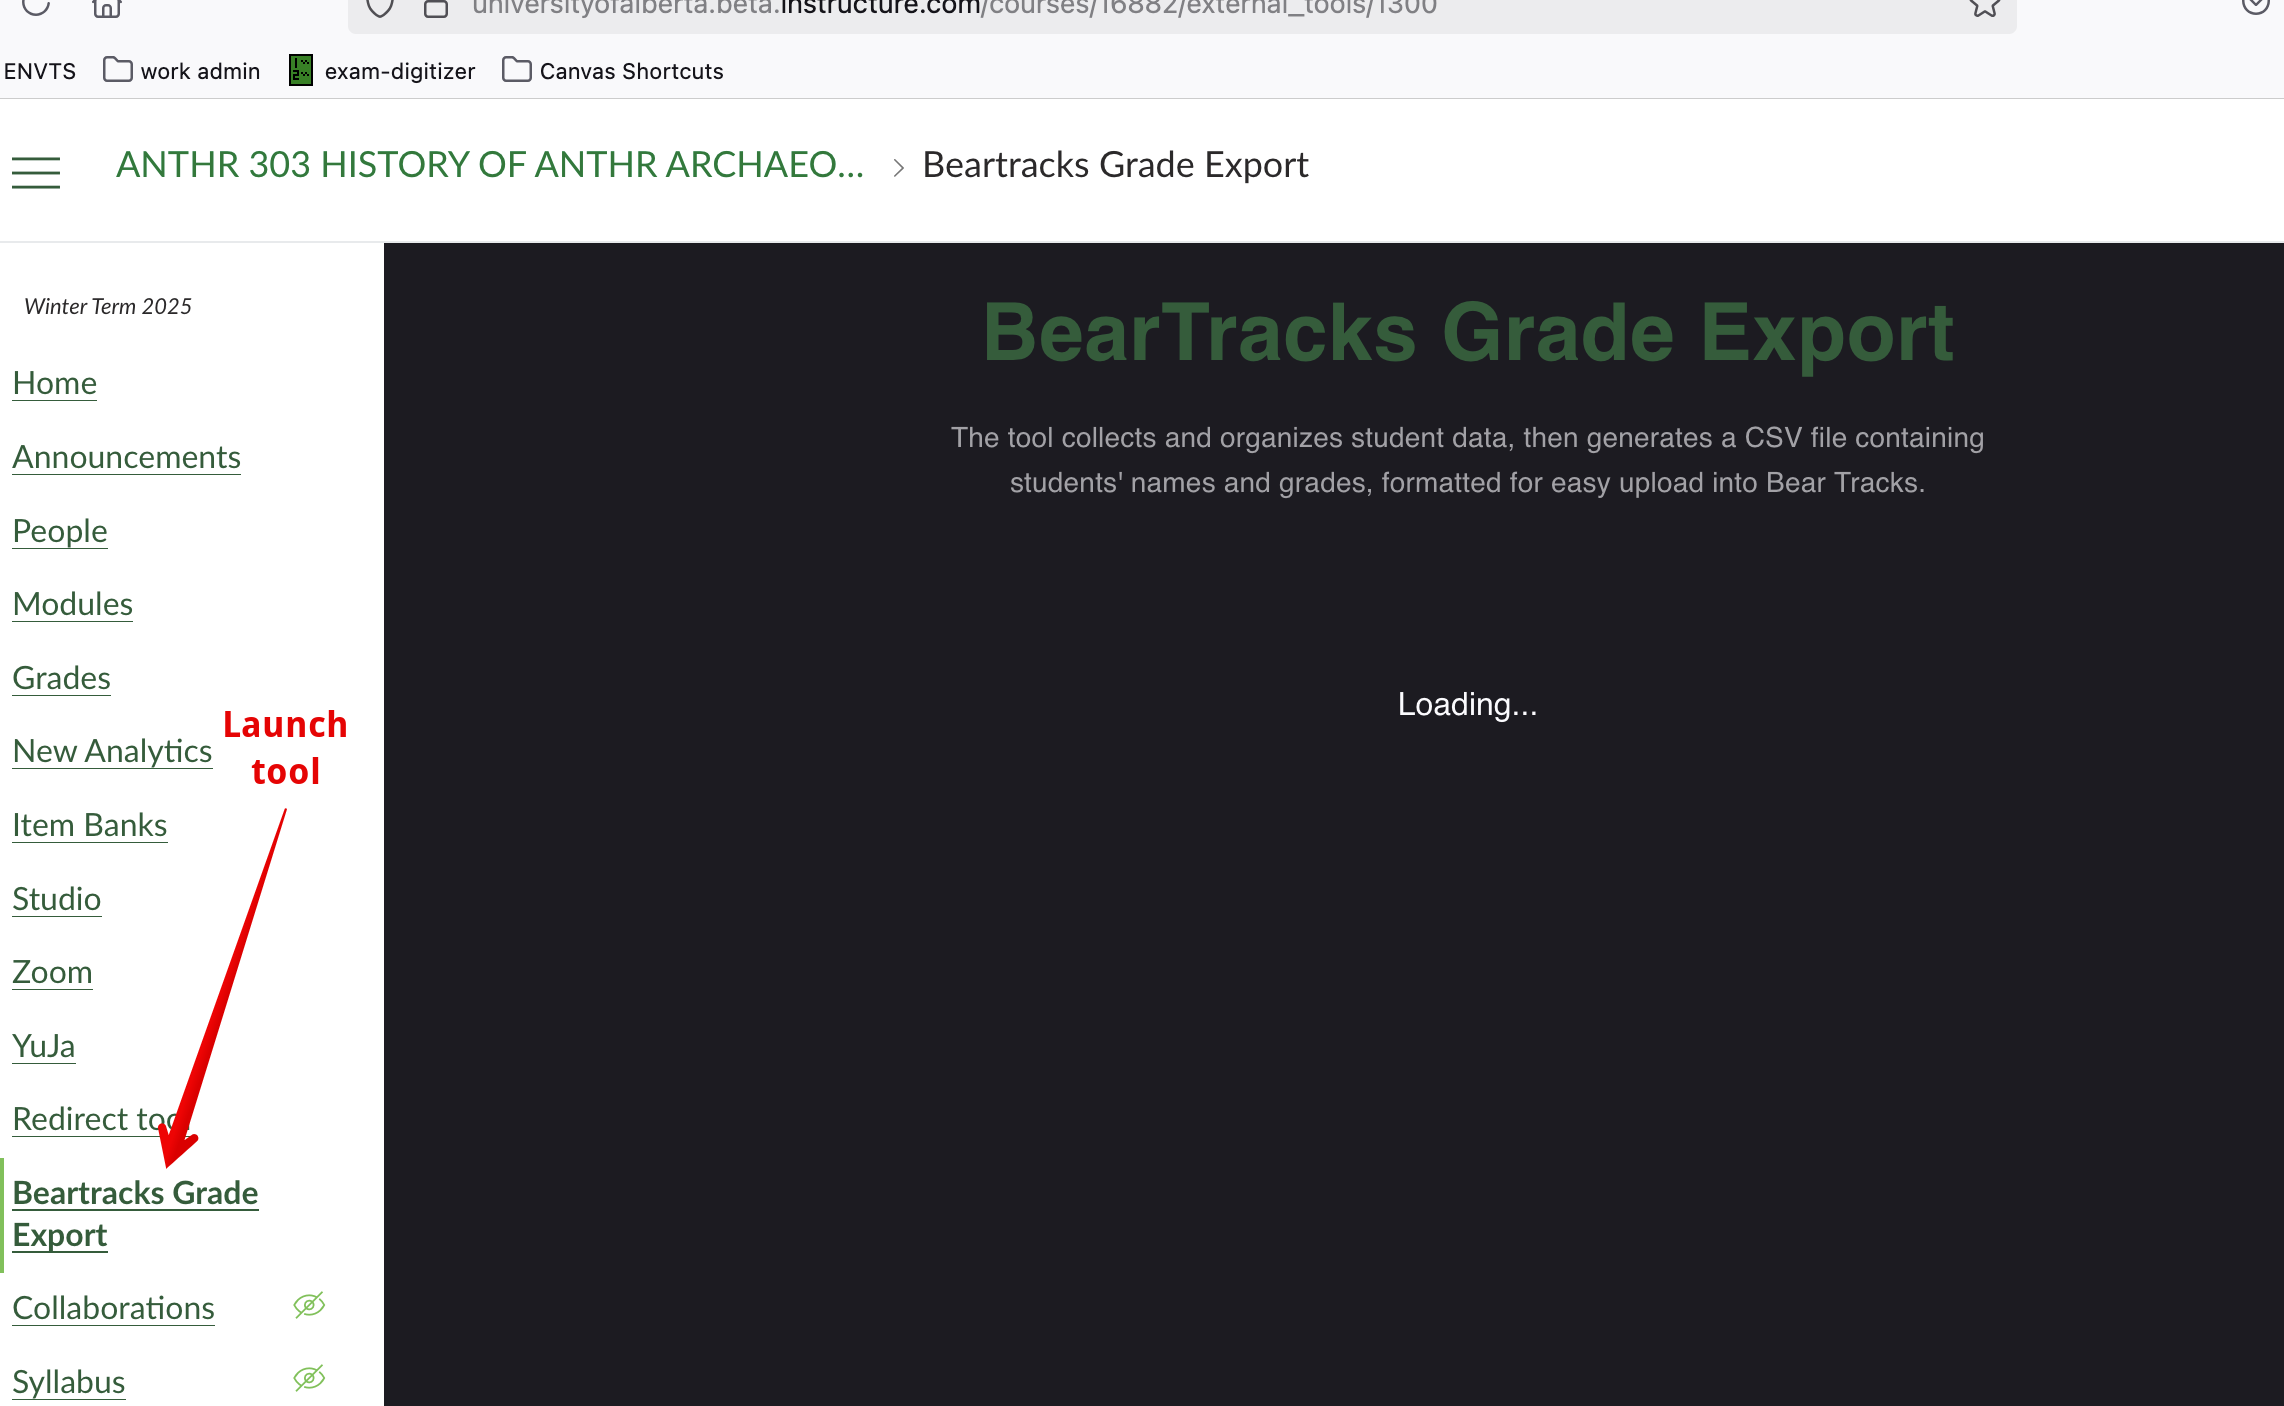
Clicking it will show the export screen in the center panel with detailed usage instructions about the tool and a dropdown box to select the appropriate Canvas course total column for use:
Most often the correct selection will be to choose the Final Grade column but when instructors use a Manual Posting Policy and have not released all scored grades to student BEFORE they are uploading into Bear Tracks (for example if they only want to display the final letter score in Bear Tracks), they will need to select the appropriate alternative column:
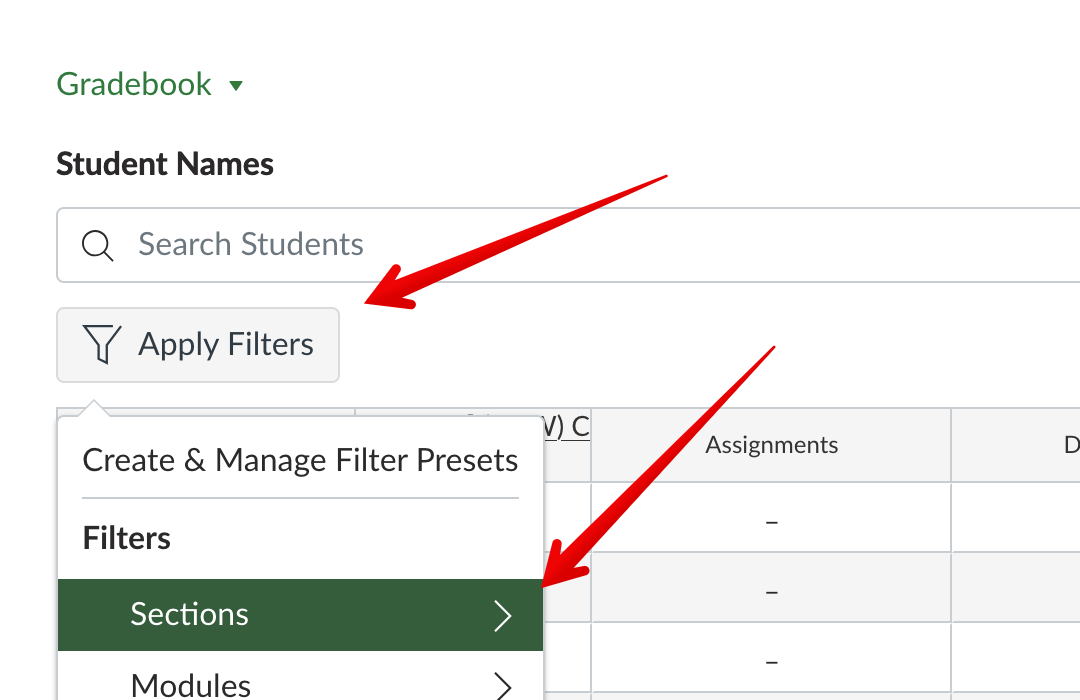
Once instructors have selected the column they require, they can click Fetch Grades (see screenshot above). When the fetch completes, the csv will be automatically downloaded to your machine and it can then be uploaded into Bear Tracks (see below.) Downloading Student Grade FilesNote: This and the following section are only required if instructors are manually merging student Canvas grades with a Bear Tracks export file instead of using the Bear Tracks Grade Export tool. Once grades have been assigned for items and tabulated into a final grade in the Canvas gradebook at the end of term, instructors will need to download and combine two files: an export of the Canvas gradebook and a grade roster export from Bear Tracks. Download the Canvas Gradebook: 1. Enter the gradebook by clicking Grades in the course left nav menu. When working in a combined course, instructors must upload different section's grades into Bear Tracks individually. If this is your case, then filter the gradebook to the specific section you are trying to upload near the top left:
2. Then click Export near the top right and choose Export Current Gradebook View:
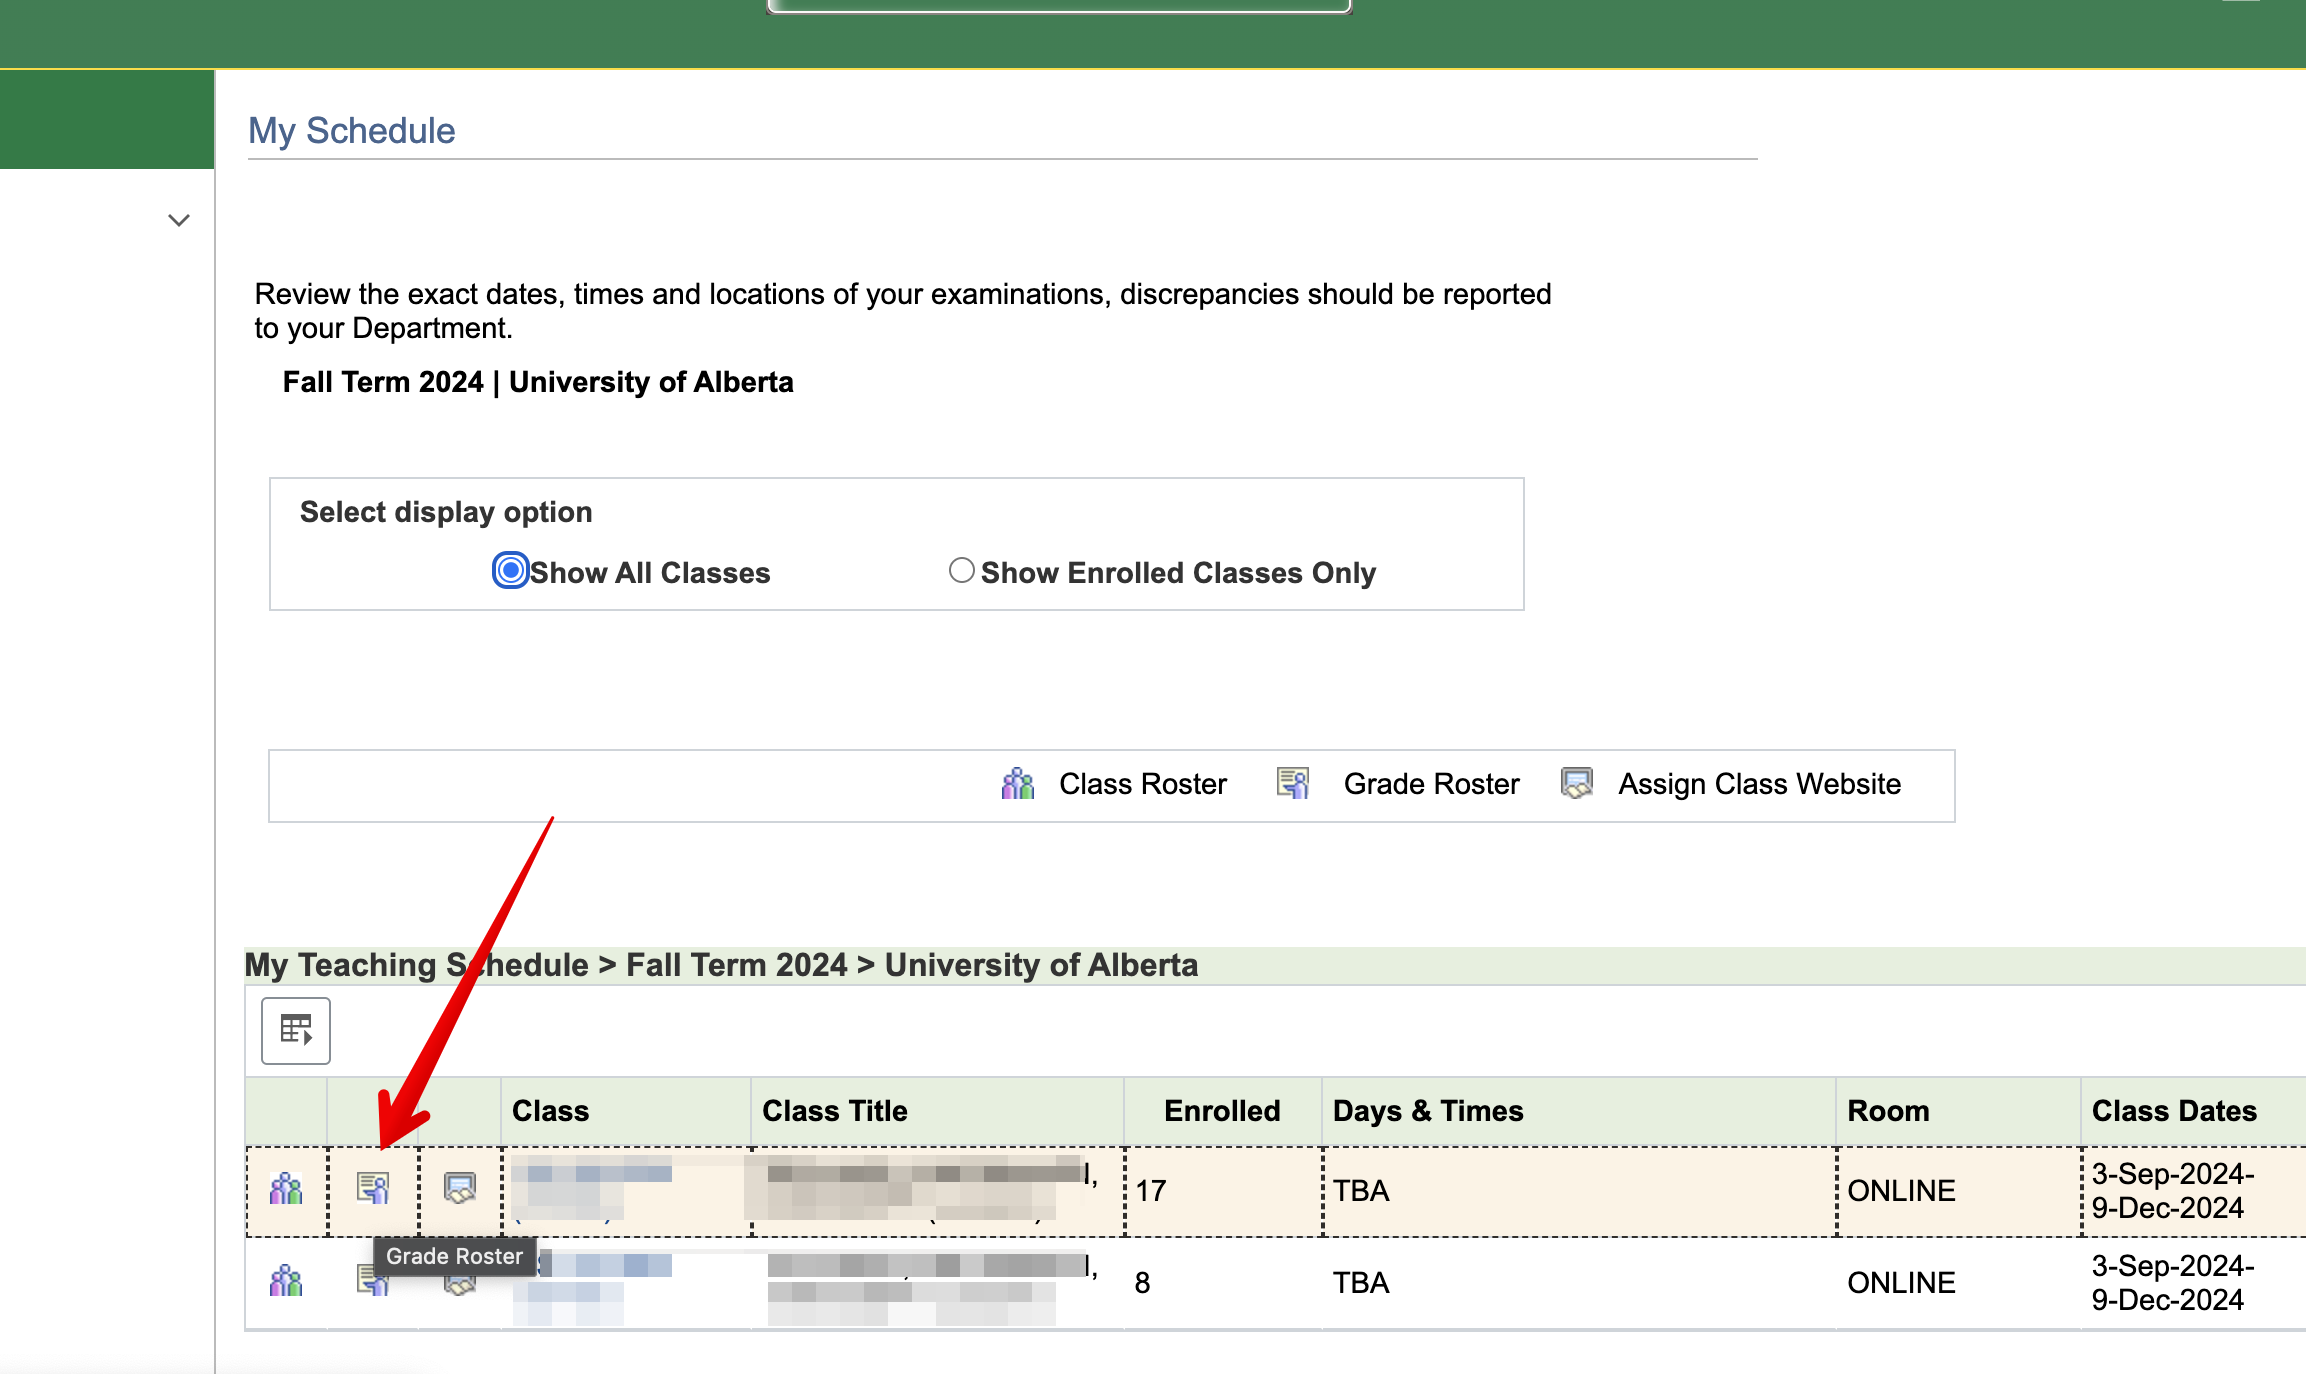
Download the Bear Tracks Grade Roster: 1. Login into Bear Tracks and access the Instructor Centre. 2. Access the class and section that you need to upload grades for, then click the Grade Roster icon to the left of its name:
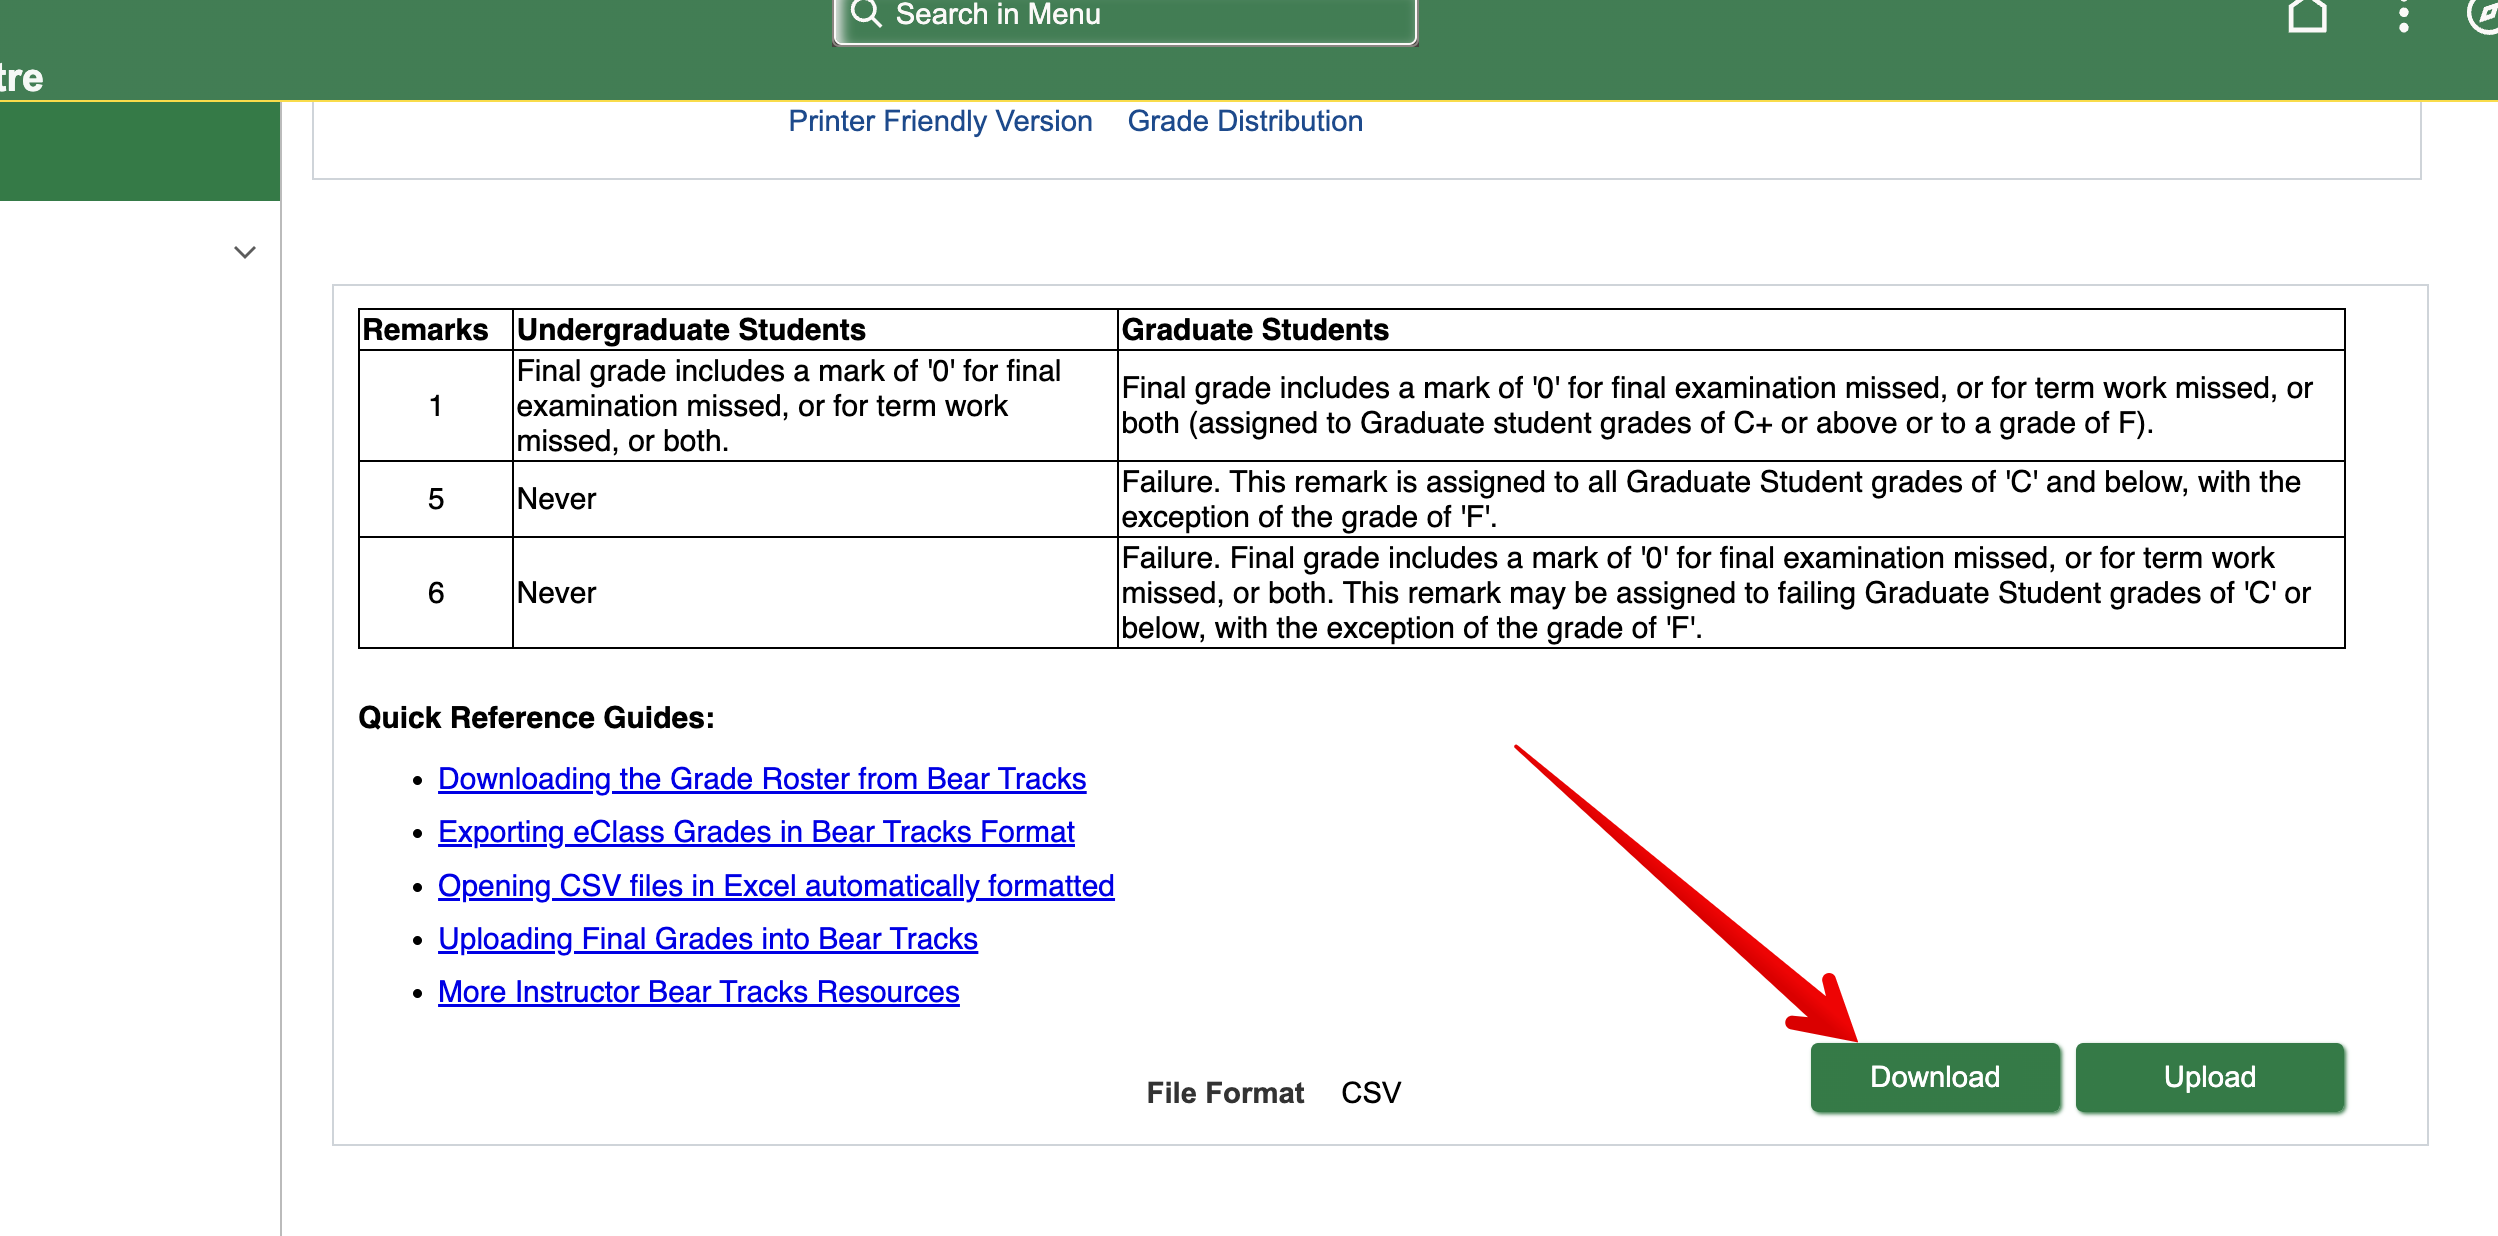
3. Scroll down and click the Download button to the right of the Quick Reference Guides:
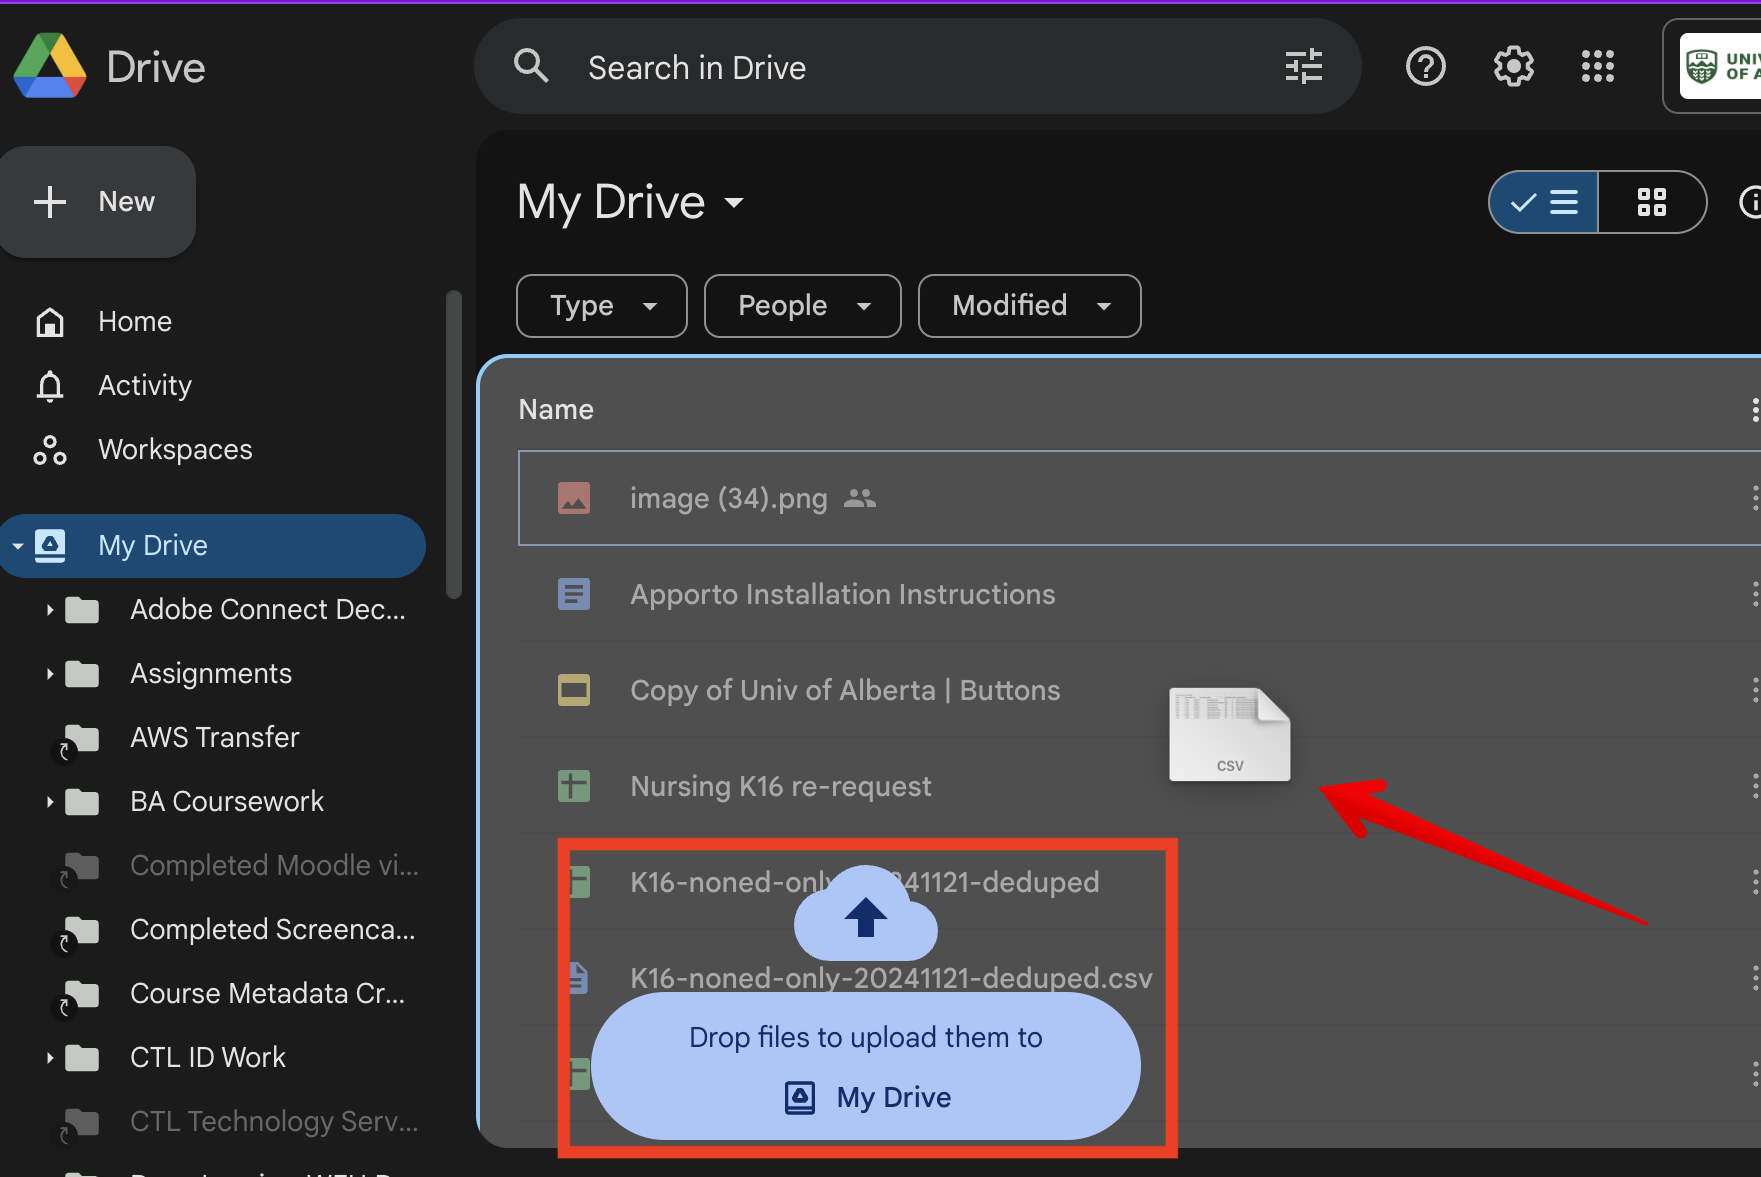
You should now have 2 .csv files: the Canvas one with a name like '[date-stamp]_Grades-[course-name].csv' and the Bear Tracks one with a name like '[term number.course code].csv'. Combining the FilesFor this process, elements from both files will be need to be put into one combined spreadsheet that is compatible for Bear Tracks import. The required columns from the Bear Tracks spreadsheet are the Term and the Class Number; and the required columns from the Canvas spreadsheet are the SIS User ID (which is the Bear Tracks Student ID #) and the Current Grade (read only) or Final Grade (read only). Both of these spreadsheets have 2 header rows above the rows of class and student data and these do not need to be edited at all. This guide will demonstrate how to merge these columns using Google sheets but any spreadsheet tool (Excel, LibreOffice, Numbers, etc) should work. Google sheets is being demonstrated because it is freely available to all U of A faculty and staff and other spreadsheet programs sometimes convert .csv files in unexpected ways (see Additional notes below.) Merge the files: 1. Drag and drop (or browse and select) both files into a browser tab opened to your google My Drive:
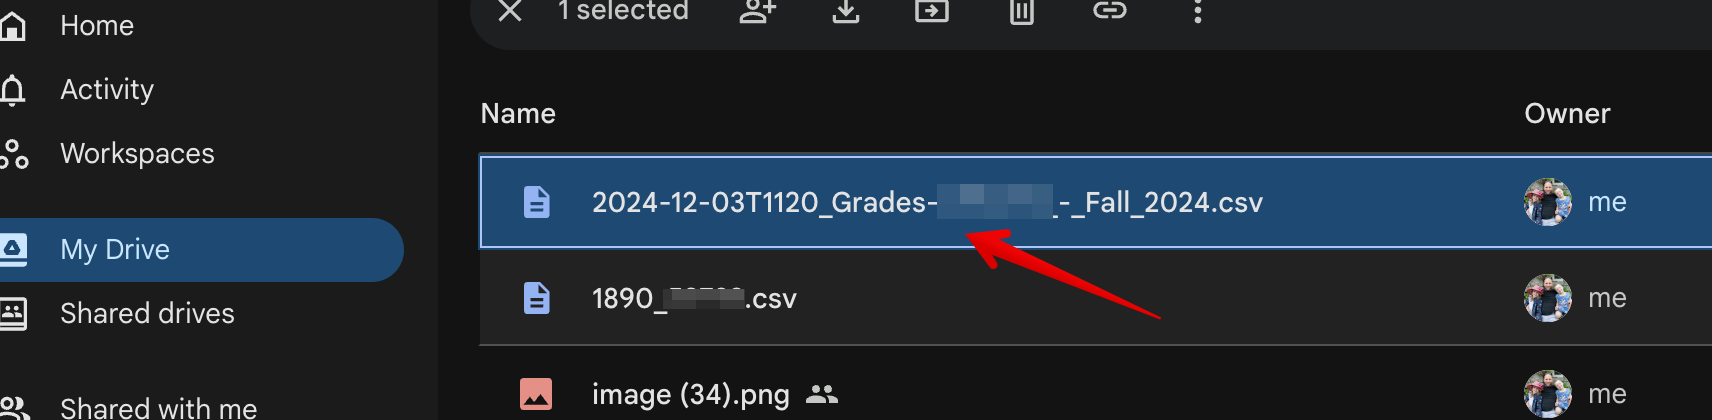
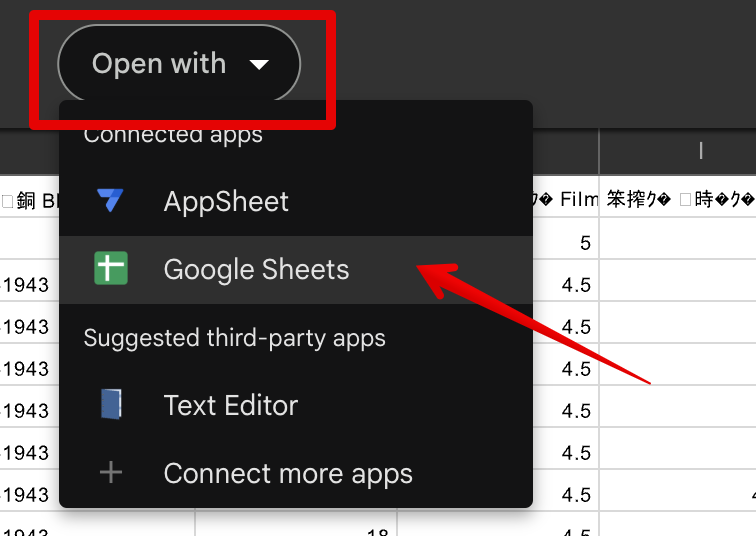
2. Double-click to open the Canvas .csv file preview, then select Open with > Google sheets:
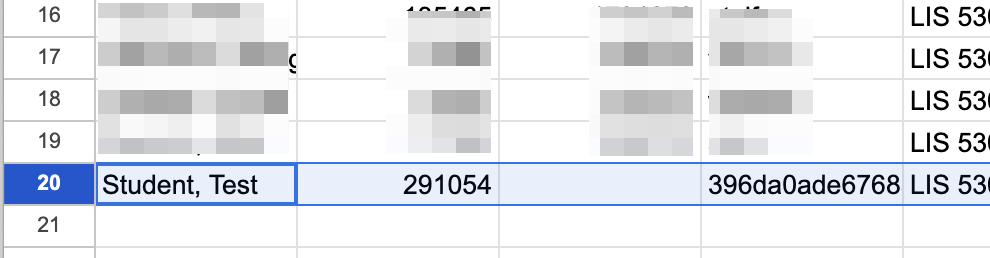
3. Select and delete the grade row for the test student from the very bottom of the sheet. (This row may not be in your gradebook if you have not submitted anything using the test student or reset it recently):
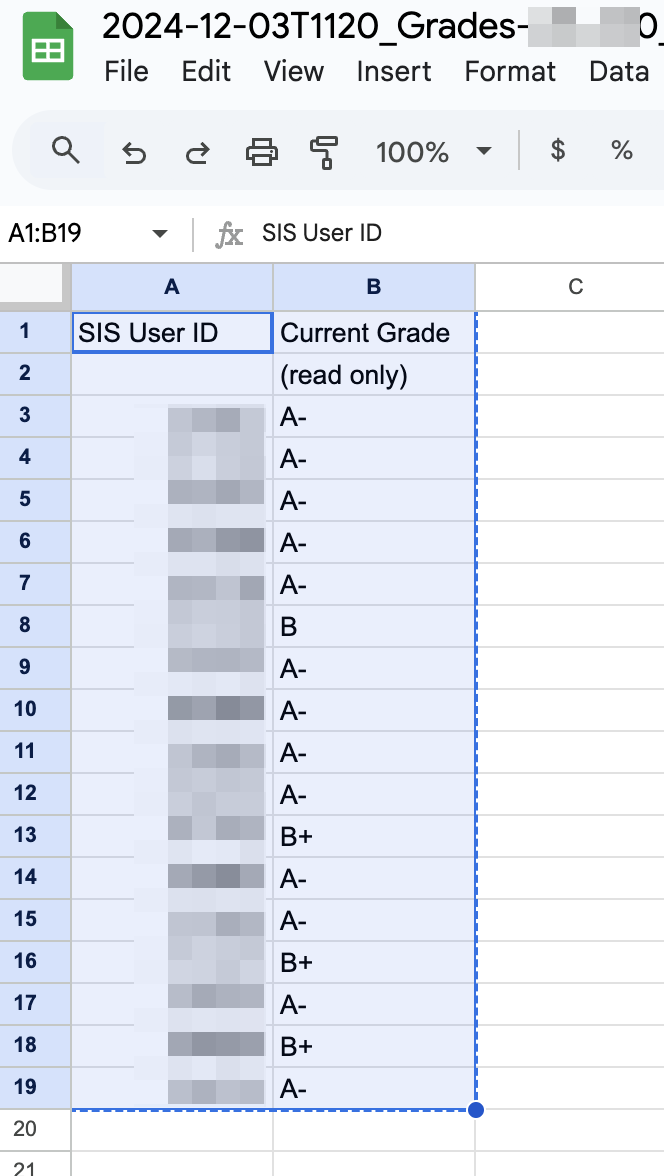
4. Delete all the columns except SIS User ID and Current Grade (read only), then click ctrl/cmd a to select all the data and ctrl/cmd c to copy it:
5. Go back to your Google drive and double-click the Bear Tracks csv to open the preview and then select Open with > Google sheets for that file. (Repeat Step 2 above for the Bear Tracks csv file.) 6. Delete all the columns except Term and Class Number:
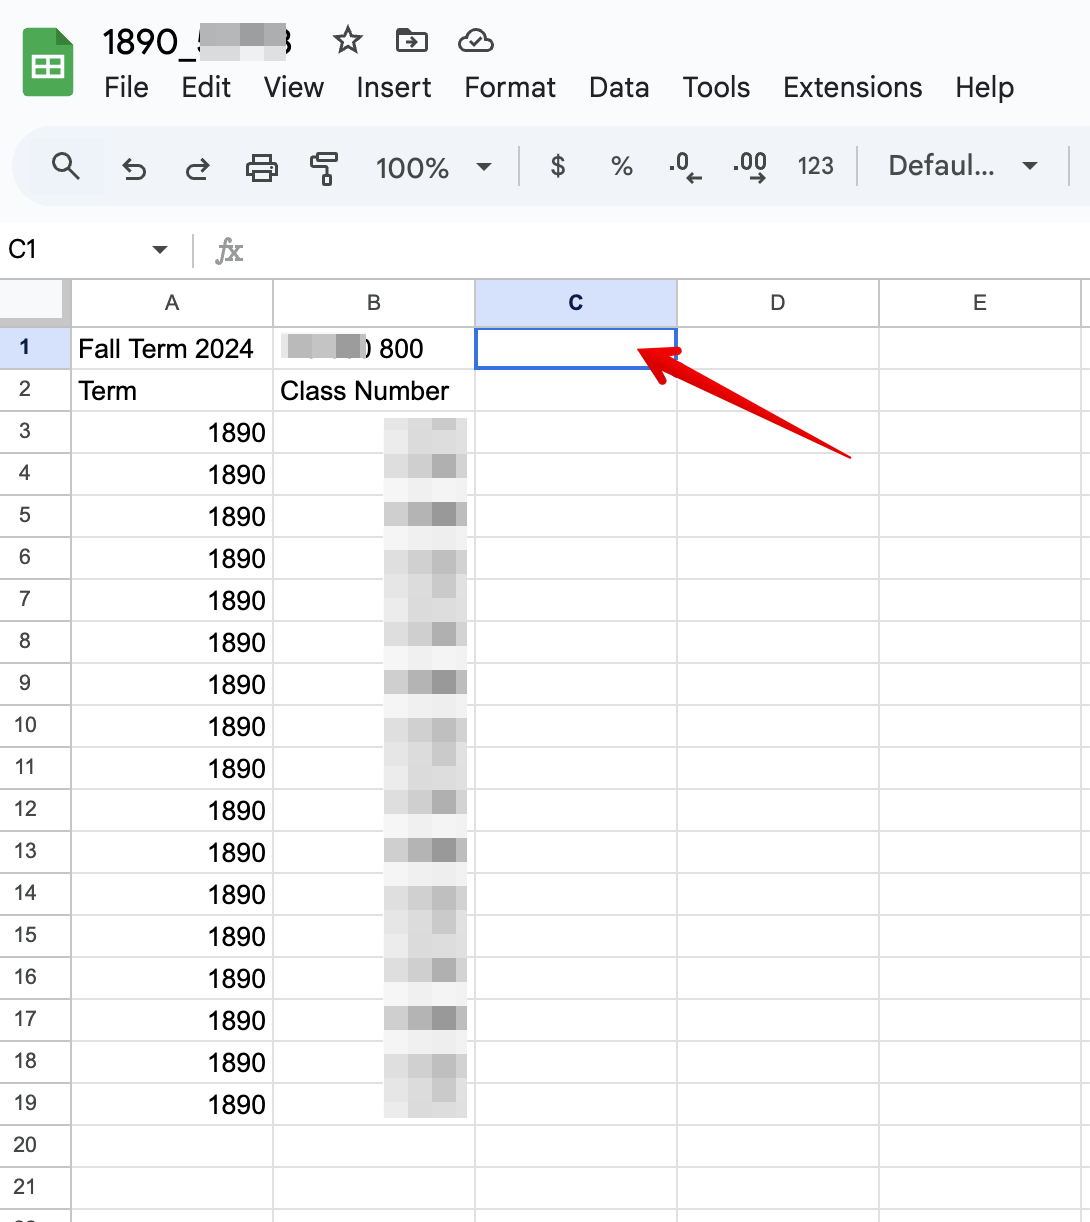
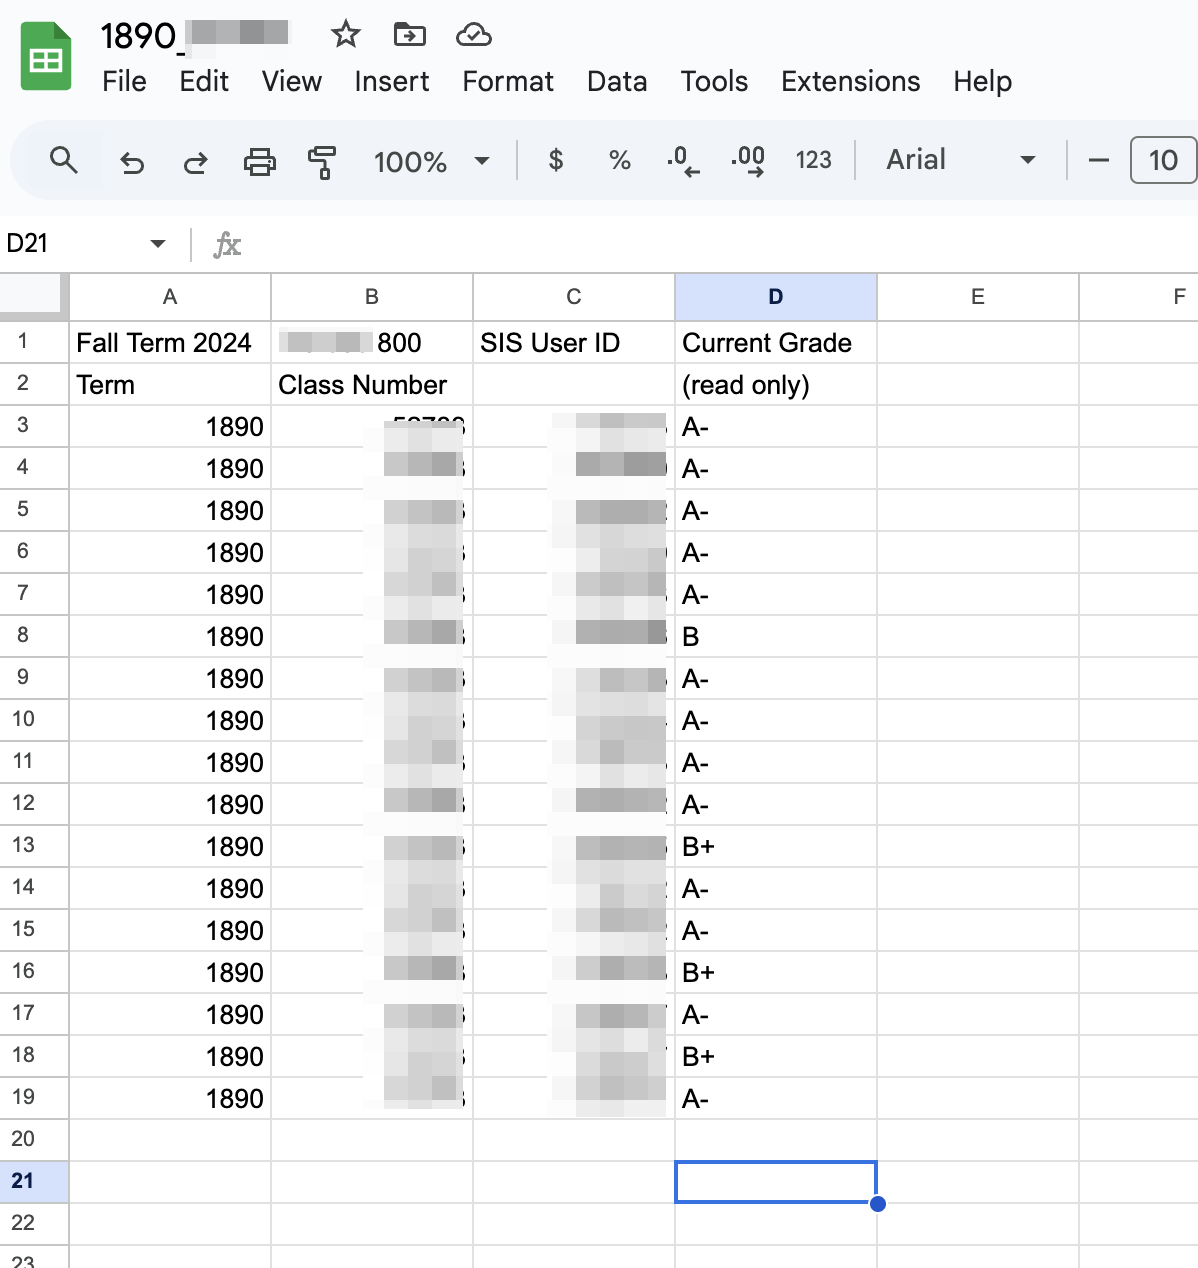
7. Place your cursor in the top row of Column C then paste the data copied from the Canvas csv spreadsheet. The resulting file should look like this with the number of students matching the rows in the Bear Tracks spreadsheet:
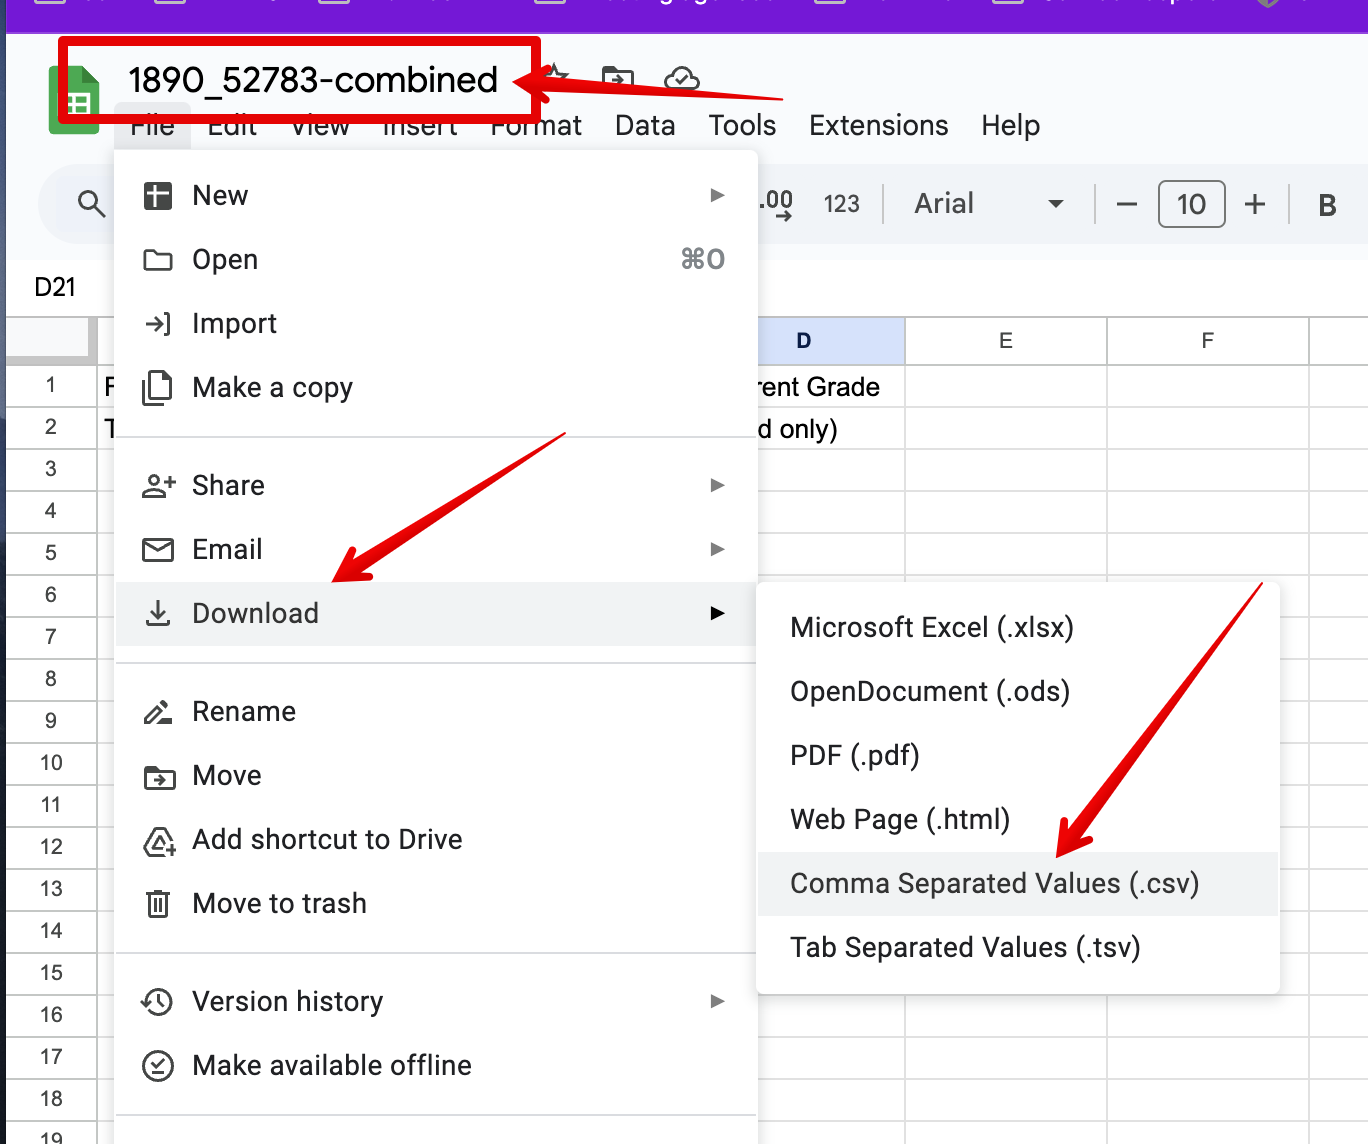
8. Rename the file to something identifiable and then select Download > Comma Separated Values (.csv) to export the file:
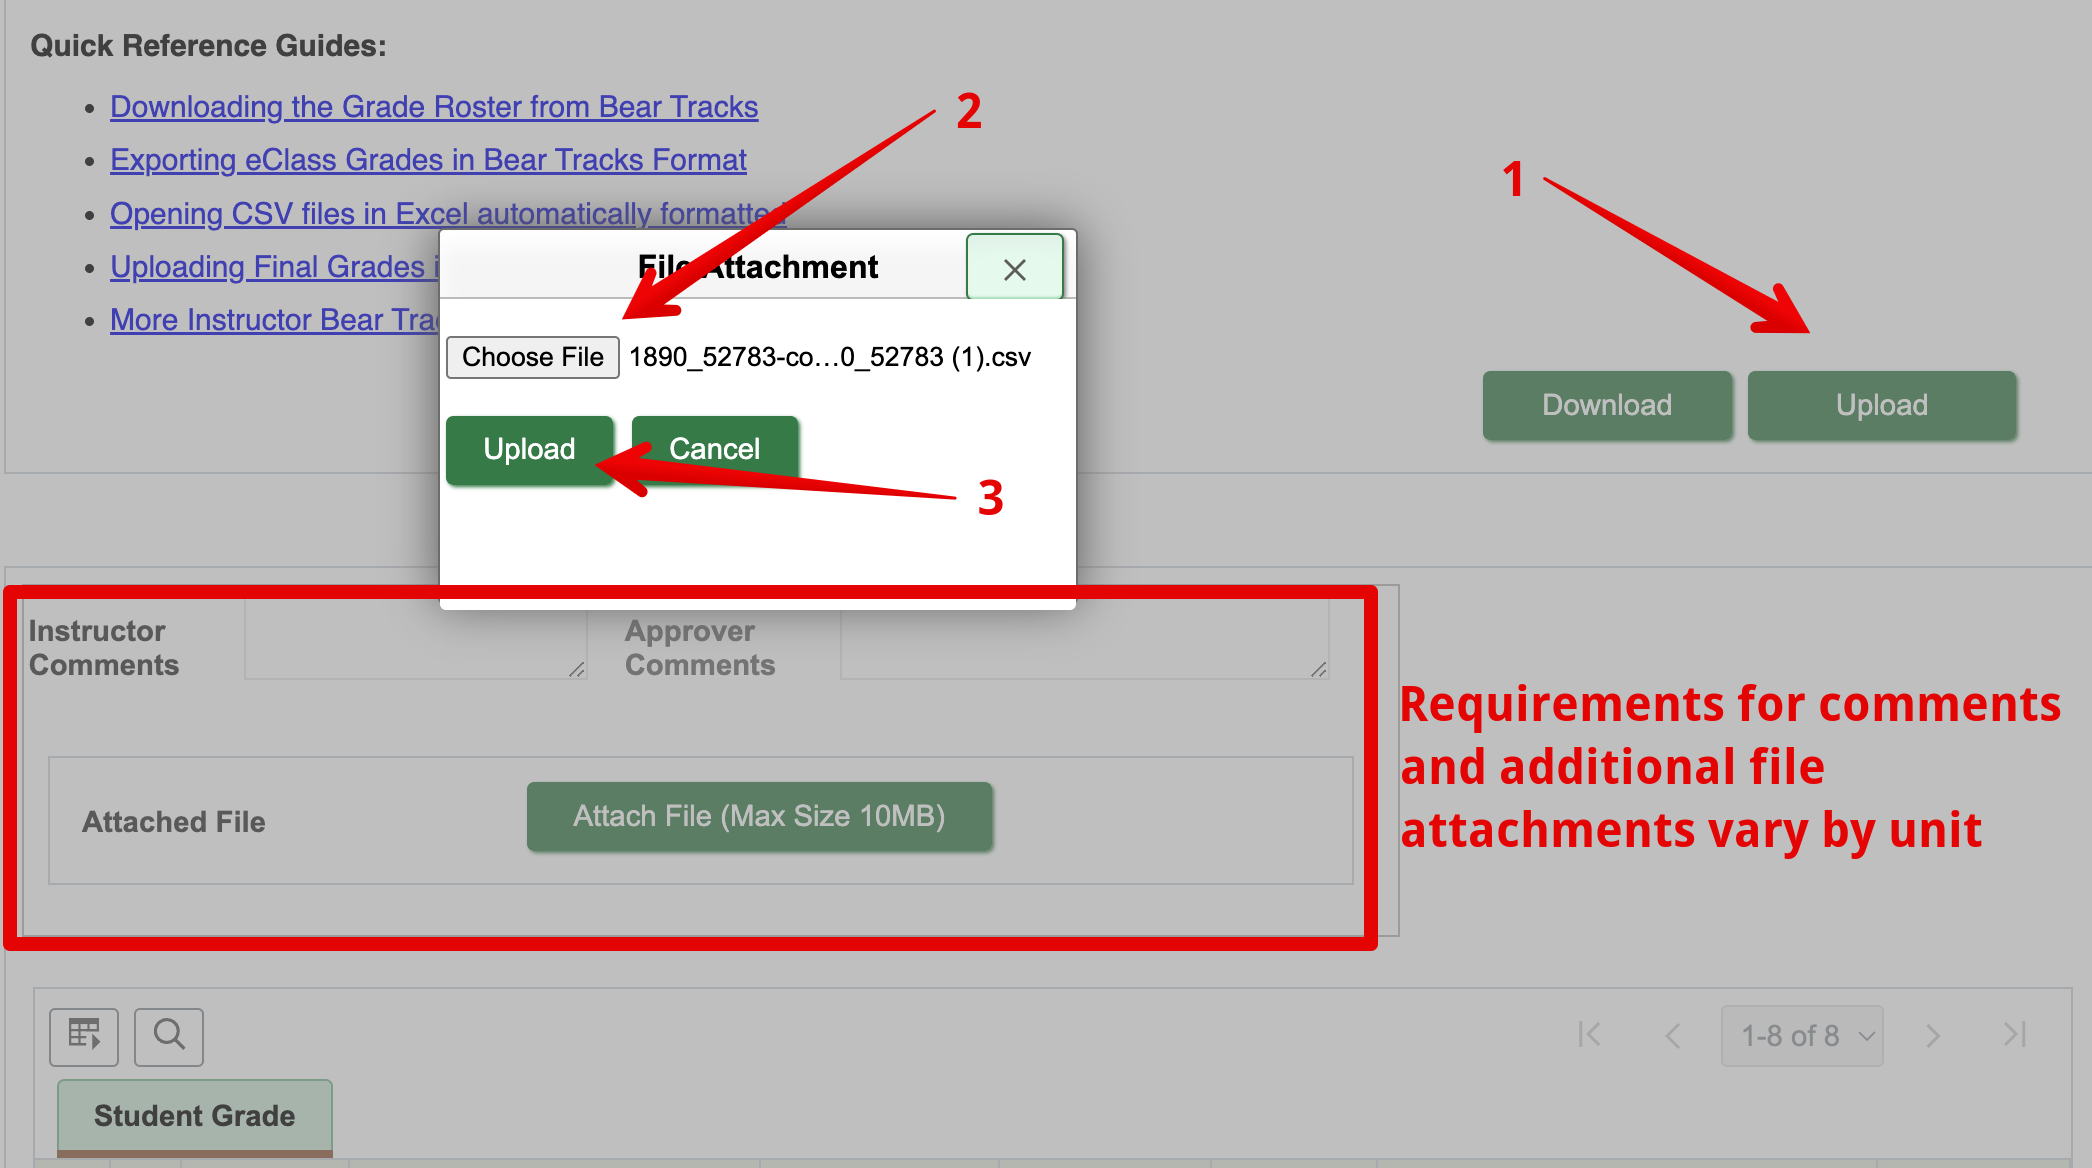
Uploading into Bear TracksTake note of where this file was saved because it now needs to be uploaded into Bear Tracks (for either the Bear Tracks Grade Export tool method or if manually combining spreadsheets): 1. Login into Bear Tracks and access the Instructor Centre. Access the class and section that you need to upload grades for, then click the Grade Roster icon to the left of its name (see screenshot above.) 2. Scroll down and click the Upload button to right of the Quick Reference Guides. Then click Choose File, select the file you have just created and downloaded from Google Drive, then click Upload:
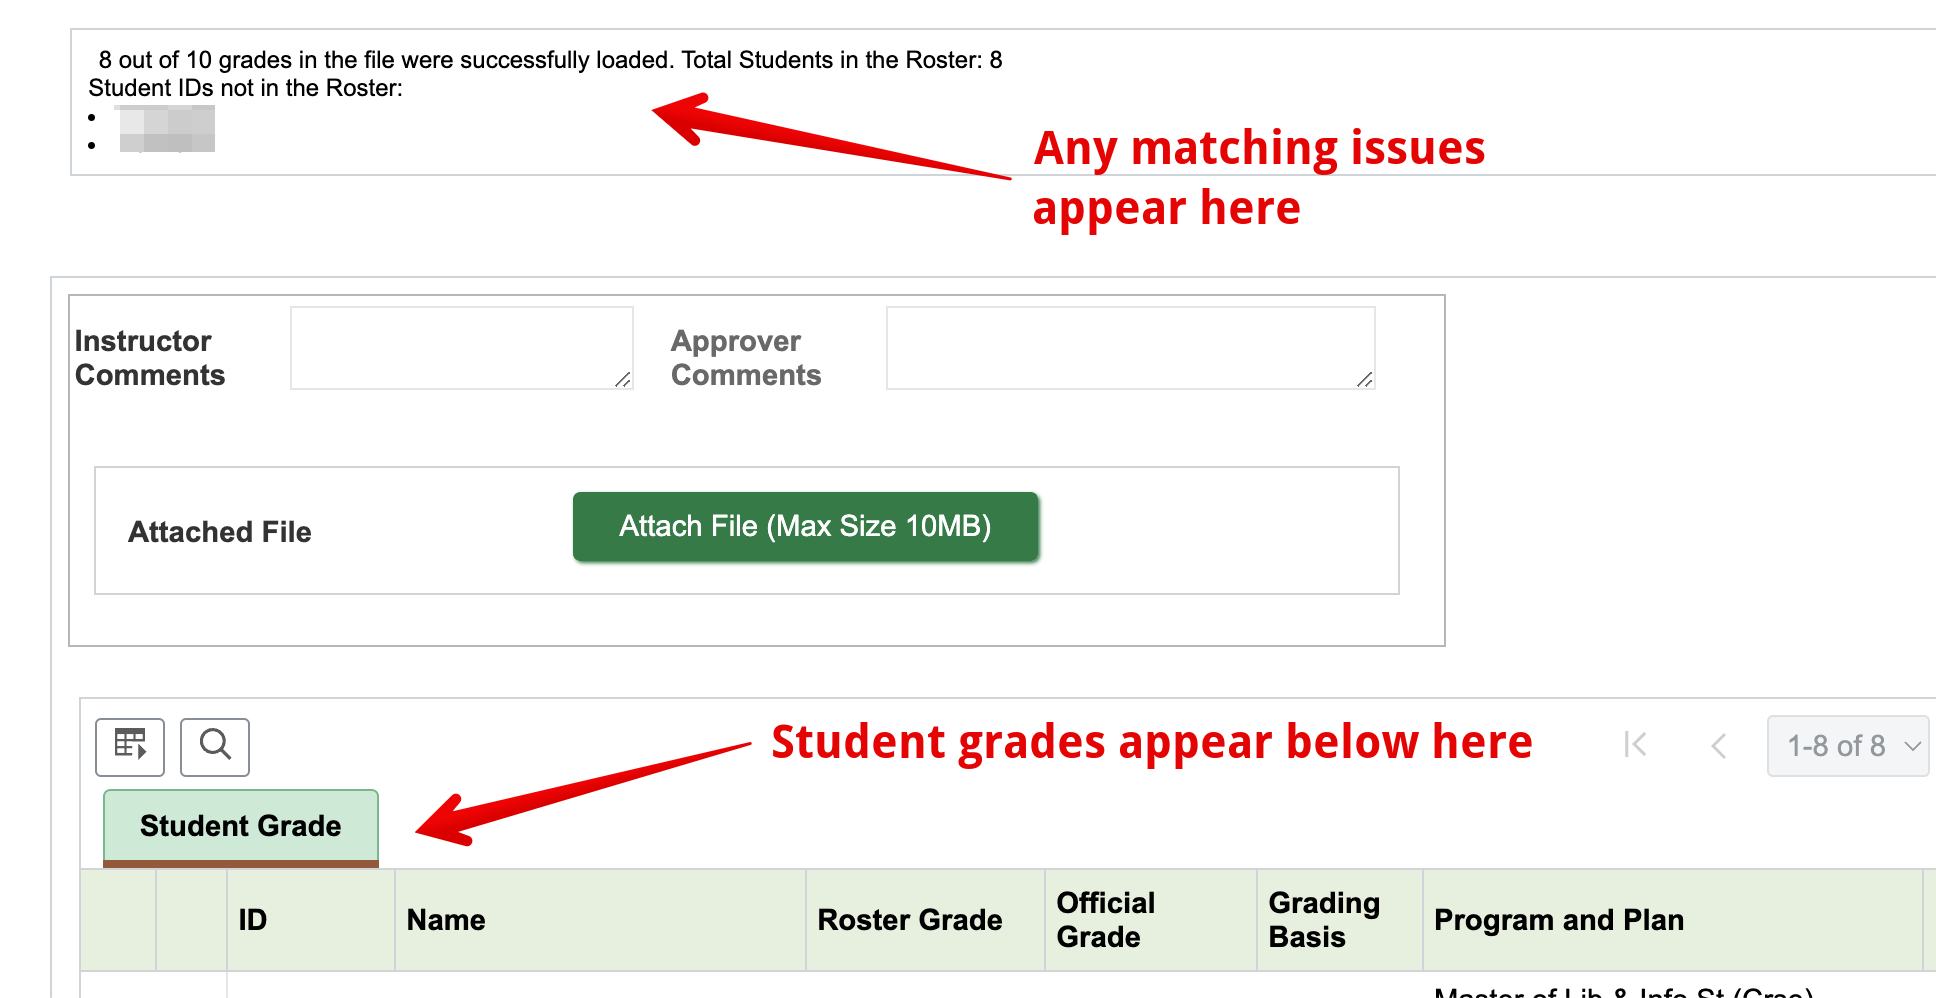
Note: Below the upload area is an additional box to enter comments and/or additional grade-related files. Instructors should consult their departments for any specific requirements they need to follow for those fields. 3. If there are any issues with student matching, they will be listed below the comments area. Uploaded grades will appear in the Roster Grade column of the Student Grade table:
Additional Notes
| |
|
|
Knowledgebase: Canvas > Canvas for Instructors

Comments (0)