|
Adding Folders
Last modified on 05 July 2023 02:12 PM
|
The folder resource enables a teacher to display a number of related files inside a single link, reducing scrolling on the course page. Any file uploaded to a folder resource can only be downloaded by students, not viewed online. A zipped folder may be uploaded and unzipped for display/download, or an empty folder can be created with files uploaded into it. Recall that PDF files are usually preferable to posting other file formats since browsers display PDF files in a consistent format.
Adding a folder
- Click on Edit mode at the top right of your course page.
- Choose a topic area where you wish to add content (the week, unit, etc…) and click on the Add an activity or resource button.
- Click on the Folder icon, and a settings page will open
General
- "Name" is required. Make this as meaningful as possible for your students.
- "Description" is optional. You may provide an explanation or instructions here for your students.
- "Display description on course page": Toggles whether or not the description of your folder will be displayed on the course page below the link to your folder.

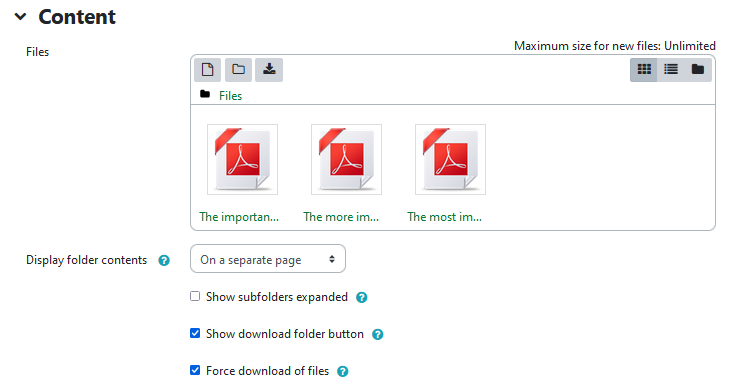
Content
- "Files": This is where you select the file(s) to add to your folder. Either click on the 'Add' link or drag-and-drop your folder or zipped file here. Note that you can embed folders for more complex structures.
- "Display folder contents": You may choose to display the folder contents:
- 'On a separate page'
- 'Inline on a course page': There will be no link to a separate page.
- "Show subfolders expanded": If enabled, subfolders are shown by default. Otherwise, they are shown collapsed.
- "Show download folder button": If enabled, a button will be displayed allowing the contents of the folder to be downloaded as a zip file.
- "Force download of files" is selected by default. Disabling this setting allows files to be displayed in the web browser rather than downloading/saving them.
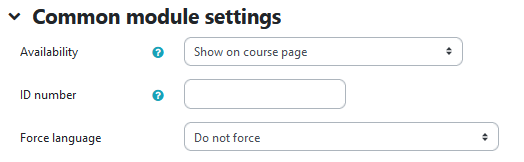
Common module settings
- "Availability": This setting has 3 options:
- 'Show on course page' - The activity is available to students (subject to any access restrictions which may be set).
- 'Hide from students' - The activity is only available to users with permission to view hidden activities (by default, users with the role of teacher or non-editing teacher).
- 'Make available but now shown on course page' - A link to the activity must be provided from elsewhere, such as from a page resource. The activity would still be listed in the gradebook and other reports.
- “ID number": An ID number identifies the activity for grade calculation purposes.
Restrict access
Activity completion
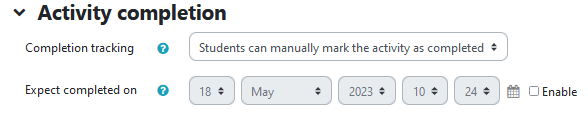
- Please note that you will not see the activity completion options until activity completion is enabled for your course. The steps to enable activity completion tracking can be found in our article on Completion Tracking.
- "Completion tracking": Activity completion is tracked, either manually or automatically, based on certain conditions. Multiple conditions may be set if desired. If so, the activity will only be considered complete when ALL conditions are met. A tick next to the activity name on the course page indicates when the activity is complete.
- "Require view":
- Student must view this activity to complete it: A tick will only appear once the student views the activity.
- Student must submit to this activity to complete it: A tick will only appear once there is a submission from the student.
- "Expect completed on": This setting specifies the date when the activity is expected to be completed. The date is not shown to students and is only displayed in the activity completion report.
Folder display:
Here is the folder display with an expanded file tree:

Tags
Notes
- Files within a folder can only be sorted alphabetically.
|
 (1 vote(s)) (1 vote(s)) Helpful Not helpful
|