|
Using the Completion Progress Block
Last modified on 04 July 2023 03:16 PM
|
|
|
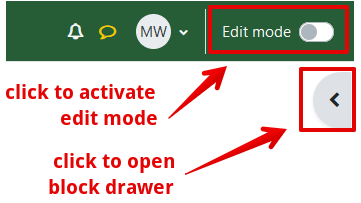
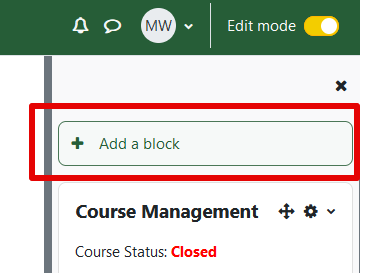
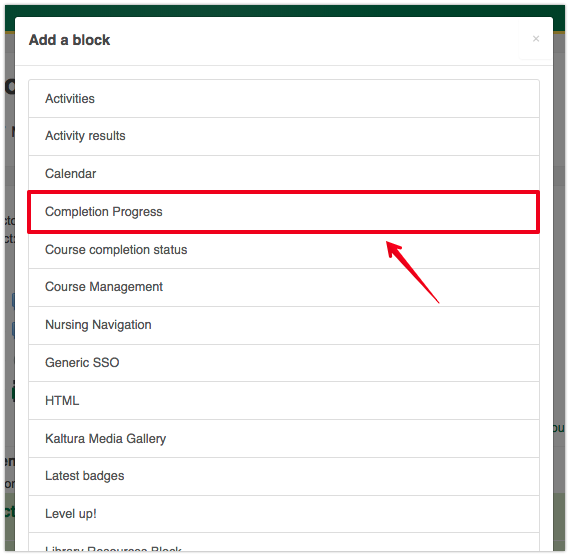
The Completion Progress block in eClass gives students a visual indication of their progress through a course. To display completion progress, completion tracking must be enabled in your course and set up for at least one activity or resource. For more details on completion tracking, please see our article on Completion Tracking. To add the Completion Progress block to your course:
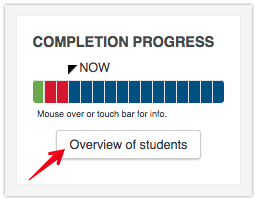
Each box represents an activity or resource in your course. When a user mouses-over each section of the bar, it provides the name, completion status, expected completion date, and a link to the corresponding activity. By default, items in the progress bar are ordered by expected completion date, unless a completion date is not set in which case they appear in the same order as they are listed within the course content. The NOW cursor indicates the current date relative to the expected completion dates of each activity.
The colors seen in the completion progress bar can be interpreted as follows: Blue - Not yet completed.
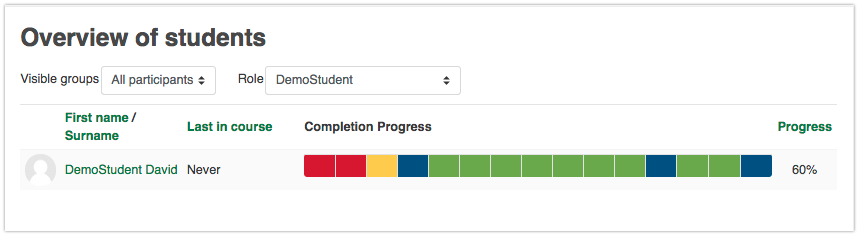
Overview of students Instructors can access an overview of student progress via the Overview of students button.
This view shows each student’s progress through the course as a completion bar and a percentage. Similar to the completion progress block, mousing-over a box will display which activity it corresponds to. This view also allows filtering by groups.
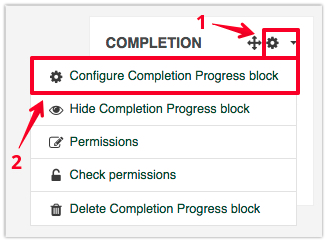
Settings The progress bar’s settings can be modified by selecting the gear icon under Completion Progress and then clicking Configure Completion Progress block.
Details on most of these settings can be found by selecting the corresponding
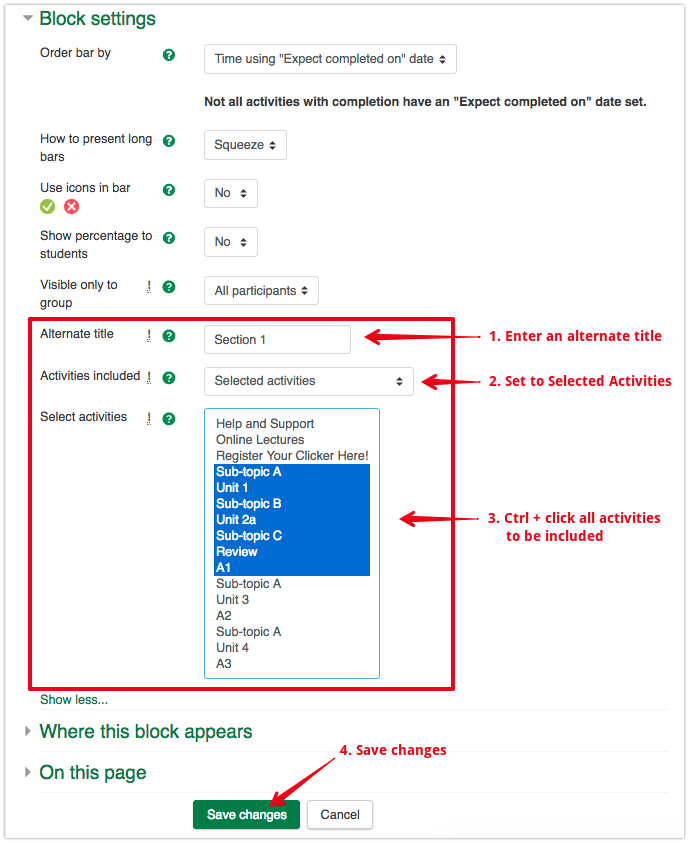
Using Multiple Completion Progress Blocks Multiple Completion Progress blocks can be added to a single course. This allows you to display a visual representation of student progress through different sets of criteria (ie. Assignment progress, progress through each week, progress through each topic etc) using different progress bars. To limit the activities included in a Completion Progress Block:
| |
|
|
Knowledgebase: eClass > eClass For Instructors > Constructing Courses > Gamification Elements for eClass Courses