|
The Lesson activity is a flexible way to add interactive content to your course. It allows for the range of content to be added with multiple pages of activities and quiz questions. The Lesson can be built with a navigation structure with options for adaptive branching based on question pages.
Adding a Lesson Activity
- Click on Edit mode, at the top right of your course page.
- Move to the topic area where you wish to add content (the week, unit, etc…), and click on the Add an activity or resource link.
- Click on the Lesson icon, and a settings page will open.
General
- 'Name' is required. Make this as meaningful as possible for your students.
- 'Description' - Optionally provides explanation and instructions for students.
- 'Display description on course page' - If selected, the description of your assignment will be displayed on the course page below the link to the assignment.

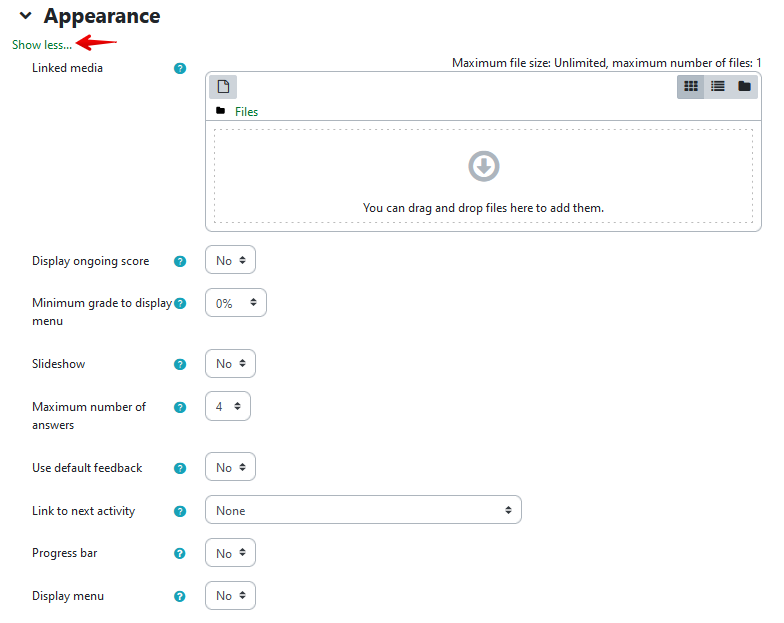
Appearance
- 'Linked media' - A media file may be uploaded here for use in the lesson. A 'Click here to view' link will then be displayed in a block called 'Linked media' on each page of the lesson.
- 'Display ongoing score' - Toggles whether or not each page will display the student's current points earned out of the total possible thus far.
- 'Minimum grade to display menu' - Determines whether a student must obtain a certain grade before viewing the lesson menu. This forces the student to go through the entire lesson on their first attempt, then after obtaining the required grade, they can use the menu for review.
- 'Slideshow' - Toggles whether the lesson is displayed as a slideshow, with a fixed width and height.
- 'Maximum number of answers' - Specifies the maximum number of answers that may be used in the lesson. If only true/false questions are used, it can be set to 2. This setting may be changed at any time since it only affects what the teacher sees, not the data.
- 'Use default feedback' - Toggles whether or not the default response 'That's the correct answer.' or 'That's the wrong answer.' will be shown when a response is not found for a particular question.
- 'Link to next activity' - Provides a link at the end of the lesson to another activity in the course if an activity is selected from the drop-down list.
- 'Progress bar' - Enables a progress bar at the bottom of lessons which will indicate percentage completion.
- 'Display menu' - Allows students to see a menu for navigating between pages in the lesson.
Availability
- 'Available from' and 'Deadline' - These settings allow instructors to specify a time frame in which the feedback tool is accessible. Leave the boxes unchecked if there are no time limitations.
- 'Time limit' - If enabled, a warning about the time limit is displayed at the beginning of the lesson and a countdown timer is displayed. Any answers given after the time has elapsed are not graded.
- 'Password protected lesson' - Toggles whether a password is required in order to access the lesson.
- 'Password' - You may enter a password to access the lesson here, provided that 'Password protected lesson' is enabled.
- 'Allow lesson to be attempted offline using the mobile app' - If enabled, a mobile app user can download the lesson and attempt it offline. All the possible answers and correct responses will be downloaded as well. Note: It is not possible for a lesson to be attempted offline if it has a time limit.

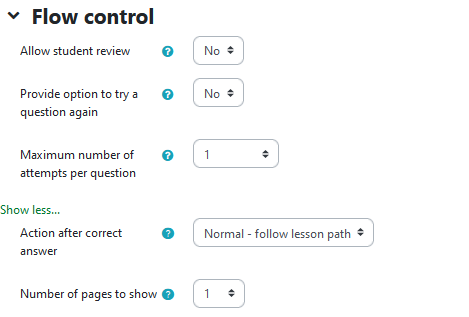
Flow control
- 'Allow student review' - Allows students to navigate again through the lesson from the start.
- 'Provide option to try a question again' - Lets a student try a question again without credit.
- 'Maximum number of attempts per question' - Specifies how many times a student can attempt each question.
- 'Action after correct answer' - There are three options for the pages after answering a question correctly:
- 'Normal' - Follow the lesson path.
- 'Show an unseen path' - Pages are shown in random order with no page shown twice.
- 'Show an unanswered page' - Pages are shown in a random order, with pages containing unanswered questions shown again.
- 'Number of pages to show' - Specifies the number of pages shown in a lesson. It is only applicable for lessons with pages shown in a random order. If set to zero, then all pages are shown.
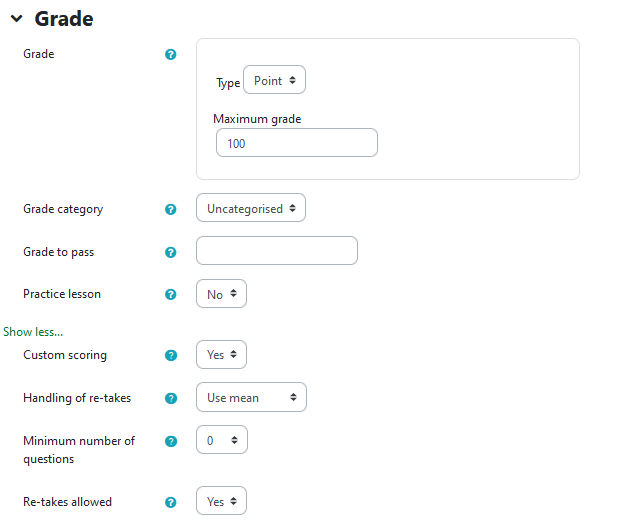
Grade
- 'Grade' - Allows you to select the type of grading used for the assignment. If “scale” is chosen, you can then choose the scale from the 'scale' dropdown. If 'point' is used, you can then enter the maximum grade for the assignment.
- 'Grade category' - Allows you to choose which category it will be assigned to in the gradebook.
- 'Grade to pass' - Determines the minimum required grade to pass. The value is used in activity or course completion, and in the gradebook, where pass grades are highlighted in green and fail grades in red.
- 'Practice Lesson' - Toggles whether or not the lesson appears in the gradebook.
- Click 'Show more' to see 'Custom scoring' - If enabled, then each answer may be given a numerical point value (positive or negative).
- 'Re-takes allowed' - If enabled, students can attempt the lesson more than once.
- 'Handling of re-takes' - If re-takes are allowed, this setting specifies whether the grade for the lesson is the mean or maximum of all attempts.
- 'Minimum number of questions' - Specifies the minimum number of questions that will be used to calculate a grade for the activity.
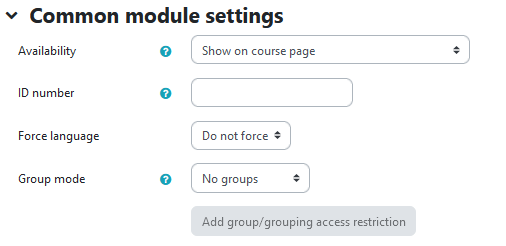
Common module settings
- 'Availability' - This setting has 3 options:
- 'Show on course page' - The activity is available to students (subject to any access restrictions which may be set).
- 'Hide from students' - The activity is only available to users with permission to view hidden activities (by default, users with the role of teacher or non-editing teacher).
- 'Make available but now shown on course page' - A link to the activity must be provided from elsewhere, such as from a page resource. The activity would still be listed in the gradebook and other reports.
- “ID number' - An ID number identifies the activity for grade calculation purposes.
- 'Group mode' - The group mode defined at the course level is the default mode for all activities within the course. Each activity that supports groups can also define its own group mode, though if the group mode is forced at the course level, the group mode setting for each activity is ignored. This setting has 3 options:
- No groups - Students are not segregated into groups.
- Separate groups - Only group members can see their own group while other groups remain invisible.
- Visible groups - Group members can see other groups but still work in their own group.
- 'Grouping' - A grouping is a collection of groups within a course. If a grouping is selected, students assigned to groups within the grouping will be able to work together.
- “Add group/grouping access restriction” - Allows access only to students who belong to a specified group, or all groups.
Restrict access
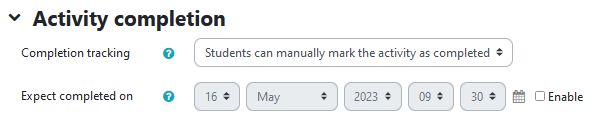
Activity completion
Tags
Basic Lesson Setup
Now that the lesson activity has been created, navigating to your lesson will show the following screen:

There are three types of content you can add:
- Content page: Pages which can be filled with text, images, and videos. Commonly used for notes.
- Cluster: A grouping of questions which can be randomly cycled through.
- Question page: A question which can be administered to students. These items allow for grading.
In this example, the lesson will be used to make a simple set of interactive lecture notes for an online course on art. Students will need to answer a comprehension verification question about each slide before they can proceed.
- First, add a content page.

The first content page will cover Lesson 1. Here you can enter a title, as well as the contents of the page.
Content 1 through Content 4 are used to set up links to other pages. Typically only one link is needed, so for this example, Content 1 will be used to link to our first Quiz. The description will be Quiz and the Jump link will be Next Page.
- When saving, you will be brought to the following page. Click on the dropdown menu shown above and select Question.

- On the next page, there will be a dropdown menu to select the question type. There are six types of questions available in lessons:
- Essay
- Matching
- Multichoice
- Numerical
- Short Answer
- True/false
For this example, the Multichoice question type will be used:

- Next, fill in the name of the question, as well as the question description:

- There will be four answer sections which allow you to enter an answer, as well as a response. In this example the incorrect answer has been placed in position 3 with incorrect answers in the other three slots.:

Notice that there is a Jump option for both for each answer. This allows you to have the lesson respond differently based on the student’s responses. For this example, Answer 3 will jump to “Next Page” and all other answers will jump to “This Question”, returning students to the question in case they answered the question incorrectly.
- Once completed, there should be two items in the lesson:

From this point, you can add additional content pages and questions that branch out using different Jumps as shown here. For example, the next content page might focus on colour contrast and shading with another quiz page for verification. If you need more content to cover a particular topic, you can link several pages with jumps and then have a quiz page every few slides or so.
This lesson setup is a basic example and does not cover all possibilities. If you require assistance with more complex use cases or with clusters, please do not hesitate to contact the eClass support team by email at eclass@ualberta.ca or by phone at 780-492-9372.
|