|
Marking Student Submissions in Assign2
Last modified on 12 September 2023 09:05 PM
|
||||
|
This article describes how instructors can use the marking interface in Assign2 Online Assessments. See Creating Online Assignments Using Assign2 or Creating Paper-based PDF Exams Using Assign2 for setting up either type of assessment. The grading features are common to both types. Contents:
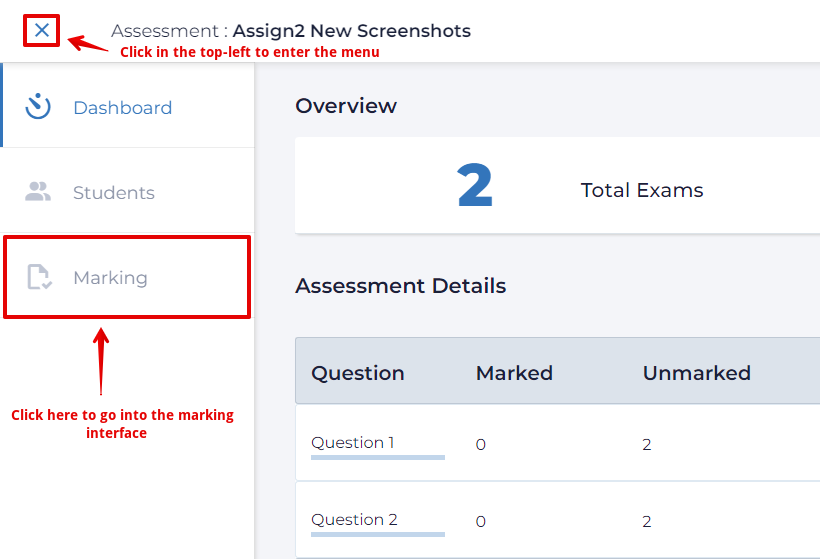
Once students have completed assignments, work can be graded by clicking the Marking option from the navigation dropdown at top left.
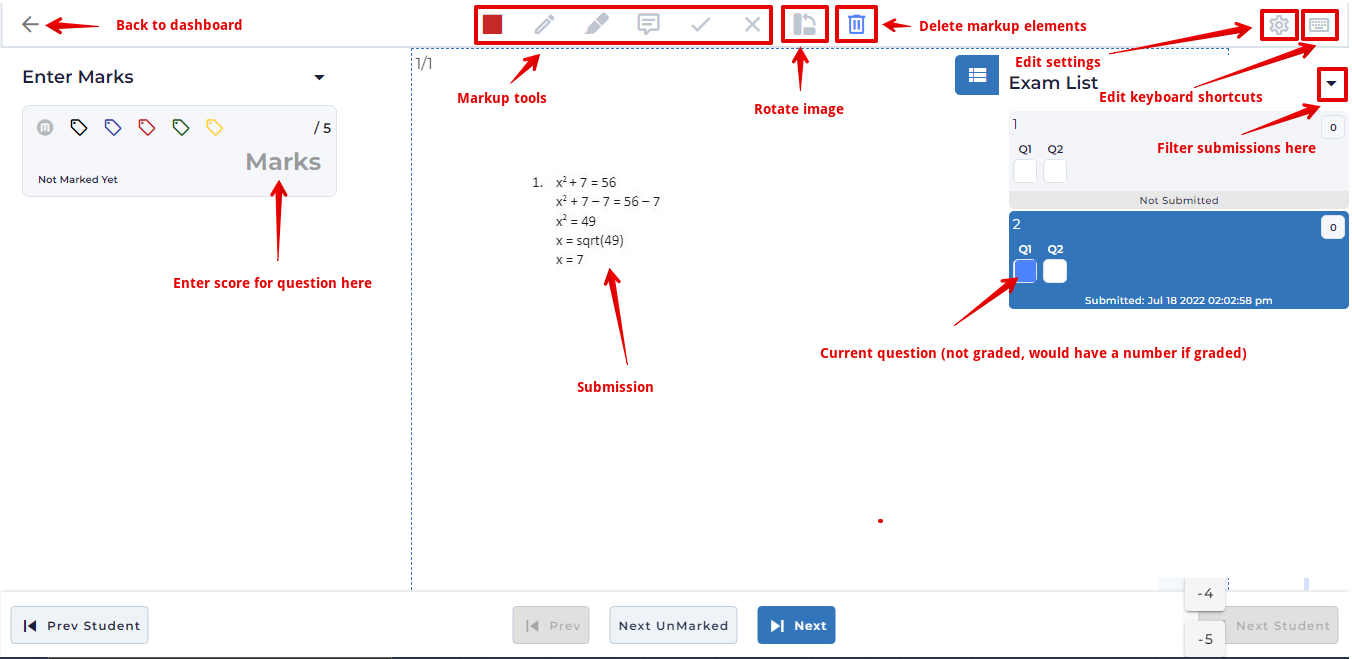
The grading interface allows multiple graders to score and markup either specific questions across all student submissions or entire student assignments at a time. Grades are entered at the top left:
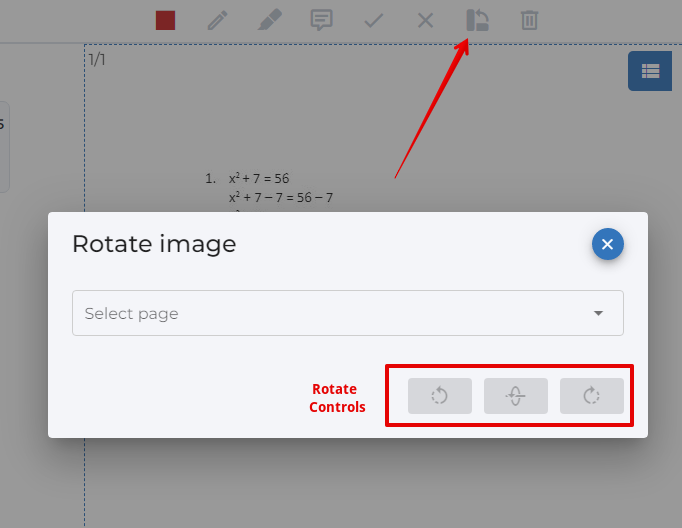
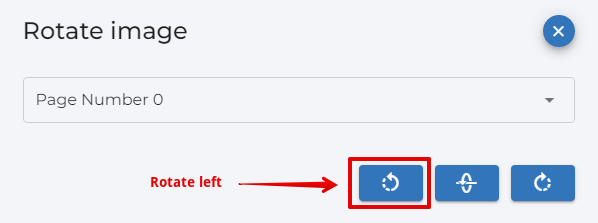
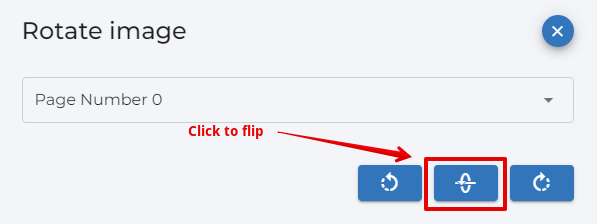
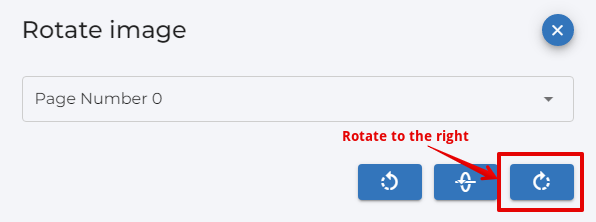
New in September 2020: Instructors can rotate any student submissions that have been uploaded in the wrong orientation:
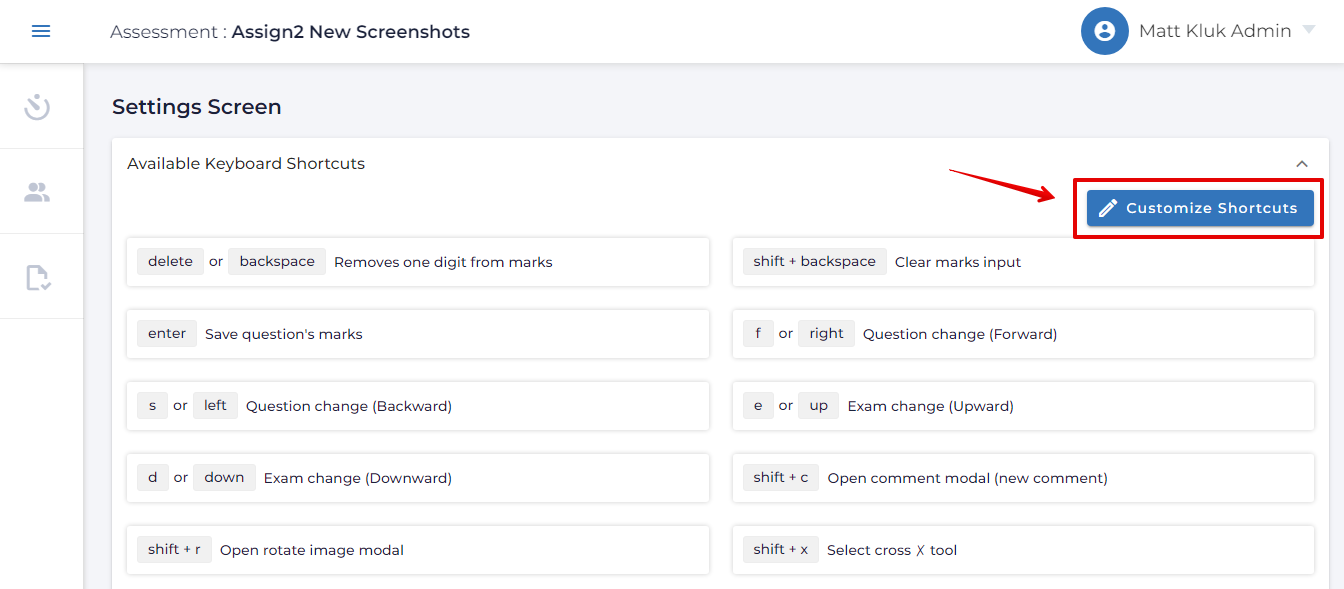
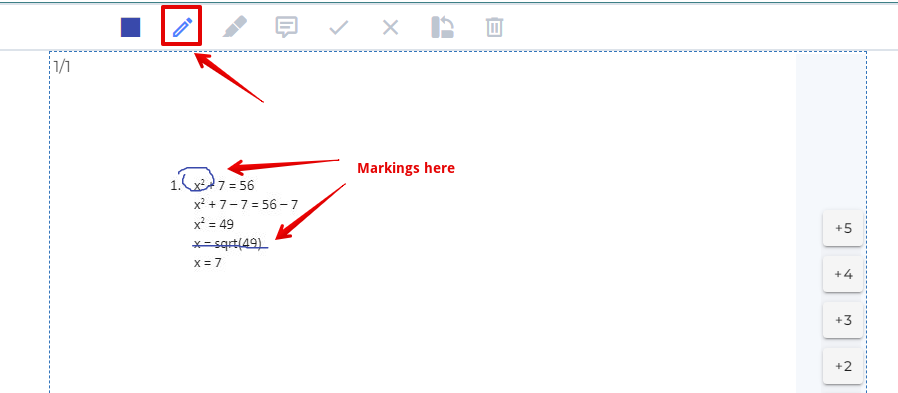
The markup tools allow graders to annotate directly onto students’ submissions. These tools available include the options to draw lines, highlight areas, and add correct or incorrect flags to students’ submissions. It is also possible to add reusable comments with the option of designated scores that can be shared across graders. New in September 2020: The following new keyboard shortcuts have been added to streamline marking tasks using the toolbar:
The keyboard shortcuts can be customized to suit individual marker's needs using the keyboard icon in the top-right, then selecting Customize Shortcuts:
Specific features of the overlay toolbar are:
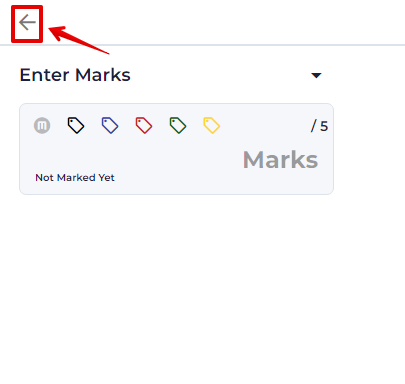
Graders can navigate to the Dashboard page using the back arrow button.
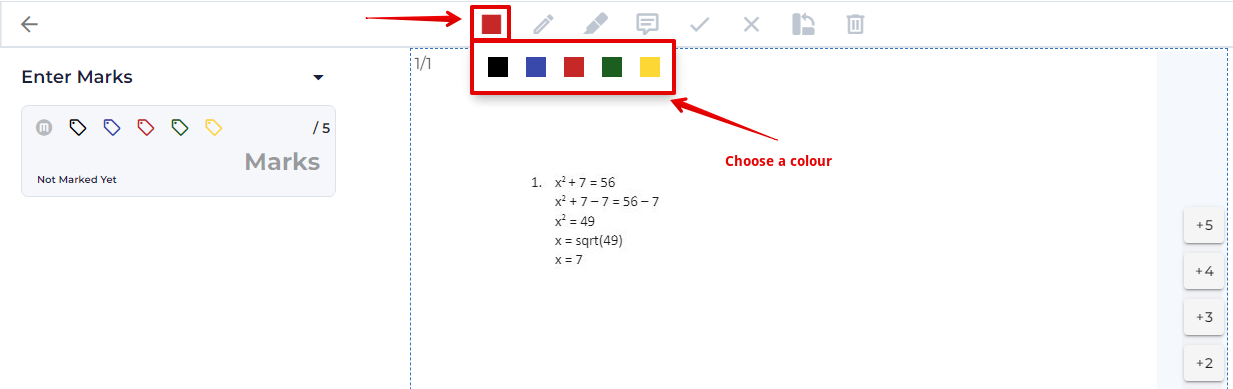
Graders can change the color of the pencil and brush (highlighter) tools by selecting from the color picker.
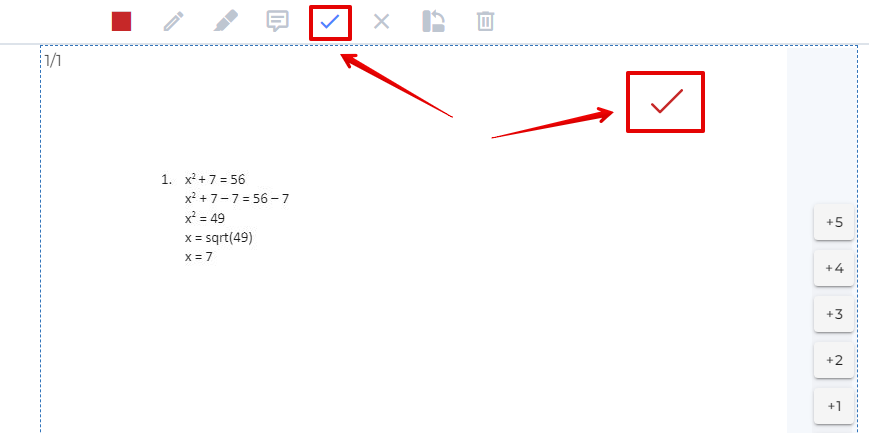
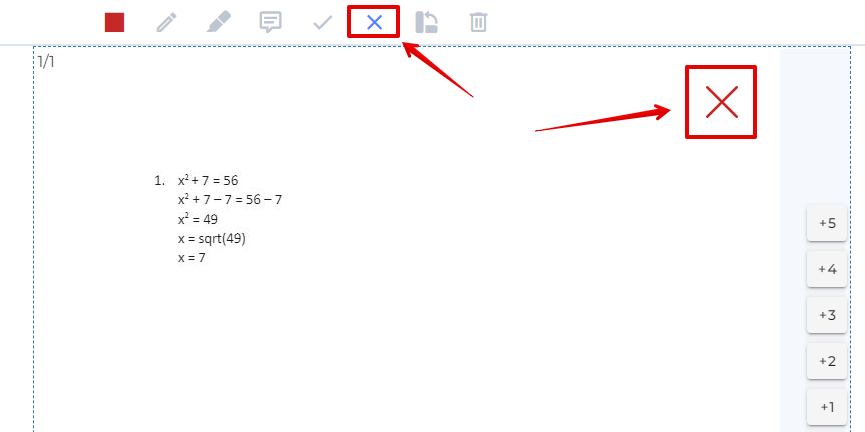
Graders can mark the submissions by placing a checkmark to denote a correct answer or a cross symbol for the wrong answer.
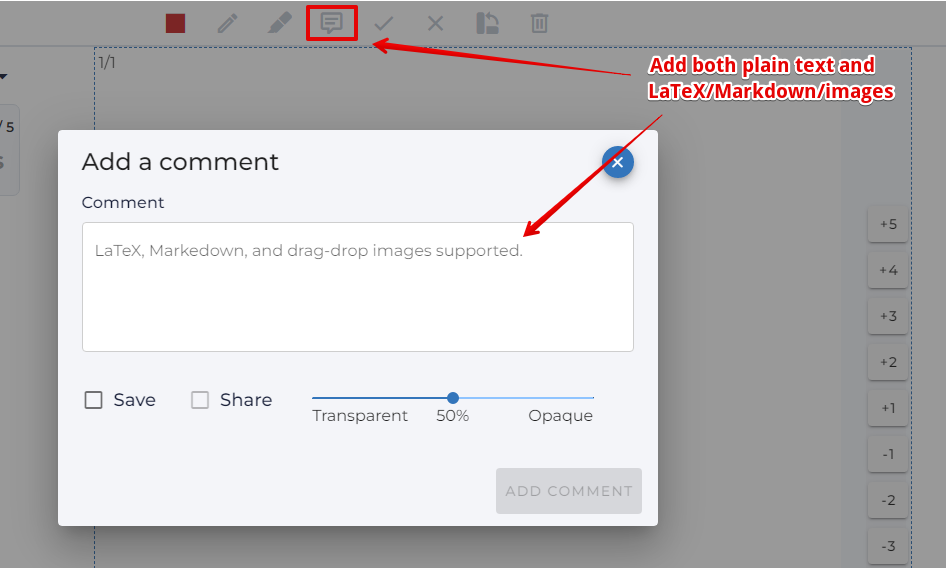
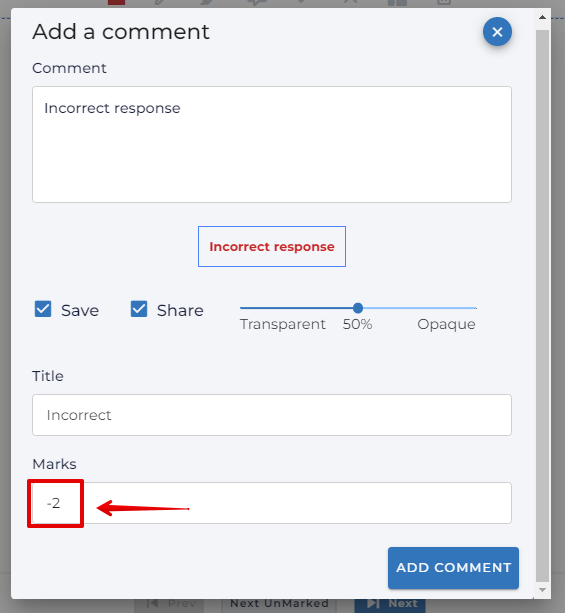
Adding Comments allows instructors to re-use common assignment feedback items and scores on common questions across student submissions. New in April 2021, both text and TeX formatted comments are added through the same icon:
By checking Save, graders can reuse comments. Checking Share will allow any other other graders in the assignment to also reuse the comment for this question. Giving the comment a meaningful title is important for ease of re-use and by entering a score in the Marks field, it is possible to automatically add that score to a question when the comment gets re-used.
New in April 2021, comments can have negative scores added.
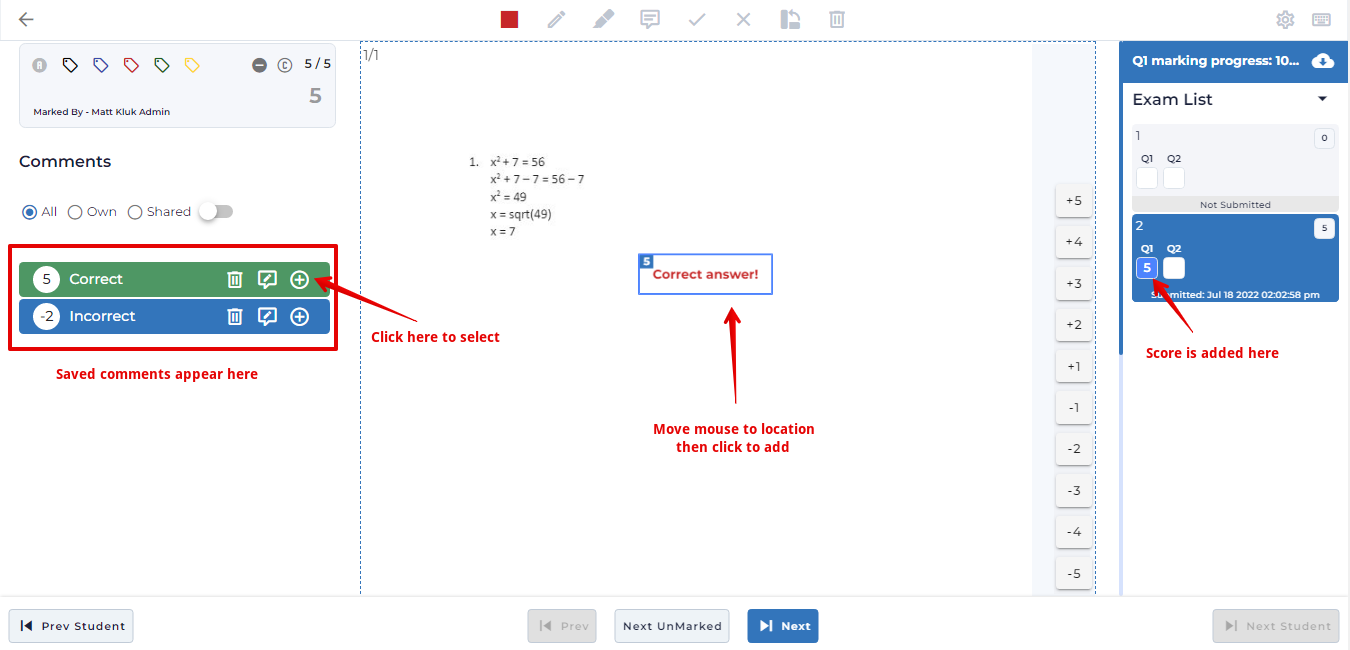
Saved comments are added below the scoring field on the left side. To add a comment (and associated grade), click the + icon, position the mouse cursor (which switches into a comment icon) over the submission in the desired spot, the click again to enter it.
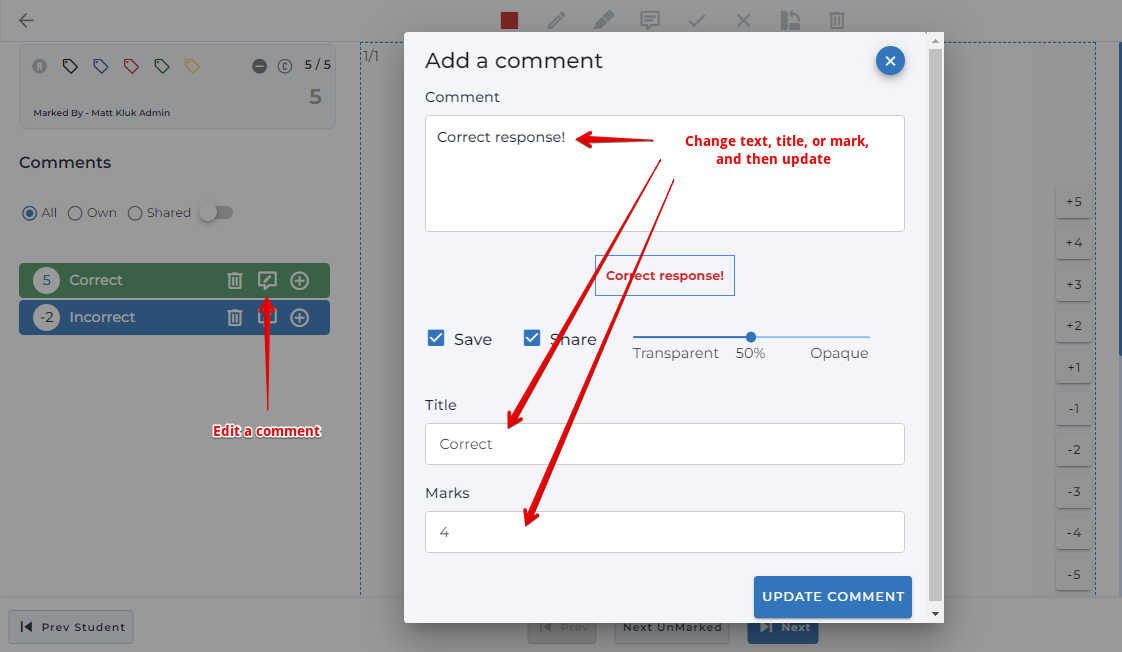
New in April 2021, the text or score on a comment can be edited after creation by clicking the edit icon beside the comment name. Comments can also be deleted. Note: editing the score of a comment after it has already been used to score assessments will update all grades already entered (though it may be necessary to refresh your screen to see these change.)
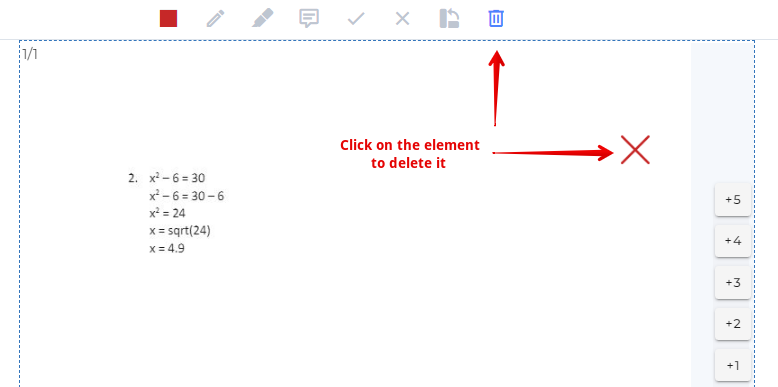
Graders can remove markings, symbols and comments by selecting the item to delete then clicking on the delete icon.
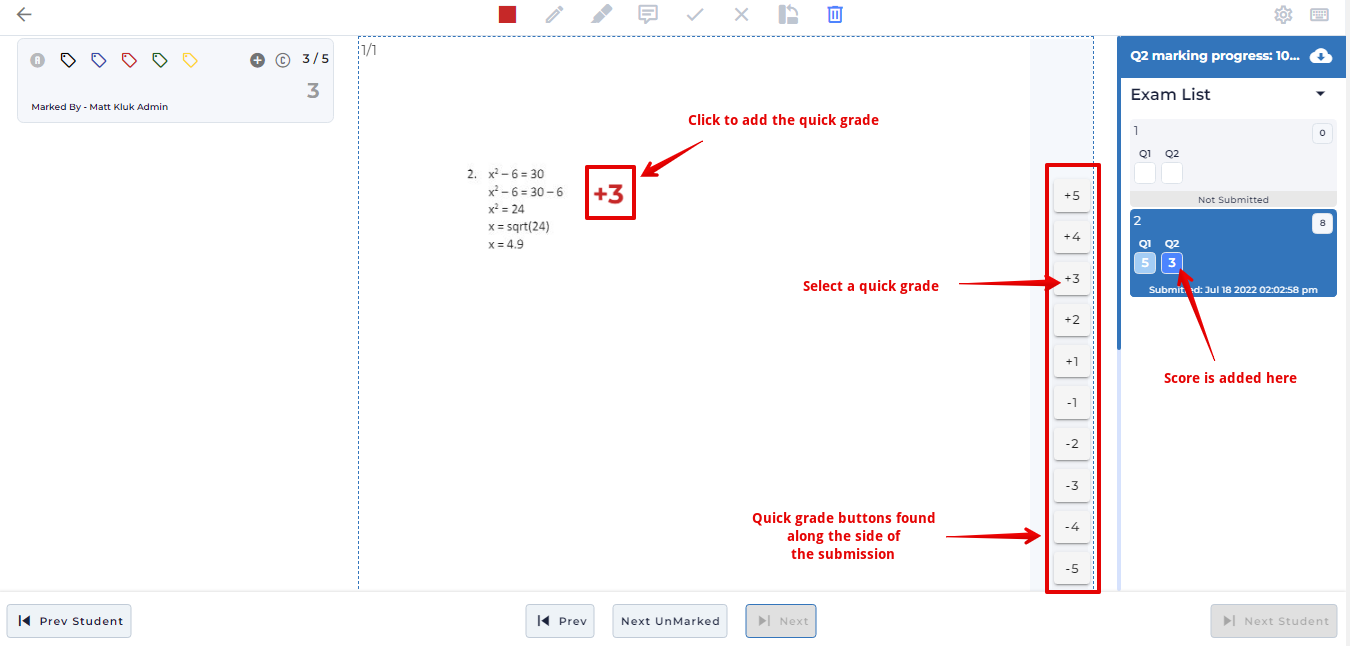
The quick grading buttons appear to the right of the student's submission. These are similar to comments, where you choose one of the buttons that has a positive or negative score, click somewhere to add it, and it will show the grade (for example, +3 or -2) and add that to the student's grade.
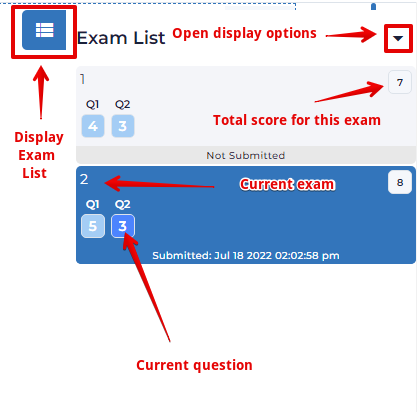
The right hand column lists all the submissions for an assessment.
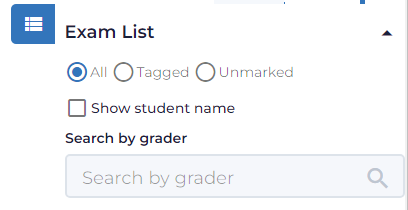
The exams can be sorted using the filters:
Note: Marking is always blind unless Show student name is selected. | ||||
|
|
||||
Knowledgebase: Online Assessment


Comments (0)