|
Proctoring and Reviewing SEM Exam Attempts
Last modified on 10 January 2025 10:28 AM
|
|
|
This article outlines how instructors can use the Smart Exam Monitor (SEM) tool to monitor and review student exam attempts. This requires that SEM sessions have already been set up in a course following the instructions in Smart Exam Monitor for Instructors. Contents:
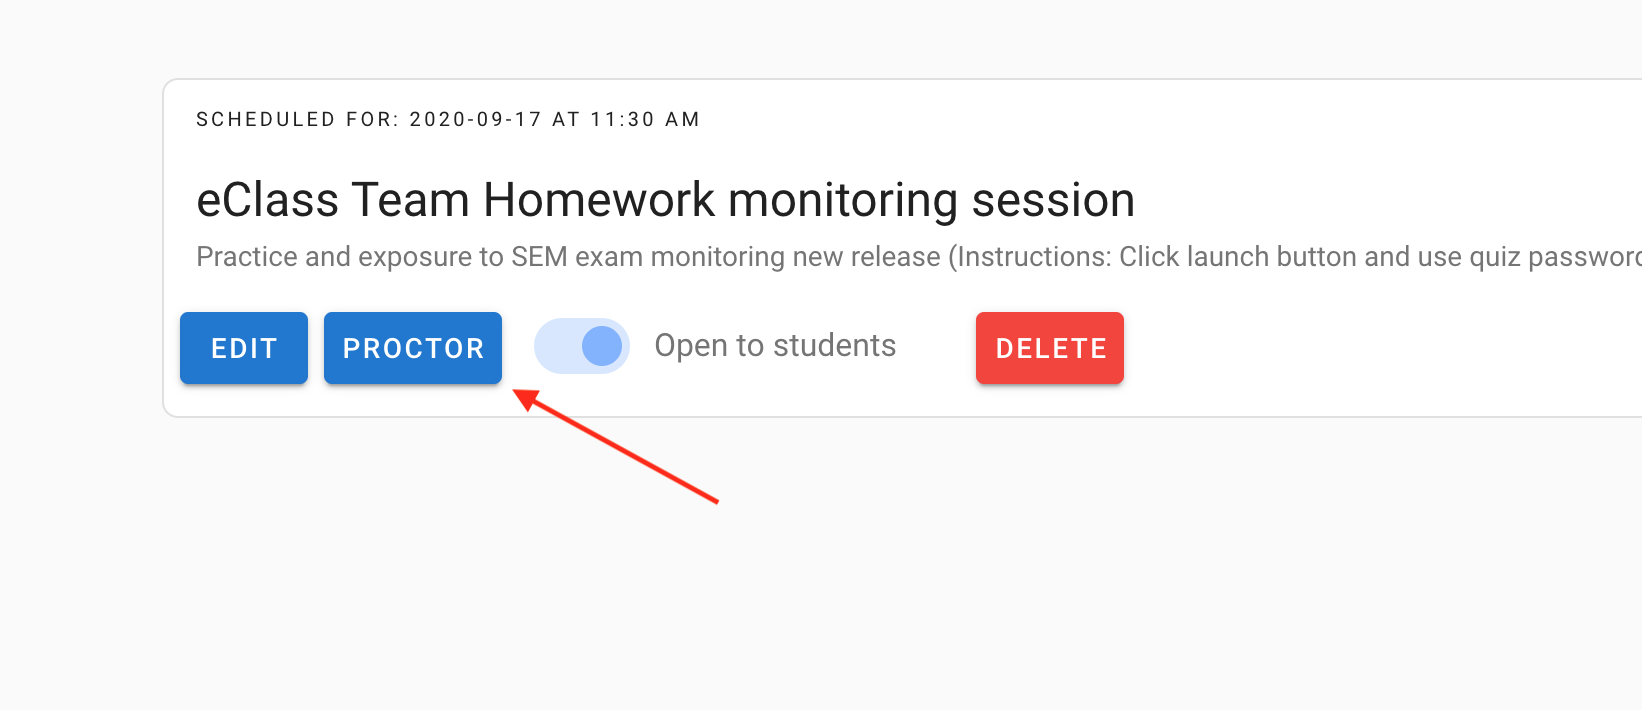
The proctor view can be accessed by any instructor or TA in the eClass course by accessing the SEM tool and session that has been created:
For instructors using SME Version 2, they will see a slightly different interface within the tool and can click the eyeball icon in the actions column to the right of a session to launch the monitoring:
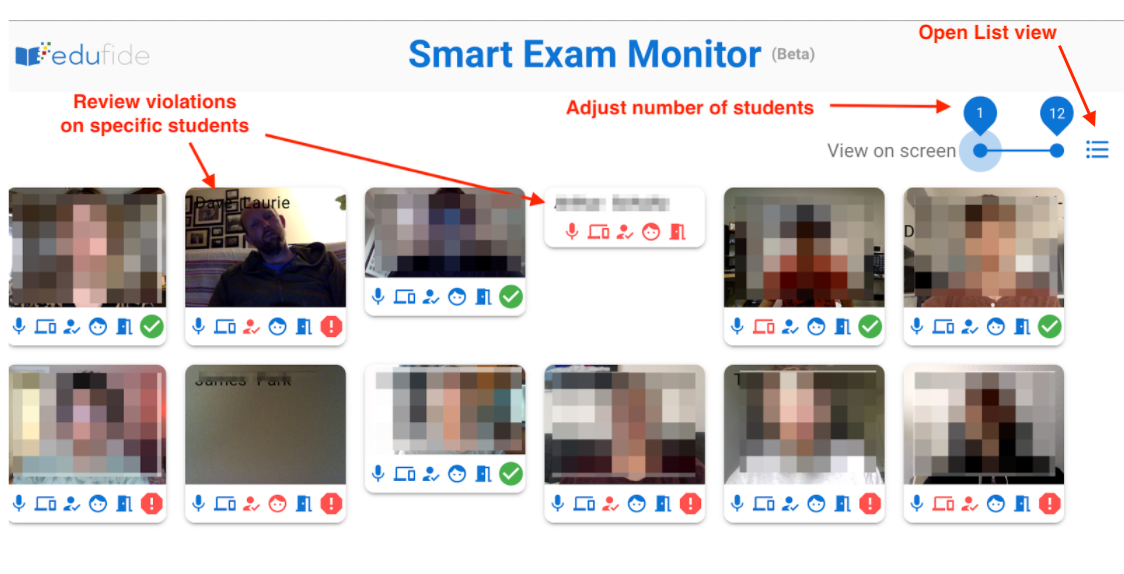
After that, instructors can use the instructions to Monitor and Exam Session. Once in the proctor view, every student who launched the monitoring for that particular session will be available for review. A green check mark at the bottom right of a tile indicated that a student has not been flagged; the red stop sign indicates that there are flagged violations for the student. Please note that when proctoring live exams, this page is updated frequently and can only be reliably used if the number of students is 20 or less. For larger classes, the number sliders at the top right allow different proctors to monitor different cohorts of students.
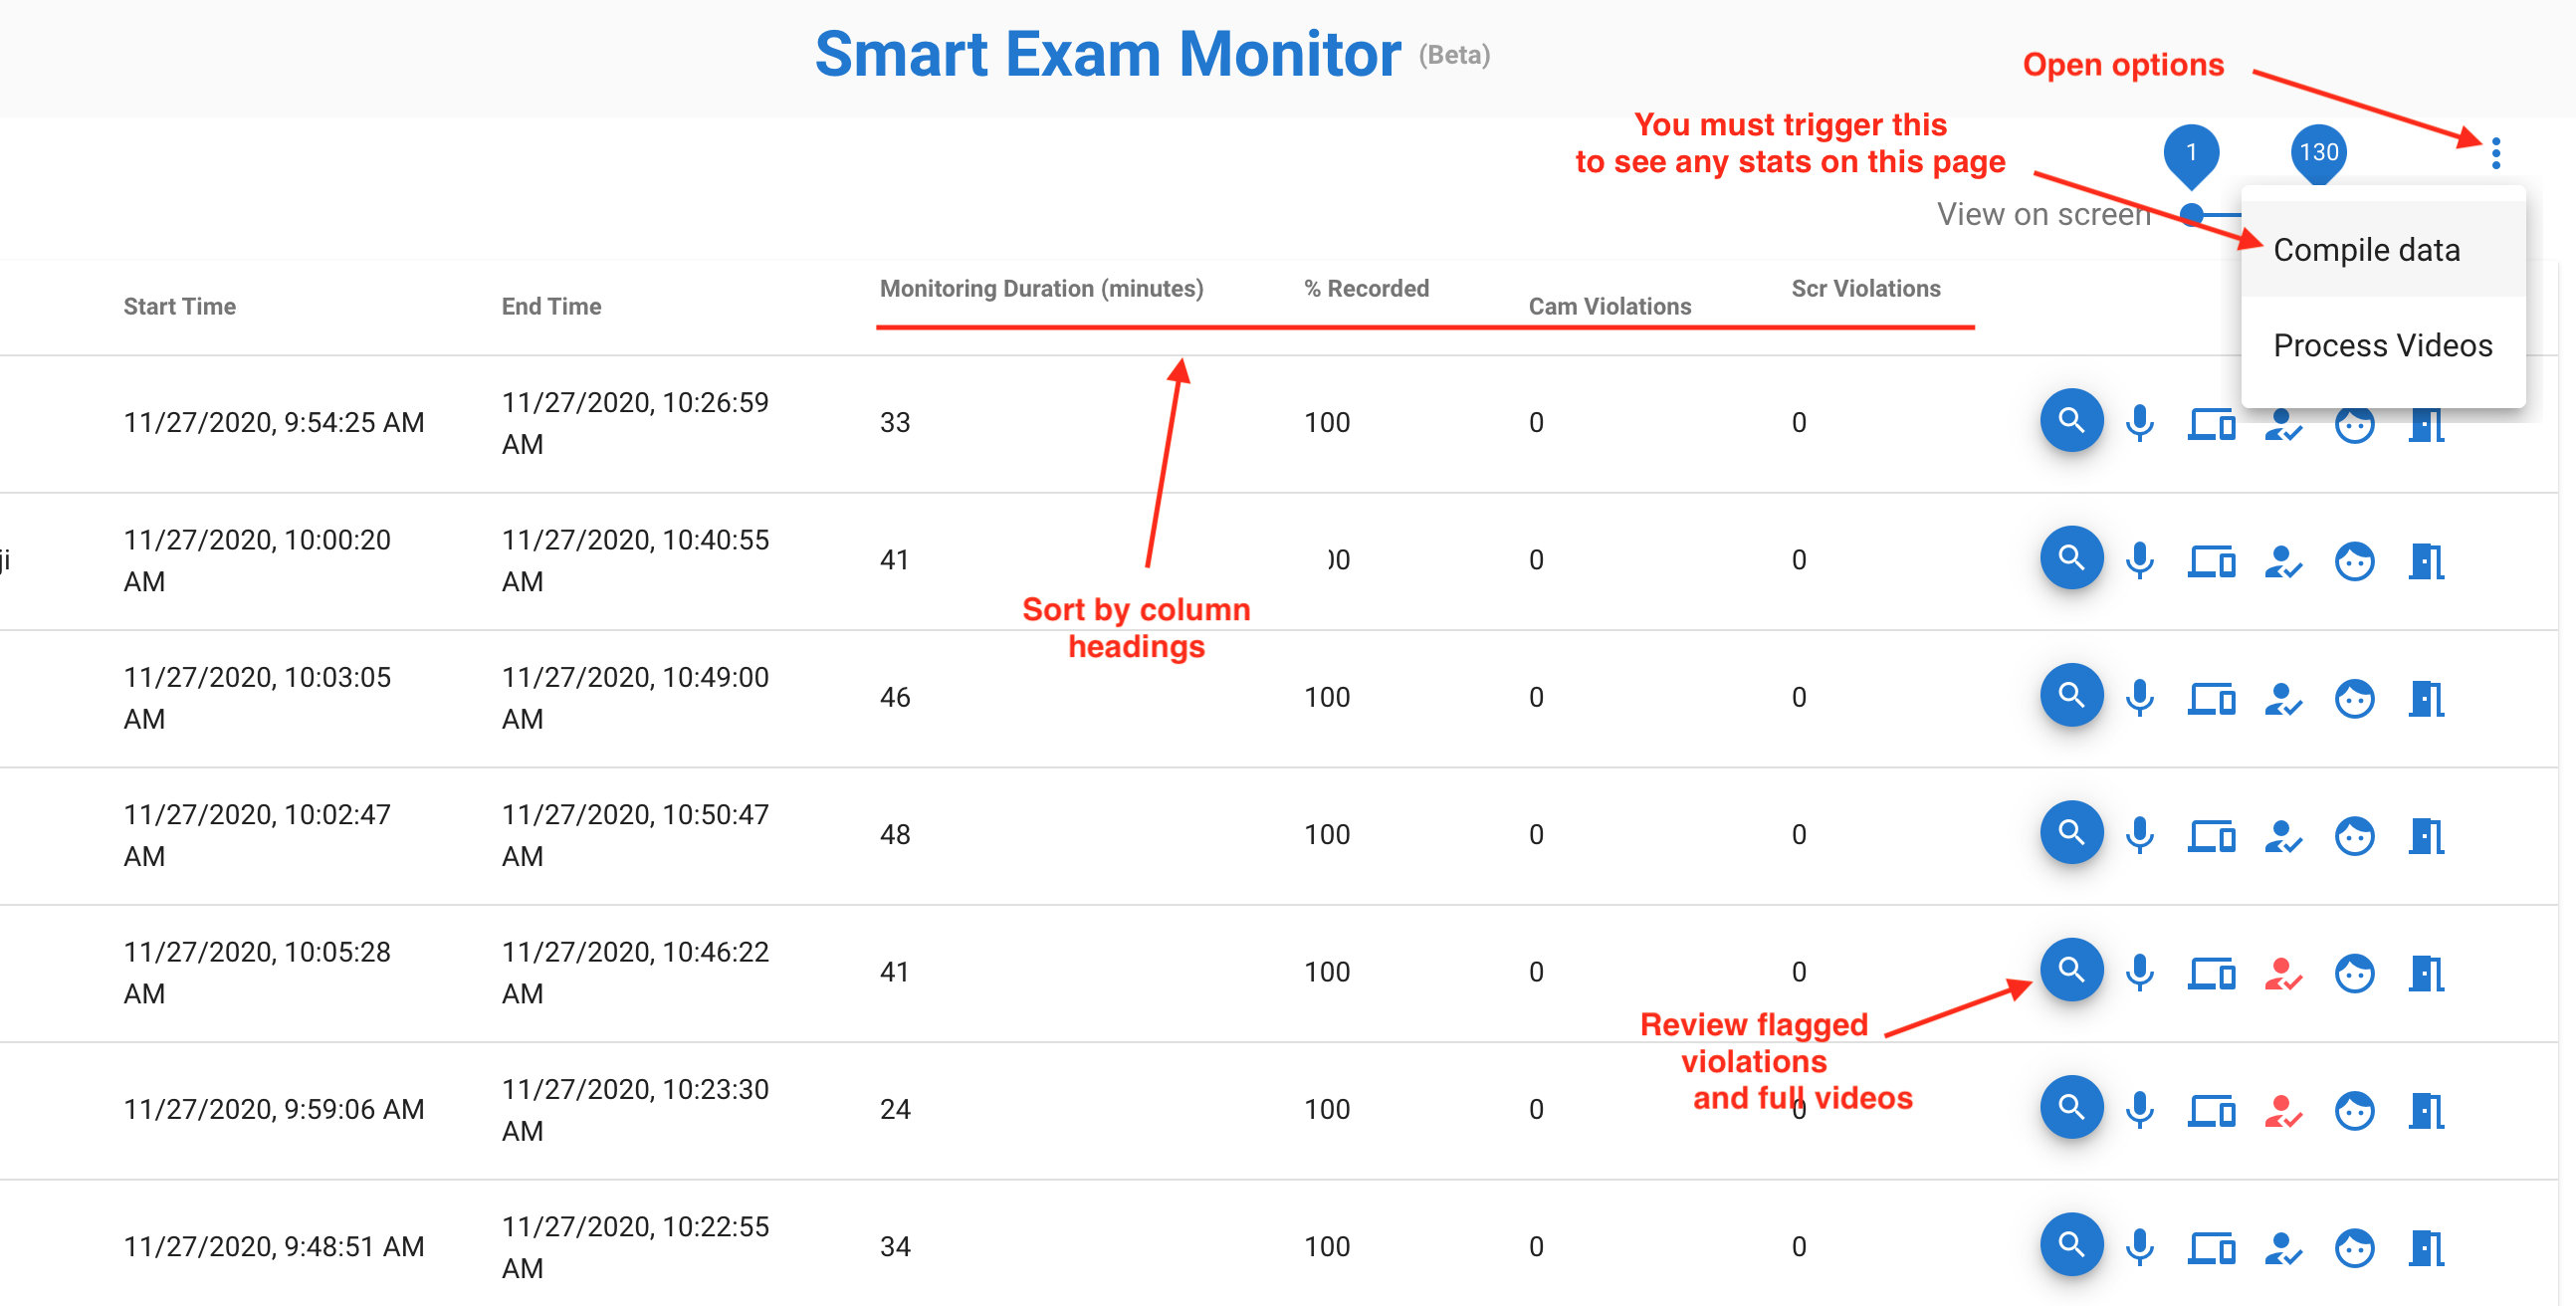
Instructors can use the list view of the proctor page to review summary statistics for their exams and more easily review potential issues. The List view is launched by clicking the list icon near the top right in the image above. Before reviewing any of the data on the page, the statistics must be compiled by clicking the 3 dot icon at the top right and clicking Compile data. Note that this process may take a few minutes (or longer for large classes) to run. Instructors can refresh the page to show the completed stats.
The list view contains the following columns of information about each attempt:
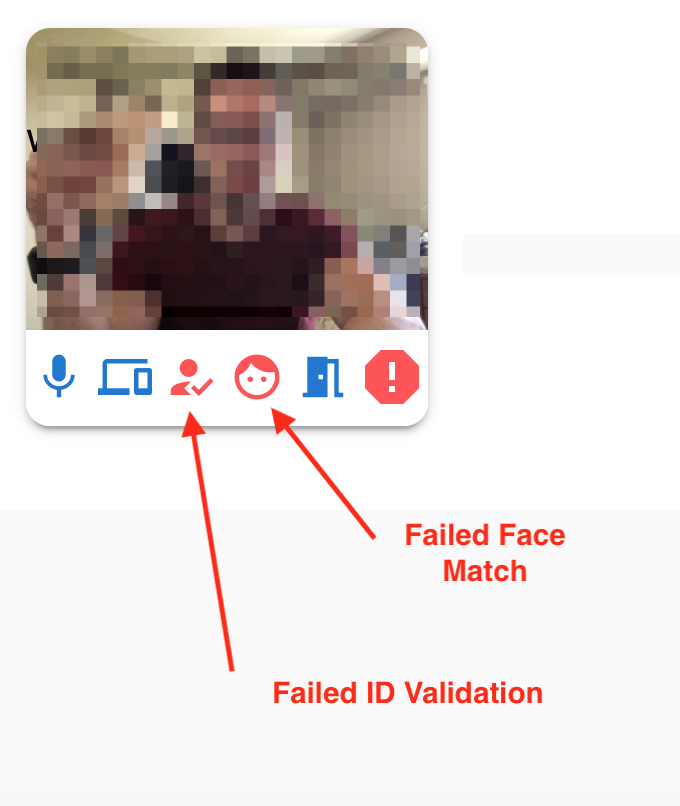
Instructors can sort by the column headers to view cases with low recording percentages (which might indicate a student has turned off the monitoring) or high numbers of flagged violations. Students who do not pass the OneCard verification and face match will be flagged for instructors to review. This would be indicated by the following red flags on a student's tile:
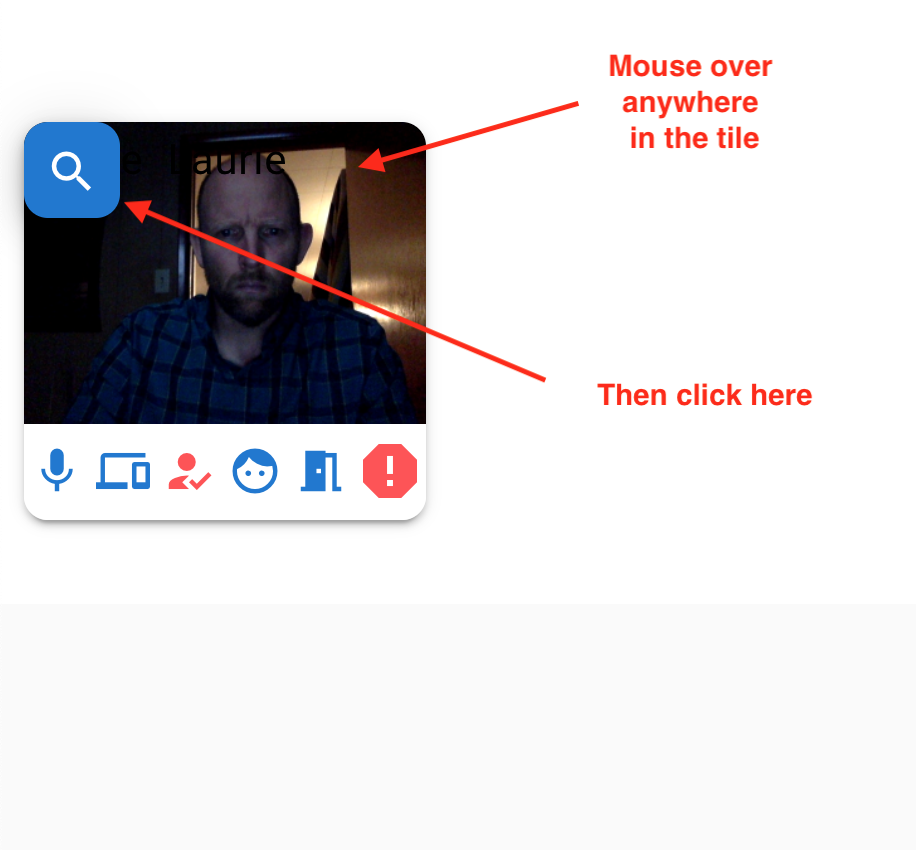
Hovering over a tile and clicking on the magnifying glass icon at the top right opens that student's monitoring data:
The captured images for the ID check and Face Match are located at the bottom of the monitoring data, just above the full exam webcam recording and screen recordings:
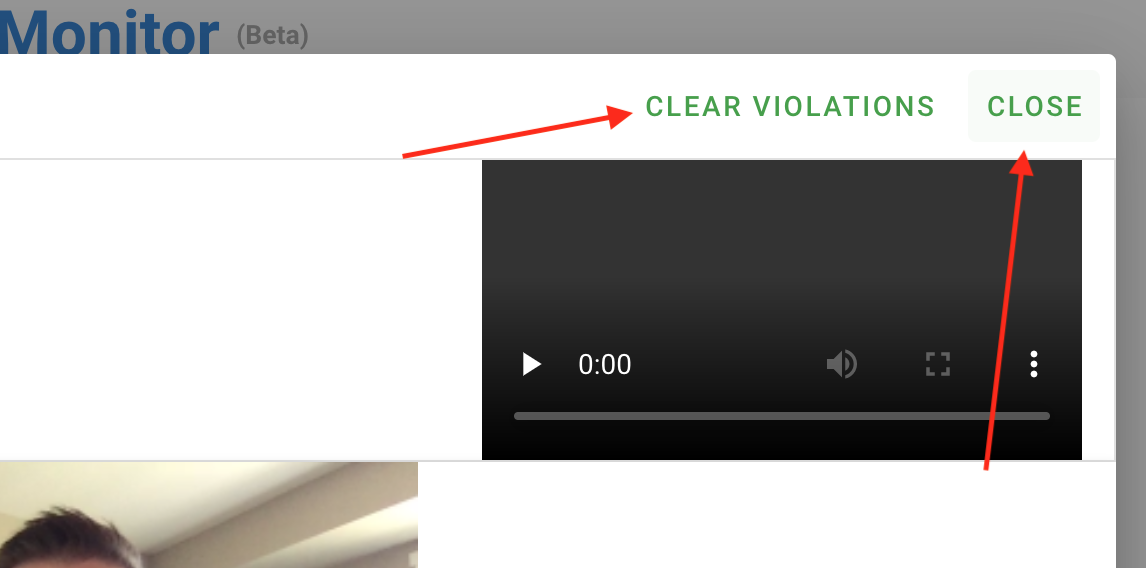
If the ID validation and face matching are fine, instructors can clear these violations at the top right of the monitoring data overlay and close the window. New violations will re-flag for that particular student.
Flags are raised by the SEM monitoring models for audio recorded during an exam, students navigating to different websites, student absences from the exam taking area, the use of secondary display monitors, and the use of other devices. These flags can be cleared in the same way as for the identity checks at the top right:
Note: the SEM automated flagging is being tuned over time to decrease in false positive flags. It has been the general experience in the Spring and Summer terms that turning off Audio monitoring may be a good idea to decrease flags as many students are flagged for simply reading the question out loud to themselves. Turning off this flagging does not turn off the webcam or microphone recording. Note: The detection of multiple monitors is not 100% accurate. The system does keep the images if a certain session is suspected of using multiple monitors. Reviewing Full Monitoring Videos The full recordings of the webcam/audio (Exam Video) and the screen recording (Screen Video) are displayed at the bottom of the monitoring data overlay for a particular student (available via the magnifying icon at the top right of their tile or in their row on the list view). Note that videos are only created on-demand: To view a articular student's video, instructors can click Update video at the bottom of the student flag list. It can take between 5 and 10 minutes to complete the backend processing of a video depending on the length of the exam.
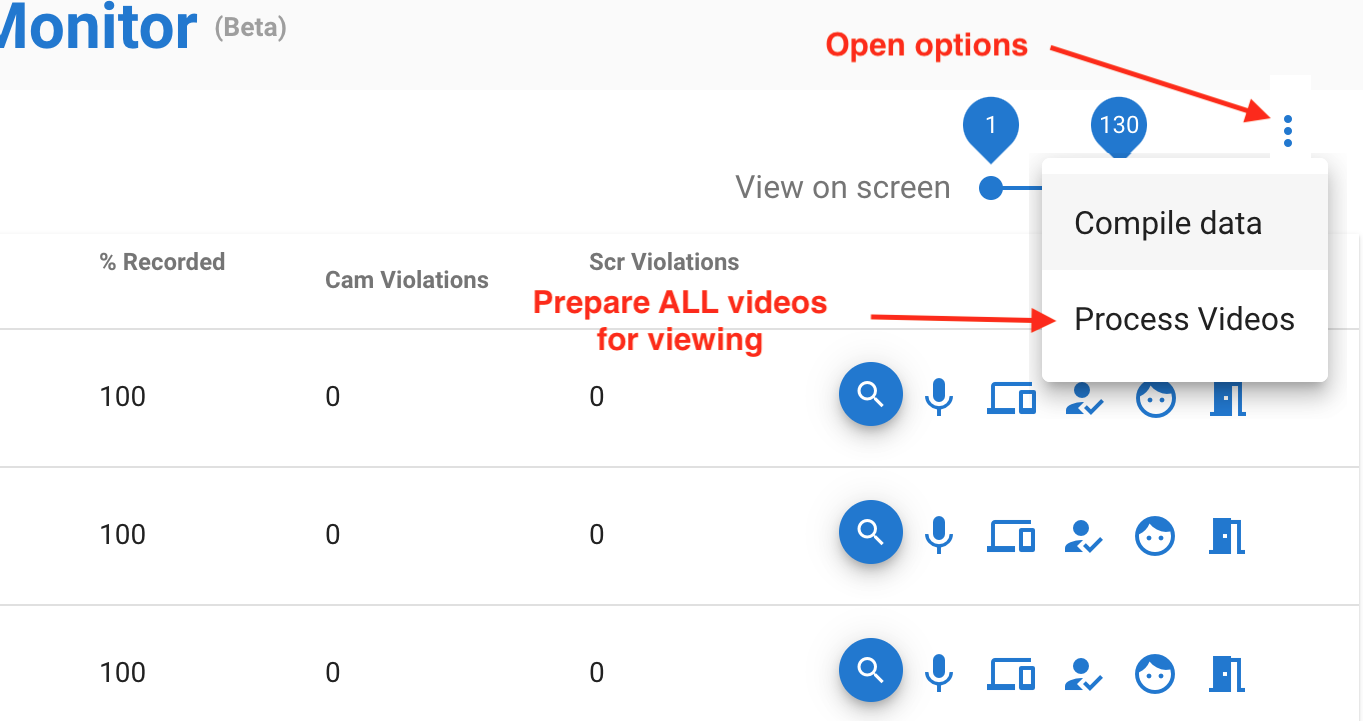
To process all the videos for a particular exam, instructors should open the 3-dot options at top right and click Process videos. This process can take a few hours depending on the length of the exam.
Additional Notes: | |
|
|

