eClass and Canvas Support
|
Uploading Content to YuJa and Sharing it with Students
Last modified on 23 July 2026 03:43 PM
|
|
|
This article describes, step by step, how to upload video (including PowerPoint and PDF) directly to your course channel and three ways you can make it available to your students. In this example, the upload process will automatically publish the video to your course channel and set the privacy settings to "Public with SSO authentication," meaning the video will only be viewable to those logged in with a UofA CCID account. If you need to further restrict your content, please see this article. If you have not already added the Yuja activity to your course, please see these instructions. Non-Video Files: While Yuja can currently accept PDF and .pptx files, please upload directly to Canvas or use another service like Google Drive to host these file types, as Yuja currently has some issues with non-video files. For example, PDF files will not currently work when links are shared, and PowerPoint (.pptx) files will not include audio annotations. Uploading your content: Before you start: You may need to disable or remove anti-virus extensions. These extensions may create problems with trying to upload videos when enabled. Uploads may stall and/or fail to appear in the Media Library. In Chrome, go to Extensions >> Manage Extensions to disable them. 1. Enter your media library by clicking the Yuja activity in your course left naivigation links:
2. Click Upload and select your file (or YouTube link) directly to your course channel:
If you do not see the Upload button, you may need to click Edit channel (or My Media) to switch views:
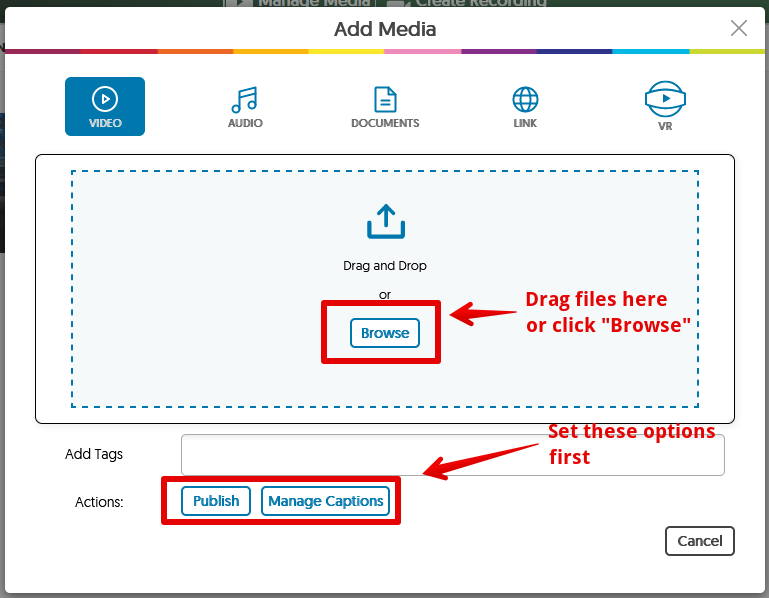
3. Drag a file from your desktop, or click Browse and locate the file on your computer. If you would like to publish the video to other channels simultaneously, or change captioning options, click the buttons below before selecting your video :
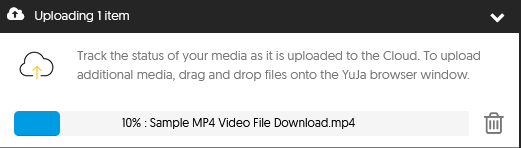
The video will immediately begin uploading. A progress bar will show up at the bottom of the Yuja window. You can keep working in Yuja while your video uploads, but do not close the browser tab until it finishes:
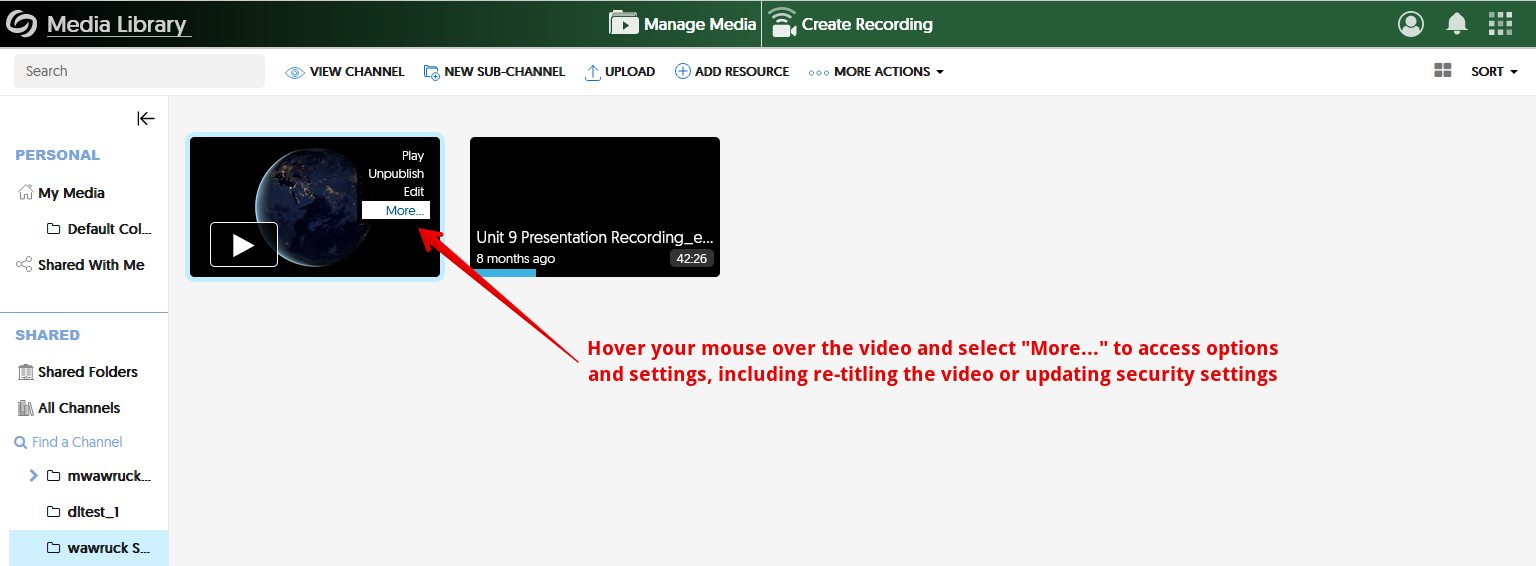
4. The video is now uploaded and published to your course channel. You can hover your mouse and select "More..." to access further options.
Sharing the Video: 1. If you've already made the Yuja activity in your course available to students, they'll be able to click that link to browse the videos in your course channel, including the one that you've just uploaded. They can also see the video if they access YuJa directly and view the course channel. 2. To add a link to your video from the eClass course page, create an assignment, quiz, discussion or page, and add the video to any editor window. 3. Click on the Yuja button. If it is not visible, click on the plugin button:
Note: You can also add a link to a video in a Module. 4. The Yuja media chooser will open and allow you to select from any video in your media library. Click to highlight a video, then click Insert Content:
5. The video will be added to the editor window.
| |
|
|