|
Using the Canvas gradebook
Last modified on 28 May 2026 09:05 AM
|
|
|
Overall, the gradebook in Canvas is less complex than the one in eClass, which will greatly simplify grading for most users. Instructors who use advanced gradebook features and/or calculate grades with custom formulas will need to move these calculations to an external spreadsheet. This article outlines the key differences between Canvas and eClass gradebooks, as well as the most important information for instructors transitioning to Canvas. For a comprehensive overview of all the Canvas gradebook features, please see How Do I Use the Gradebook in the Canvas KB. Contents:
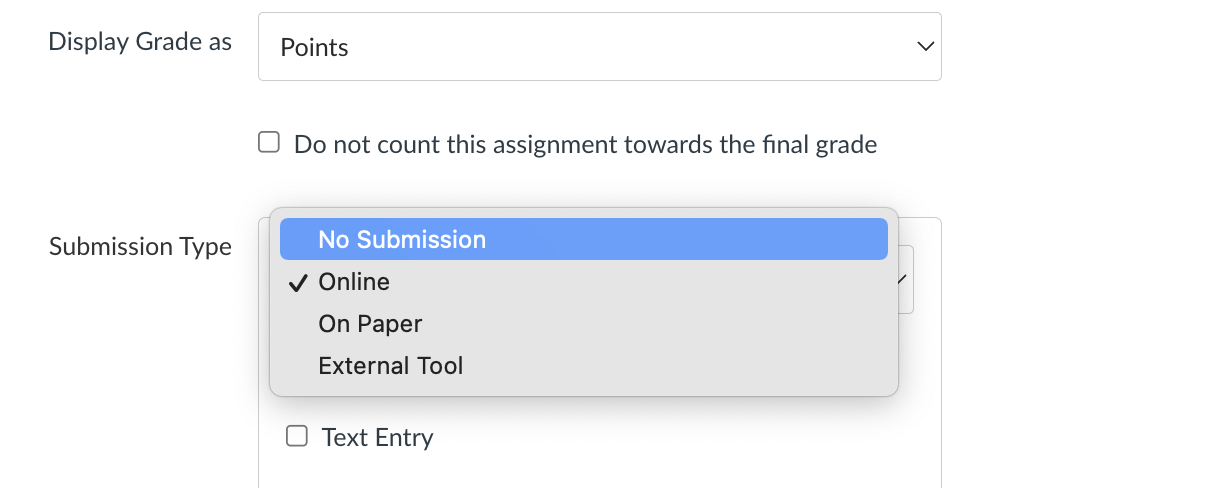
Adding Grade ColumnsAssignment columns are automatically added every time you create and publish assignments, graded discussions, and graded quizzes and surveys. A column is also automatically added for the Attendance tool. If you need to create a "Manual Grade Item" in the Gradebook, you have to create a No Submission or On Paper assignment.
Grade Visibility SettingsA commonly used feature in the eClass gradebook is hiding grades from student view until an instructor chooses to release them. By default, grade columns in the Canvas gradebook can't be hidden until at least one grade has been entered, which will also trigger an email notification to that student that they've been graded on the assignment. To change this behaviour for a course, click the cog at the top right of the gradebook, then under the Gradebook Settings, select Grade Posting Policy and change the setting in the right-side menu to Manually Post Grades:
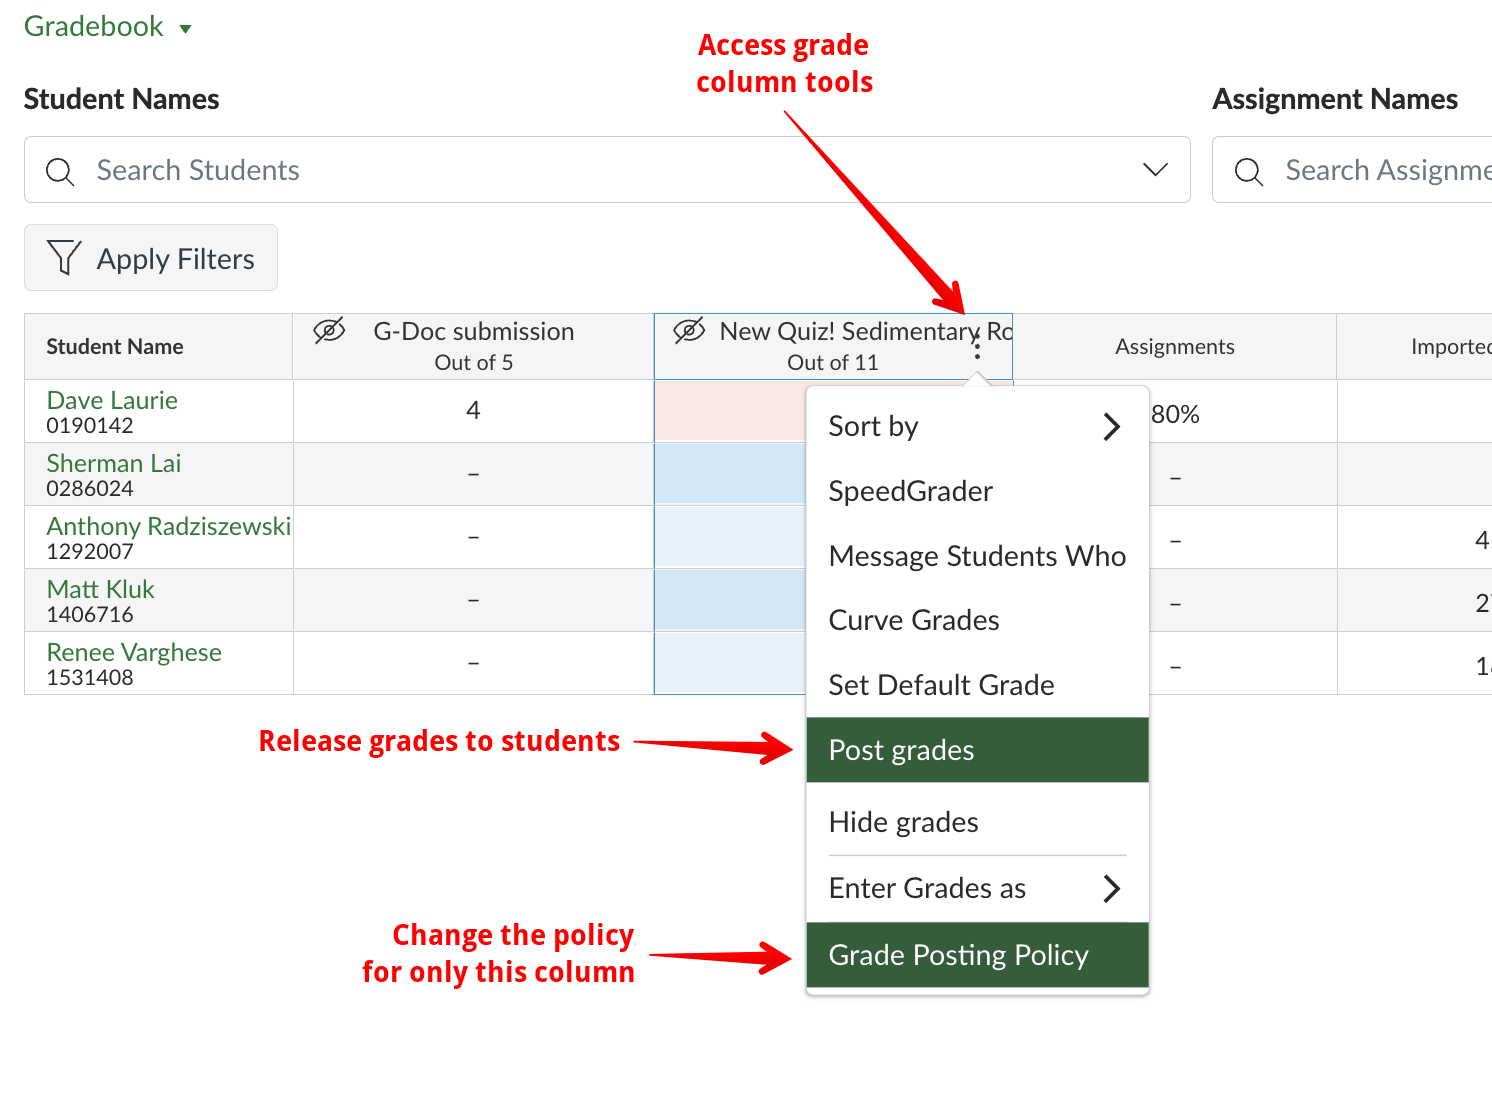
Posting GradesWhen you select posting grades manually, grades for all assignments will then remain hidden until you select Post grades from the ellipsis menu (⋮) next to the grade item name in the gradebook column header. You can also change the grade posting policy for a specific column in the gradebook under the ellipsis.
Hiding Grades After PostingIn addition to posting grades, you have the option to Hide grades:
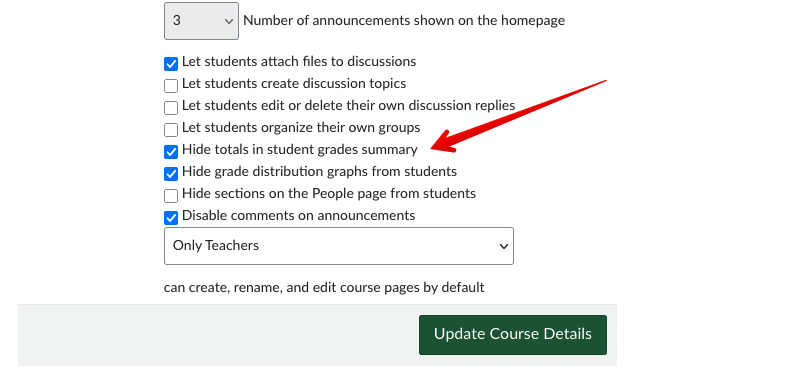
Be aware that this choice does not override the grade posting policy. Choosing to hide grades will hide grades already posted. If you have set your policy to Automatically Post Grades, students will still see and be notified of any grades subsequently entered. To hide grades subsequently entered, change the grade posting policy for the column to Manually Post Grades. Hiding Grades Totals and Grade DistributionsCanvas also allows instructors to just hide the totals in their gradebook, both the overall final total and any assignment group totals. This is done in the course settings:
If the setting "Hide grade distribution graphs from students" is not enabled, students can click on an assignment or quiz in their grade books and see a graph of the distribution of grades for the assignment or quiz:
Note: In a small class of 25 or fewer students, allowing students to see the grade distribution graph may raise privacy concerns, as they could deduce their fellow students' grades.
In Course Analytics, click on the Course Grade tab and change the Chart Options drop-down to Data Table. Click any link to reveal the assignment average, low, and high grades:
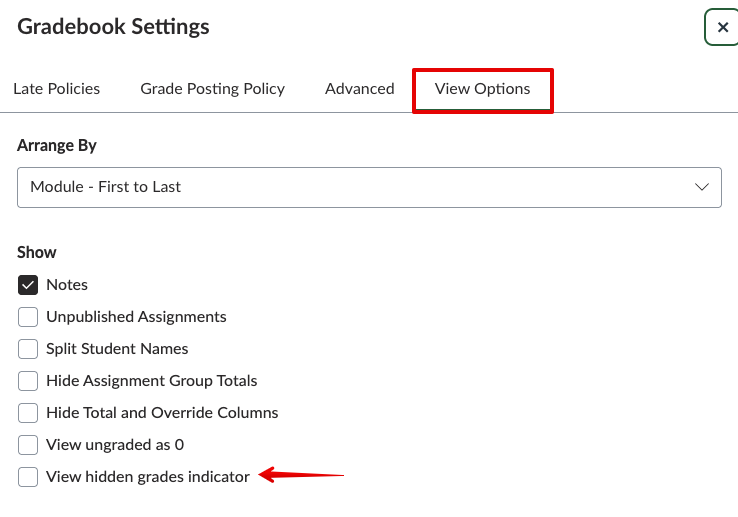
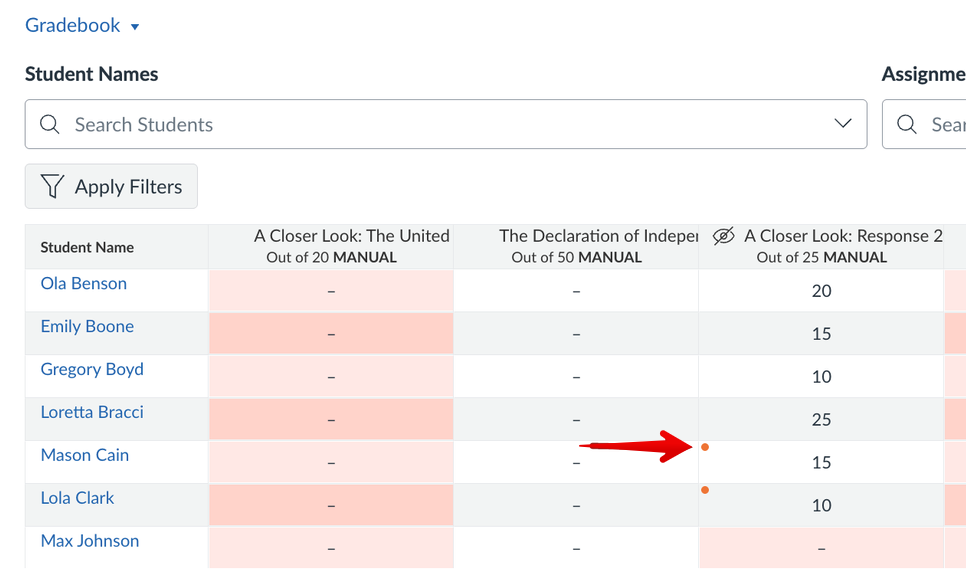
Hidden Grades IndicatorThere is a new option in the gradebook that will show instructors an icon for any grades that have not yet been posted to students. This feature helps instructors quickly identify which grades are hidden from students, reducing confusion and ensuring more accurate communication about grade visibility. At times, instructors may switch their grade posting policy to Manually Post Grades, while some grades have already been posted. The indicator provides a simple way to distinguish which grades are already visible to students and which are still hidden. To change this setting for a course, click the cog at the top right of the gradebook, then under the Gradebook Settings, select View Options and then select View hidden grades indicator:
GradeBook FilterThe main gradebook view has a filter tool at the top right that can be very useful in large courses to limit the display as needed. The gradebook can be filtered on a number of different criteria:
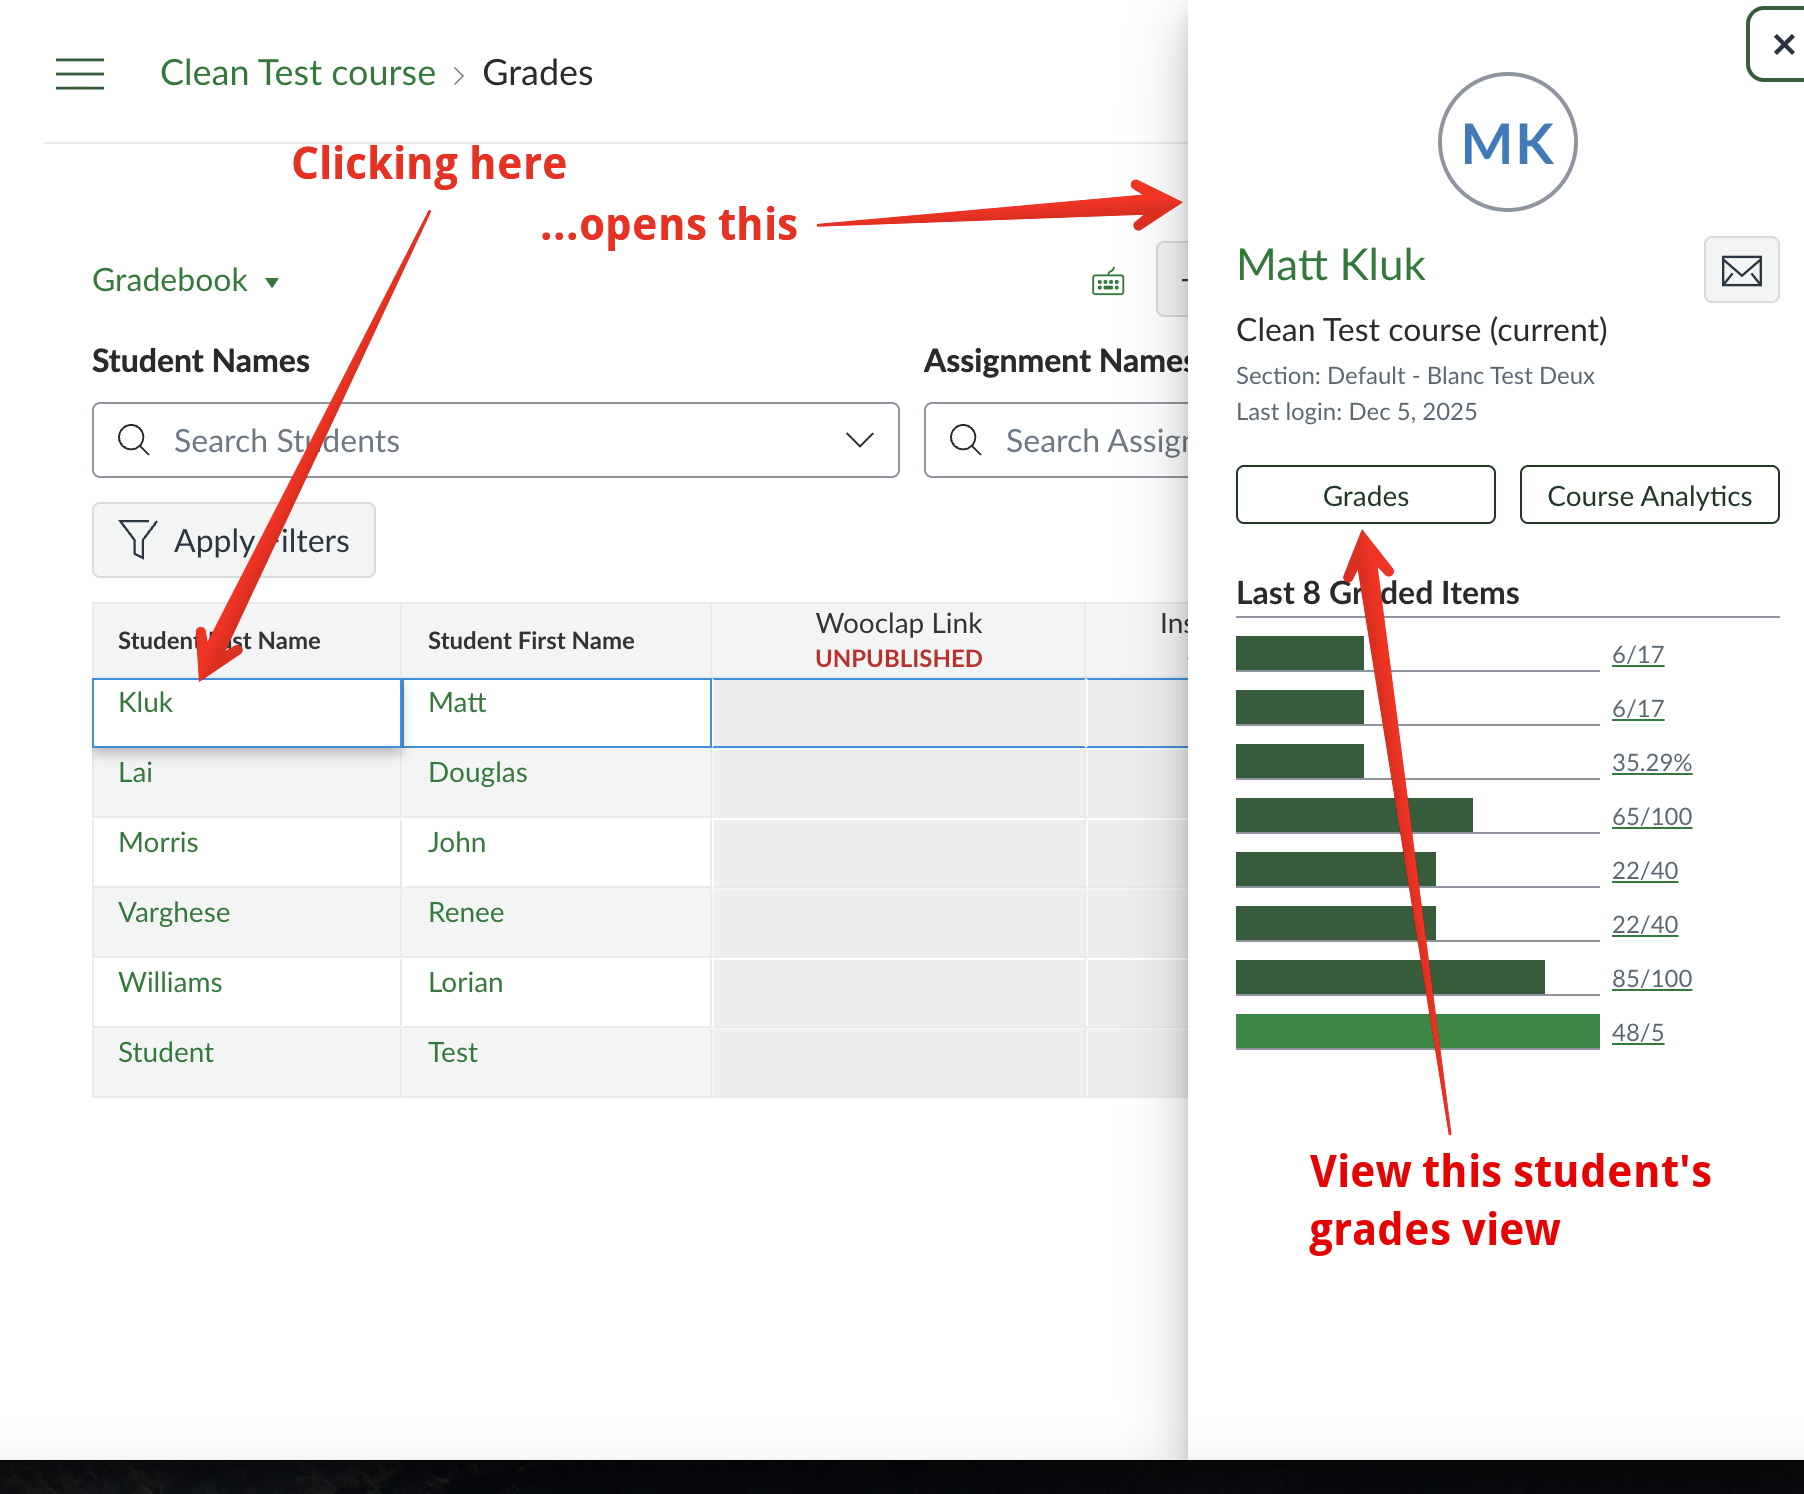
Full documentation from Canvas describes how to use these filters and the available options in detail. Viewing Student GradesInstructors can view what the grades view their students see through the gradebook by clicking their name and then clicking Grades from the modal overlay that launches from the right edge of the page:
The students' grade view looks like this:
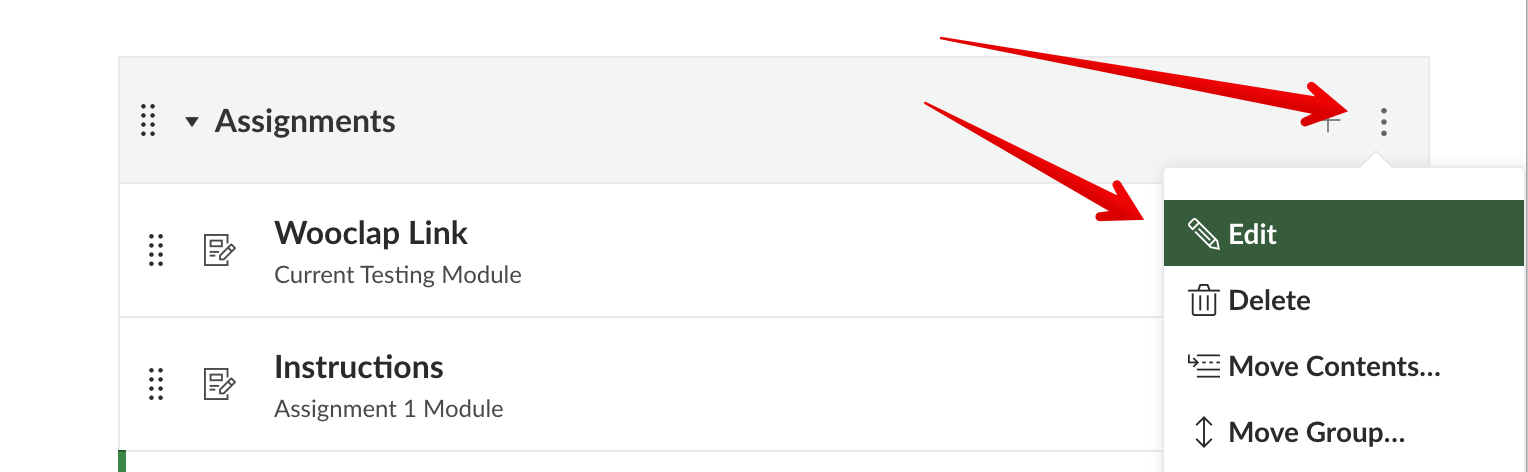
Basic Course Total CalculationsThe standard Canvas gradebook mechanism for calculating course totals is equivalent to using the "simple weighted mean" aggregation method from eClass. The course total is the sum of raw point scores across all scored assignments in the course, expressed as a percentage of the overall points. This means that an item's weight will be its proportion of the course's total grade. So, for example, if there are 3 items in the gradebook: Weighted Grade CalculationsItems can be weighted within a course using assignment groups. By default, a course has a single assignment group called "Assignments," but new ones can be created, and any gradeable item (a quiz or assignment) can be added to a group from the assignments page. Assignment groups are functionally similar to gradebook categories in Moodle. From the assignments page in your course, you just need to click the ellipsis icon (⋮) and select "Assignment group weights" to enable and define the weights:
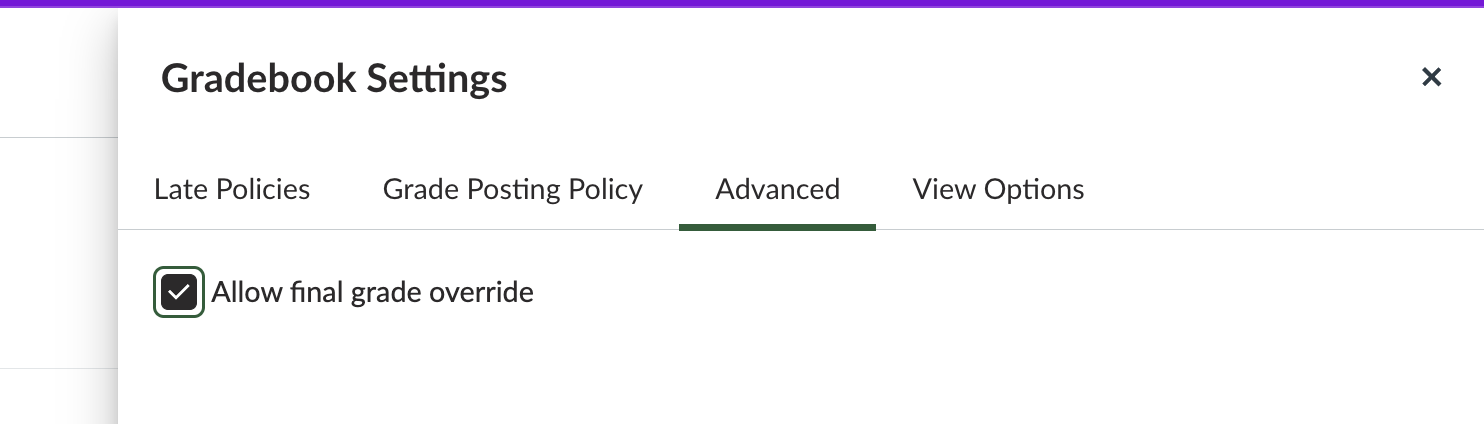
For those needing more advanced calculations, the only option is to perform them outside the Canvas gradebook and either manually enter students' total scores or import scores for an entire assignment or term from a spreadsheet. To enter the course total score manually or from a spreadsheet instead of having it automatically calculate, enter the gradebook settings via the cog wheel icon in the top right of the gradebook, then select the 'Advanced' tab, and select Allow final grade override. This will add an 'Override' column to the right of the total column where you can enter a new grade.
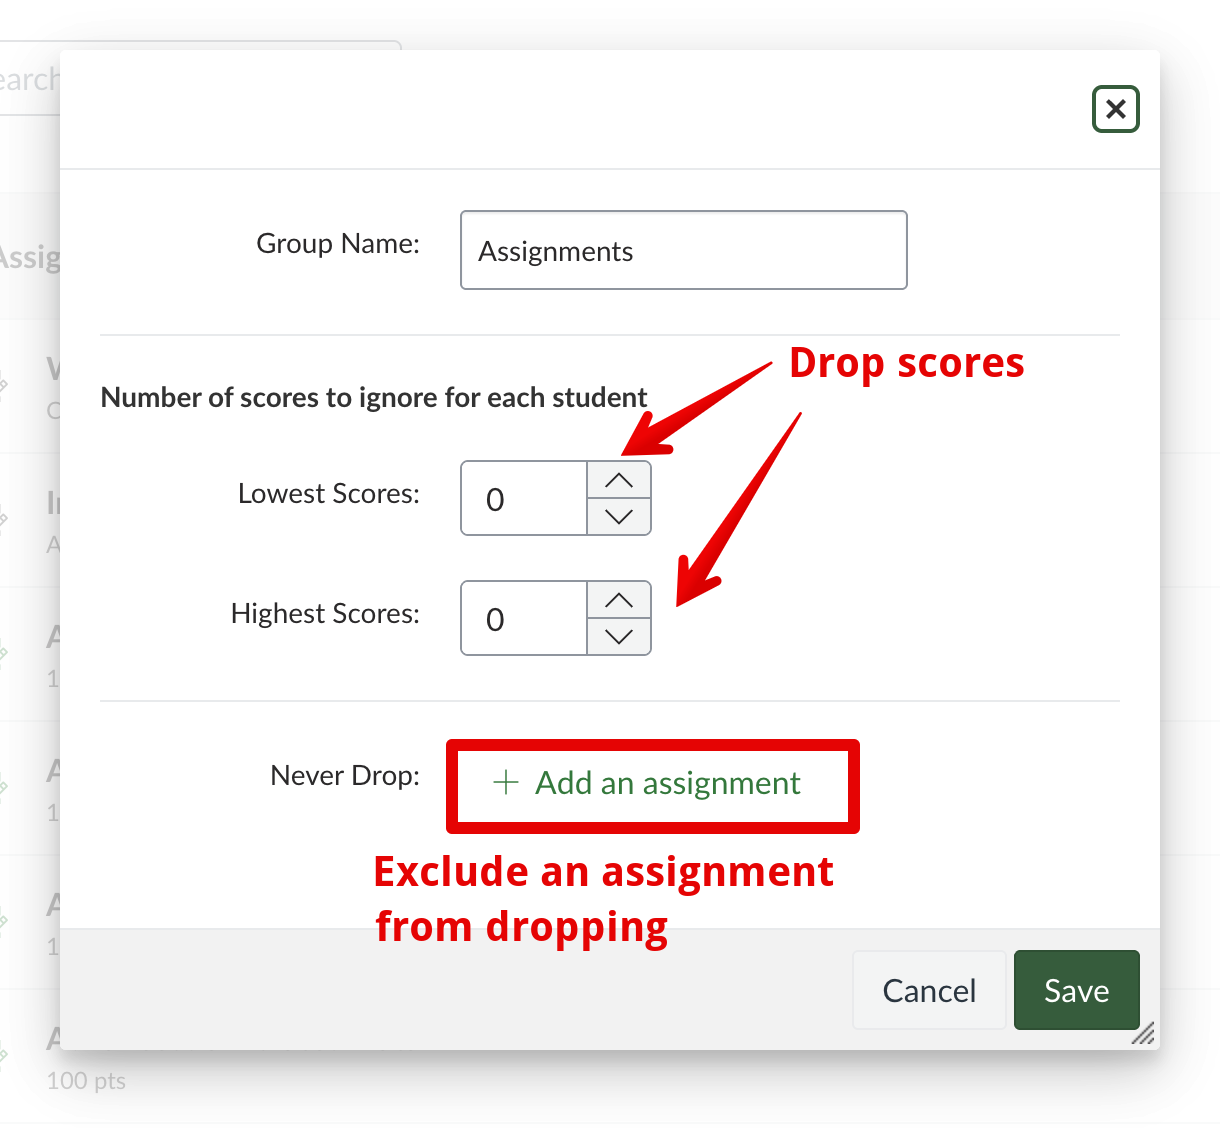
The one area where the gradebook does allow advanced calculations is within specific assignment groups where it is possible to ignore a certain number of a student's low or high scores (with the option to make some assignments 'required', i.e., excluded from the dropping). These settings are made by clicking the 3 dots icon near the top right of an assignment group:
Updating Grades in the GradebookGrades may be updated in Grades automatically or manually. Quiz: Once all questions are graded in a quiz, Grades will update automatically. If multiple attempts are allowed, the grade will be applied corresponding to the quiz setting Highest, Average, Latest, or First. Assignment: If multiple attempts are allowed in an assignment, you can view all attempts in the SpeedGrader "Submission ot view" dropdown menu:
Select the submission you want to grade. Submissions are listed in chronological order. If you have chosen an earlier submission, the message will appear: Note: This is not the most recent submission. Manual entry: To override a grade or enter one manually, simply click in the Grades cell corresponding to the student and the graded item and type the new grade.
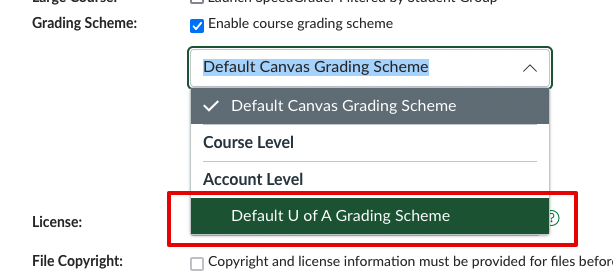
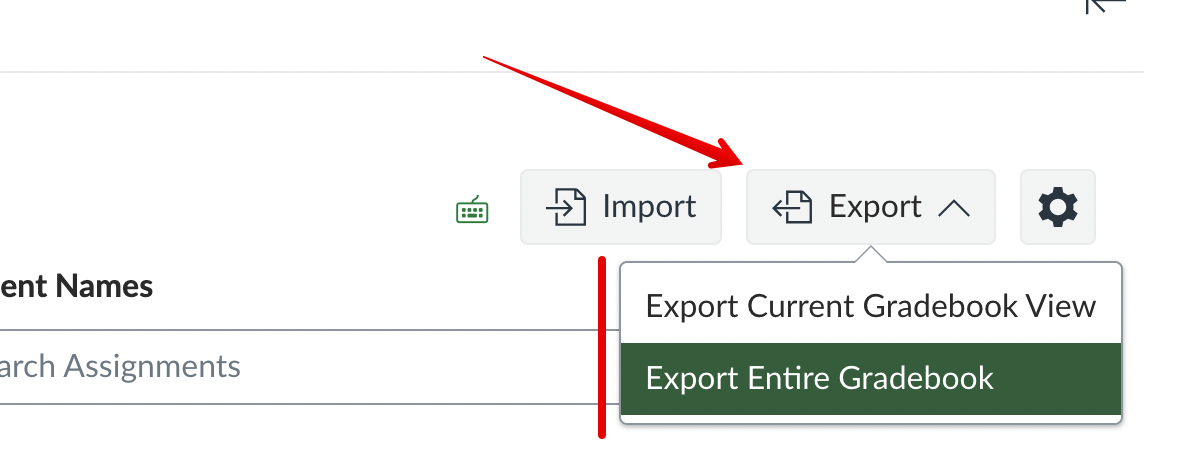
Assigning and Displaying Letter GradesIf you would like to show letter grades with the course totals, you will need to enable a course grading scheme, found in your course settings, on the "Course Details" tab. Once enabled, you can use an existing grading scheme from the drop-down menu or define a new grading scheme by clicking "+ New Grading Scheme". This process is similar to editing your grade letters in eClass and is necessary to export a .csv file with a column of letter grades to upload to Beartracks.
When selecting from the existing grading schemes, the recommended option is the 'Default U of A Grading Scheme':
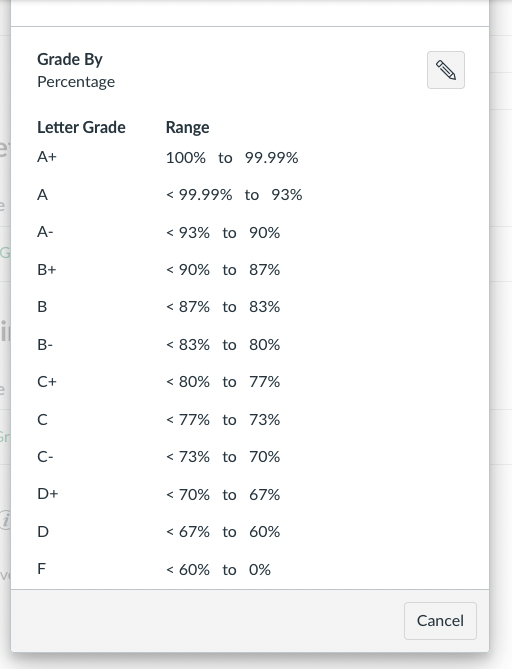
Note that this scheme/scale is the "best fit" based on the official U of A grading guidelines, so individual instructors, departments, or programs should ensure they review the boundaries prior to using it. The letter grade range boundaries are: | |
|
|
Knowledgebase: Canvas > Canvas for Instructors


Comments (0)