|
Adding Additional Users to my eClass Course
Last modified on 30 August 2023 02:24 PM
|
If you are enrolled as an instructor in an eClass course, you can follow the instructions below to add colleagues into your course in any of the different roles available: Designer, TA, Additional Instructor, Non-Editing TA (Graders), and/or Auditor role.
For a broader description of these various roles and what they should be used for, see the following article.
eClass allows users to be enrolled in courses in multiple roles but bear in mind that permissions are additive (so if enrolled as auditor and instructor, your colleague would have full instructor permissions).
Note that you will not be allowed to enroll students in your Beartracks Credit sections -- student enrollments are automatically synched with Bear Tracks each day based on your course Beartracks section information. It can take up to 48 hours from the time a student is enrolled in Beartracks by the department until they appear in eClass.
If a student does not appear in your Participants list after this time interval, please contact IST eClass support team at 780-492-9372 or eclass@ualberta.ca.
Note: If students in credit courses are going to miss significant instruction before Bear Tracks completes their enrollment in eClass, an instructor may manually add the student as an Auditor. While Auditors cannot complete any graded activities in eClass, this can be an effective temporary tool to get them access to course content.
Instructors should ensure that they remove the manual auditor role once the correct Student enrollment gets added through the Bear Tracks sync (or set it with a temporary enrollment duration), otherwise the student would retain auditor access to the course even if they dropped the course through Bear Tracks.
To add additional users:
- Log onto eClass and enter the course where you need to enroll someone.
- To open a list of existing users in the course, click on Participants from the top menu bar.

- Once you are on the Participants page, click the Enrol users button.

Note: if there is no Enrol Users button, you will need to add the Manual enrollment method first by following the steps in this article: Enabling the Manual enrollment Method.
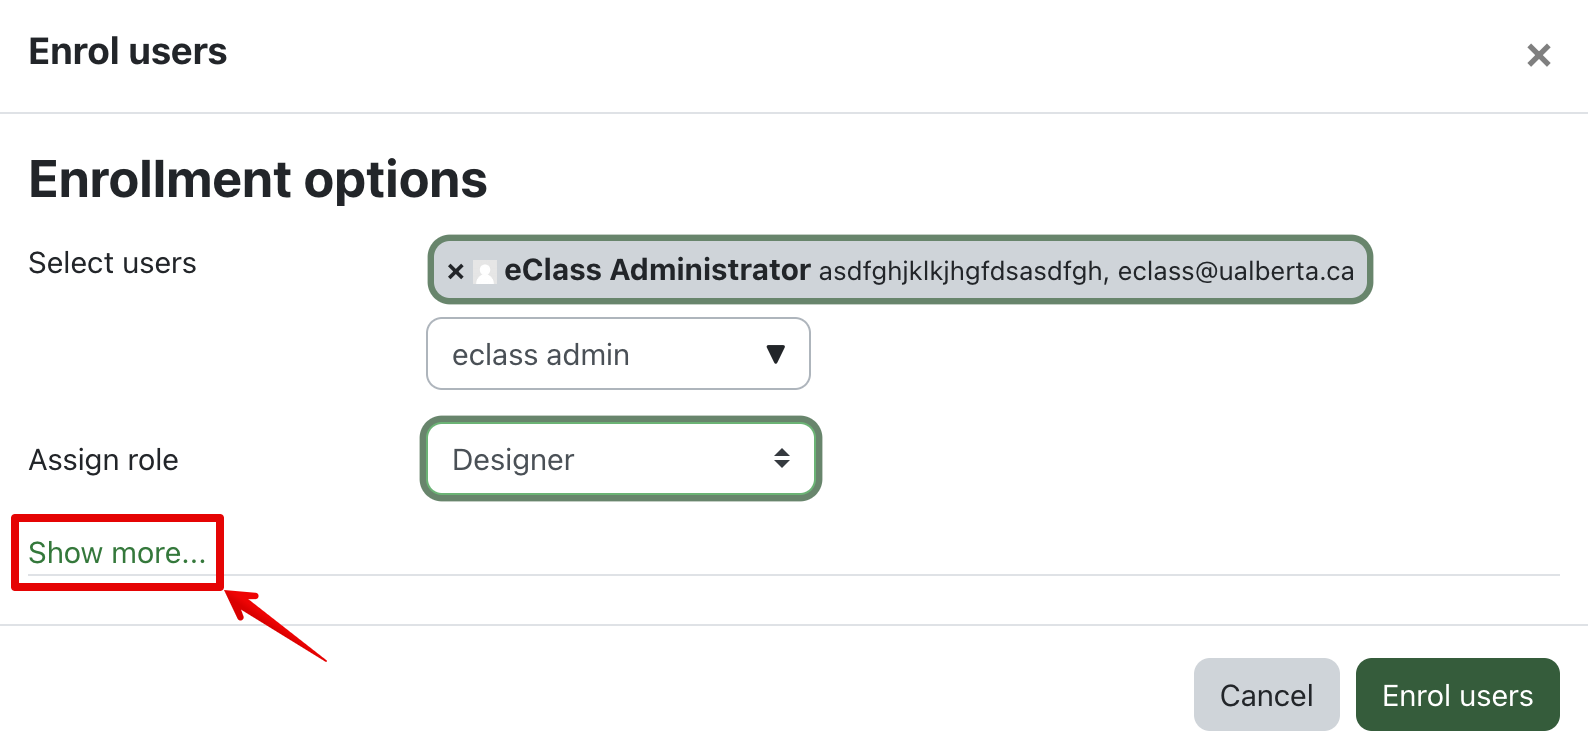
- In the 'Enrol users' dialogue box that appears over the top of the page, first type the user's first and last names or their CCID in the box provided. This will filter the users based on the names you entered.

Note: if you are having problems finding a particular user, consult the following article: Problems Finding Users to enroll in Your Course.
- Then, select the desired role from the 'Assign role' drop-down menu.

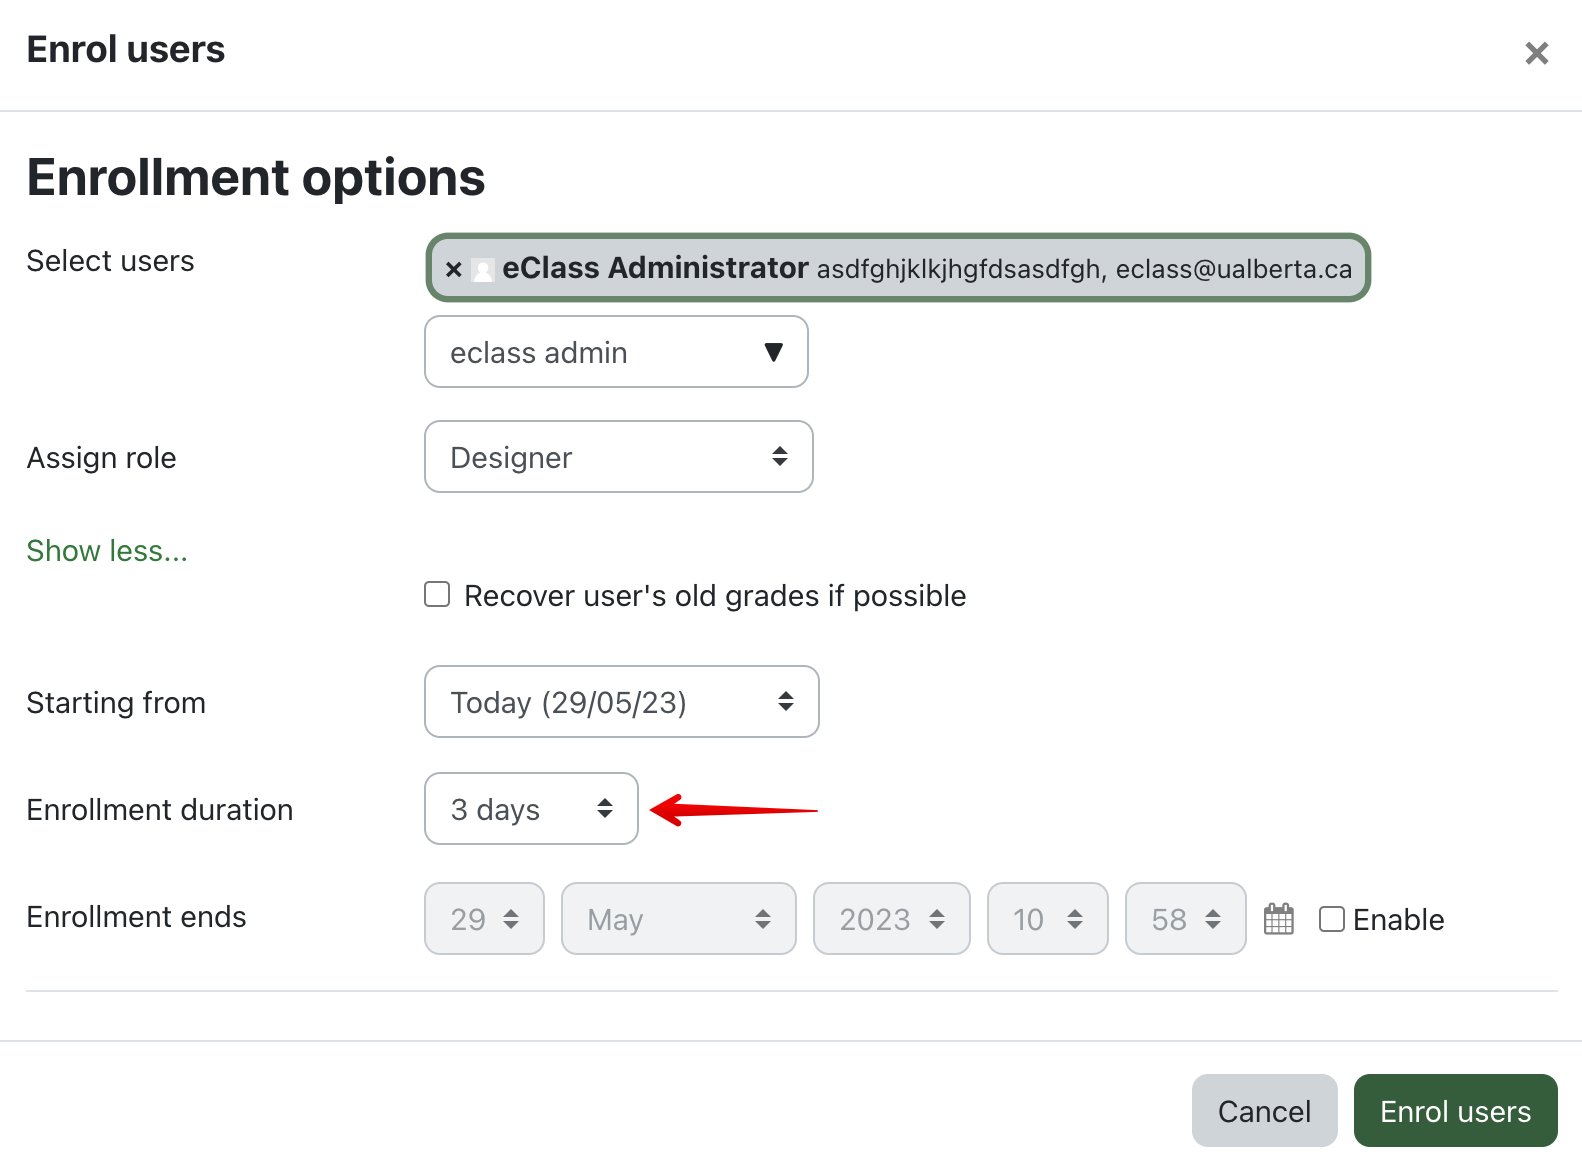
- Optionally, an enrollment duration can be set for a user’s enrollment. This can be useful when, for example, a designer only needs access to your course for a couple of days to add content and should then no longer have access. Setting an enrollment duration means you do not need to remember to come back and un-enroll the user later.
Click on Show more... to see the advanced enrollment settings. Here you can set the enrollment duration. The default value is Unlimited.
- Make sure to complete the steps 6-7 above (selecting the role and settings an enrollment duration if using). Click on enroll users when finished.

- After you have clicked enroll users, the enrollment process is complete, and those users you enrolled will appear in the course 'Enrolled users' list.
|
 (320 vote(s)) (320 vote(s)) Helpful Not helpful
|