eClass Support
Using the Collapsed Topics with Collapsed Labels Course Format
Last modified on 23 October 2023 03:49 PM

The Collapsed Topics with Collapsed Labels course format provides instructors with an additional mechanism for shortening the length of their course in eClass. As with all the other available course formats, this format does not affect the content itself but only affects its display (you can switch back and forth between course formats without affecting anything you have uploaded into your course.)

However, one major difference with 'Collapsed labels' is that the compact display change provided by the format is:

  • 1) not visible to the instructor until editing is turned off;
  • and 2) not created until the content in the course is structured in a specific way.

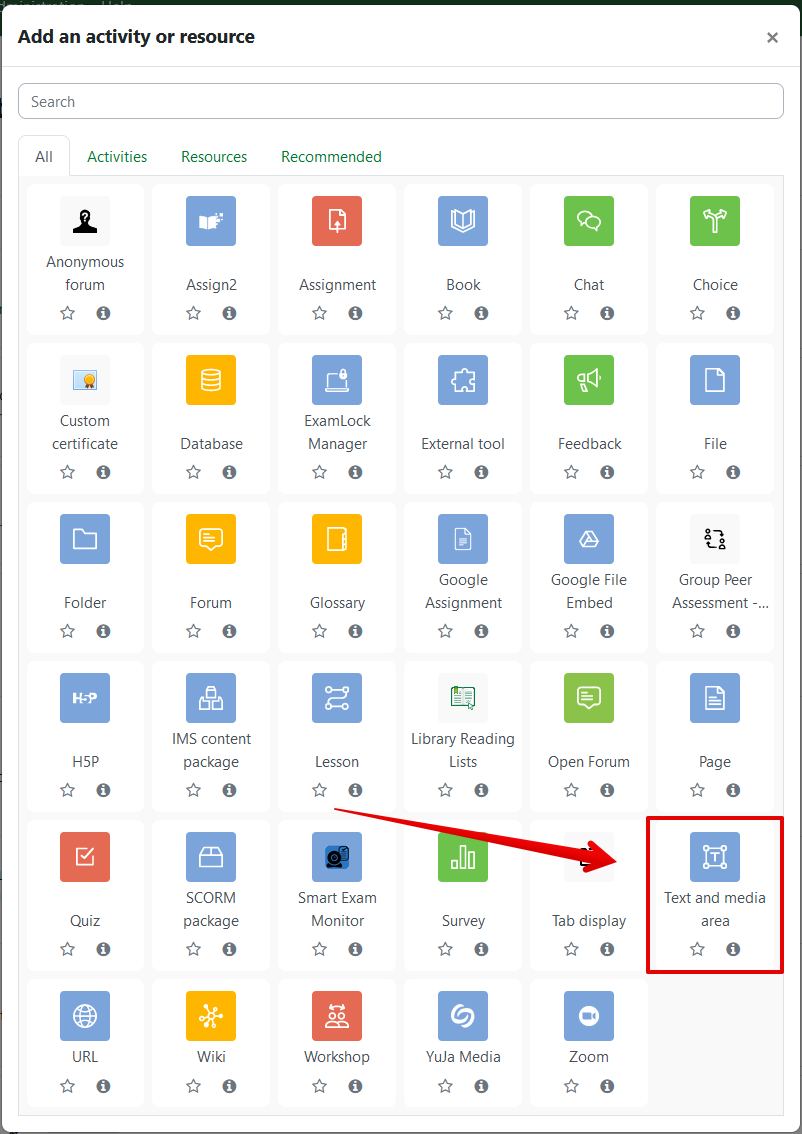
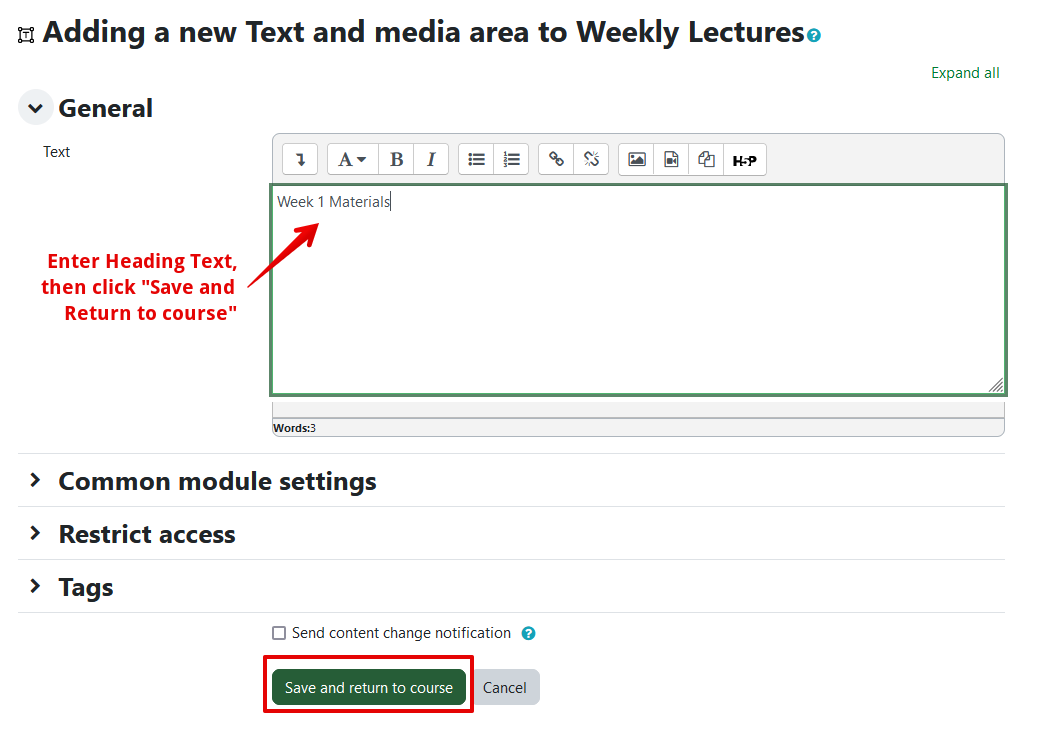
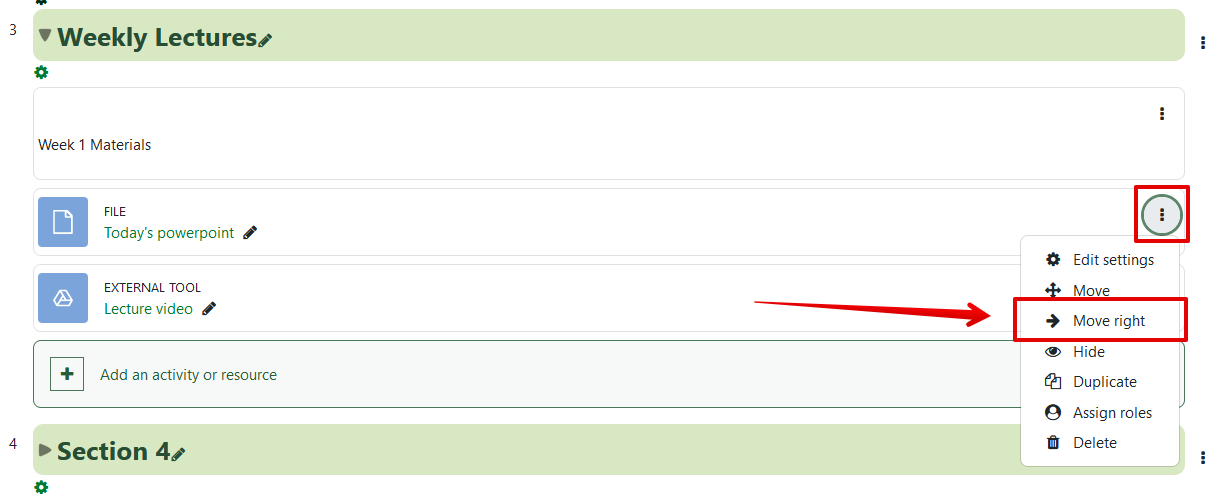
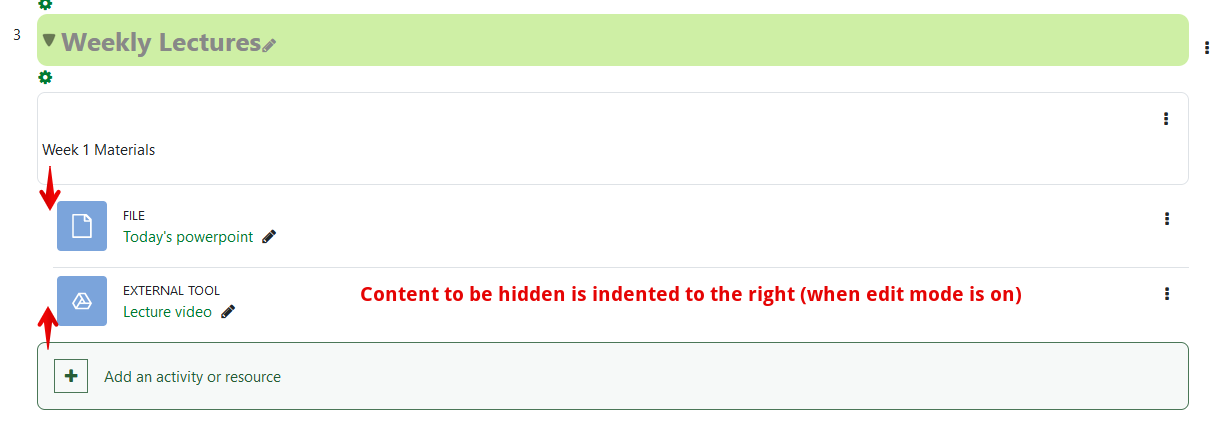
To collapse content using the Collapsed Topics with Collapsed Labels Course format:

  1. First set 'Collapsed topics with Collapsed Labels' as the course format - click Settings from the header of the course page and select the course format in Course format > Format:

    Finding the "course format" section in course settings

  2. The settings page will take a moment to refresh with the new available settings. In general, all the selected defaults for these settings should be sufficient for most users. Click Save and return at the bottom of the page to confirm the format change.
  3. Turn Edit mode on at the top right of the course page.
  4. In the content section of the page where content needs to be nested, select Add an activity or resource and insert a Text and media area activity (these were called Labels in previous versions of eClass):

    choosing the label activity


  5. Enter the heading required which will contain the collapsed content. Note: Only plain text can be displayed as a collapsible heading. Longer text is displayed (though for esthetics it is recommended to keep headers short) but anything besides text (e.g., images, tables, or HTML formatted text) will not be displayed and may break the collapsed item display.  Click Save and return to course to add the heading:

    enter heading text in the description box

  6. All new resources (and activities) are added at the bottom of the content section - the heading must be re-positioned to sit above any items that will nest below it. Your cursor will change to a 4-way arrow when you hover over the heading, indicating you can drag the item to move it:

    How to move an item by dragging
  7. Each item that will be nested beneath the heading must sit right below the heading AND be indented one tab to the right. Indent each item by clicking the 'three dots' icon (⋮) then Move right:


  8. The content is now prepared - with editing turned on, the indented items below a heading should appear shifted over slightly to the right and lined up with each other:

    content is now indented
  9. When editing is turned off, the heading is displayed in a grey bar with a + icon to its left. The 3 sub-items are not displayed until a user clicks the + icon and then the content is available as normal:

    content is collapsed below heading

    content is displayed when you click the '+' icon

Additional notes:

 1) It is not possible to collapse content in the top content section of a course (section 0 in the structure of the course) - label resources will appear normally in that section. The format affects ALL other labels in the course in the regular content section areas. Every label in those sections will be reformatted (with editing turned off) to the grey box view with the red plus to the left (even if there is no content indented right below them to be collapsed). The only mechanism to enter any freeform content into a course using this format is to edit the content section headings.

 2) Additionally, it is a known issue that a collapsed label can't be created in the last topic of a course. If you need to add a collapsed label to the last topic, create another topic at the bottom of the course. This new topic could even have no content and be hidden, and the collapsed label in the topic above will display now. 

 3) It is possible to indent labels below labels to create a nested structure for content. Any content that needs to be collapsed below an already collapsed label must be indented twice to the right.

 4) Take care when pasting content into labels: associated formatting from the paste source may override the default formatting for collapsed labels and break the collapsing function. This can be solved by using the HTML editor to replace any extra html with paragraph tags (<p></p>). Plain text content without the paragraph tags will also break the format. If you encounter this issue and have any questions about accessing the HTML code for the text, please contact eClass support by email at eclass@ualberta.ca or by phone at 780-492-9372.

(5 vote(s))
Helpful
Not helpful

Comments (0)
-->