|
Viewing Course Participants
Last modified on 05 July 2023 08:48 PM
|
|
|
Contents:
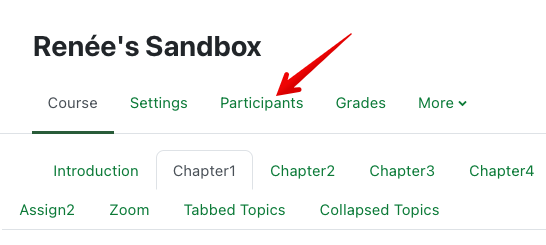
Accessing the Participants List:
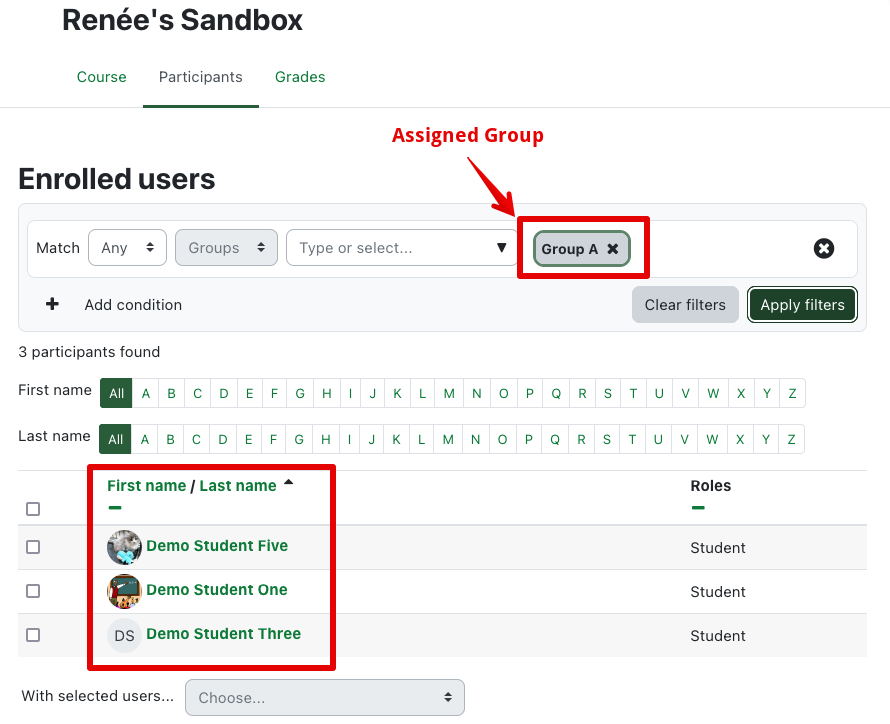
Student-view of the Participants List Students by default can see all the names of all the other students in their course. In courses where group modes have been set, the list will be pre-filtered to show the name of any assigned groups and only the students in groups that the student is a part of. The page may be configured to allow visibility of ONLY the students within a student's assigned groups:
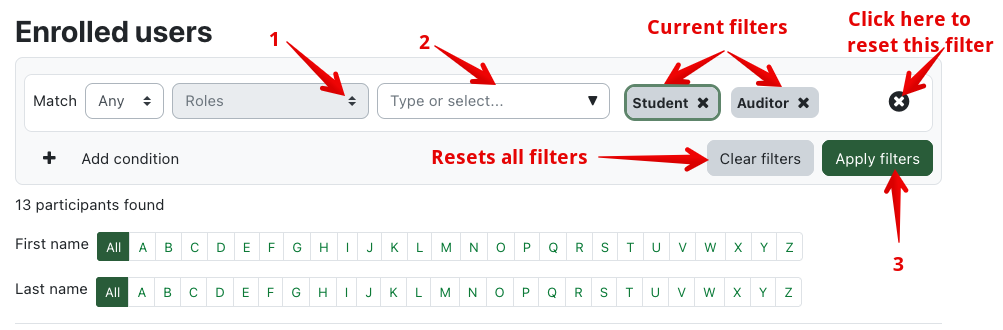
Instructors who do not want students to see each other's names in their course can follow these instructions. Filtering the Participants List:
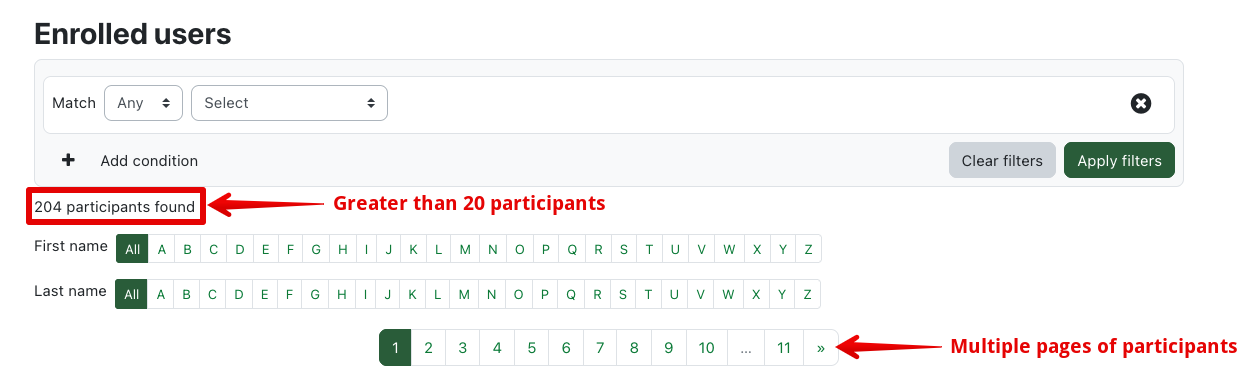
If you have more than twenty participants in a class, then, by default, the Participants list will be separated into pages, with twenty participants maximum per page.
If you want to show all of the participants in your course on one page, go to the bottom of the Participants list and click on Show all users (with "users" replaced with the number of participants in your class).
If you want to go back to showing 20 per page, click on Show 20 per page at the bottom of the Participants list.
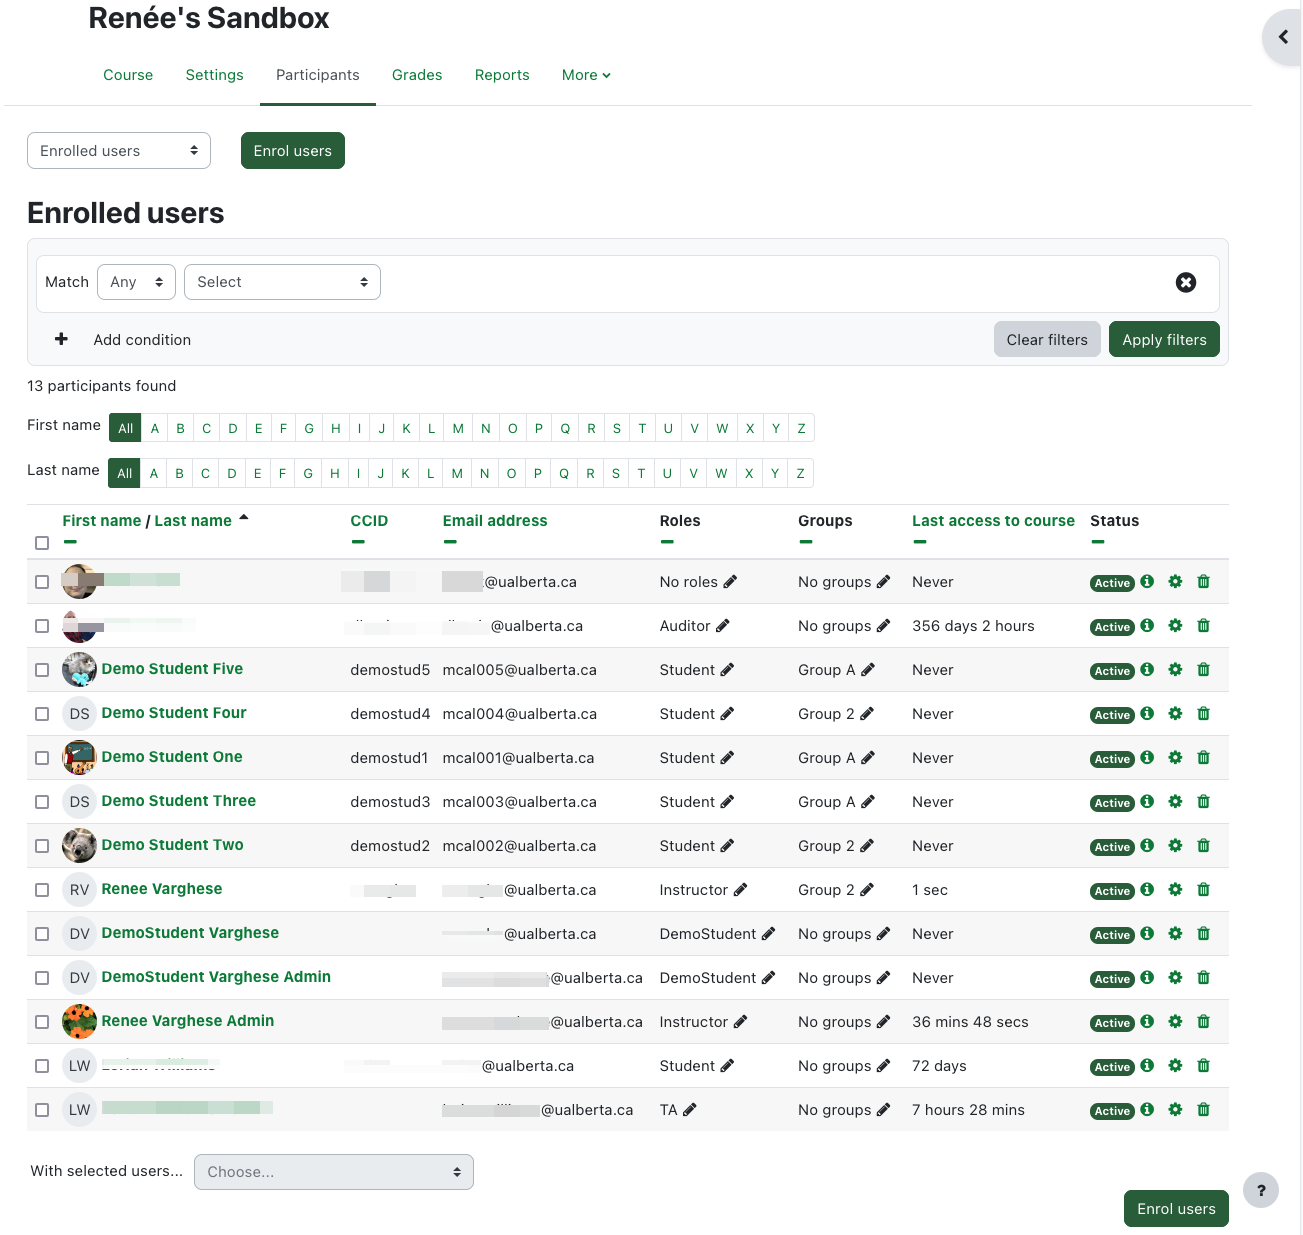
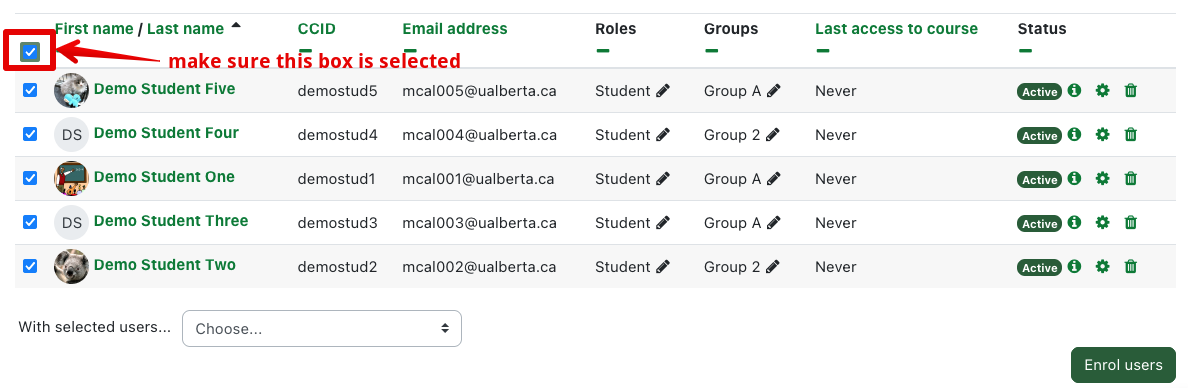
To perform some tasks, such as downloading a list of your participants, or sending a message to some of the participants in your class, you will first have to select participants. To select all of your participants, check to see if your Participants list is one page, either through having twenty or fewer Participants, or through clicking on Show all users, as shown in the previous section. If it is only one page, the easiest way of selecting all of the participants in your course is to click on the checkbox just above the list, left of "First name / Last name". Checking this checkbox will select all of your students.
If your course has more than twenty participants and is separated into pages, the best way to select all of the participants in your class is to go to the bottom of the Participants list and, at the bottom-left of the page, click on the Select all [number of] users button, and that will select every user in your course.
You can also select only certain participants by clicking on the checkbox to the left of a participant's name.
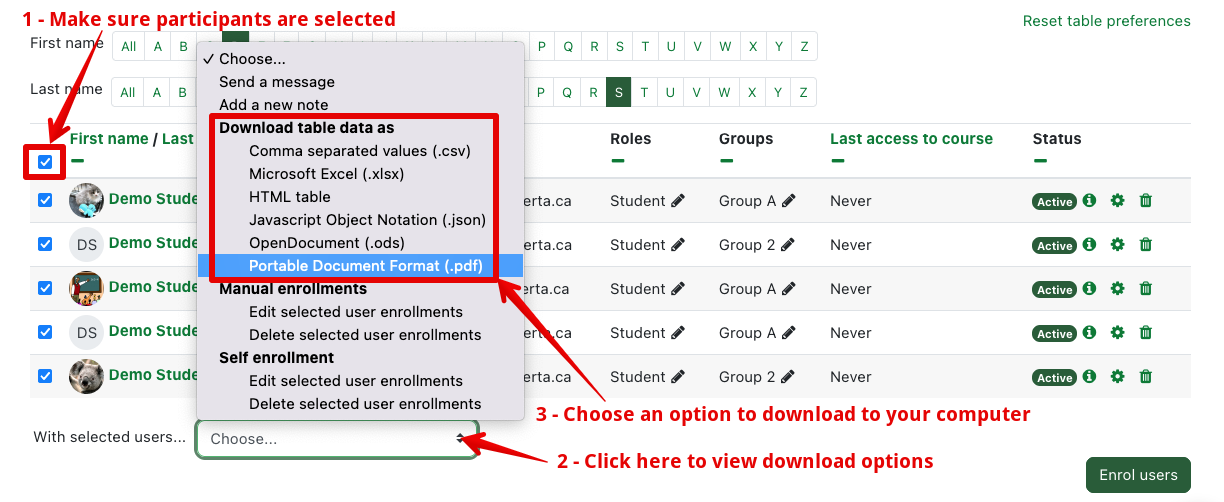
Note: If you select multiple participants on one page and then go to another page of participants, the participants that you selected on the previous page will NOT remain selected when you go to the new page. Make sure that you are showing all of the participants on one page, as detailed in the "Showing all participants" section of this article if you want to select individual participants that would otherwise be on different pages if they were separated by a maximum of twenty participants per page. Instructors can download a table of information about the participants of your course, which includes their first name, last name, CCID, and email addresses. To download participants' data, select the users that you want to export, as detailed in the previous section, and then in the "With selected users..." dropdown, choose a file type option for downloading the table data under "Download table data as", and it will download to your computer.
The download options include:
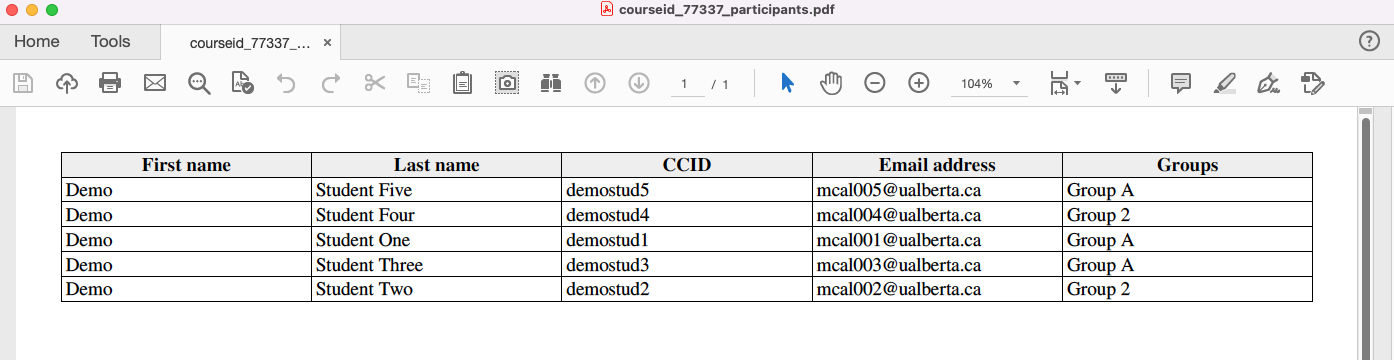
For example, if you choose PDF, you get a .pdf file containing a table of data for the students you selected.
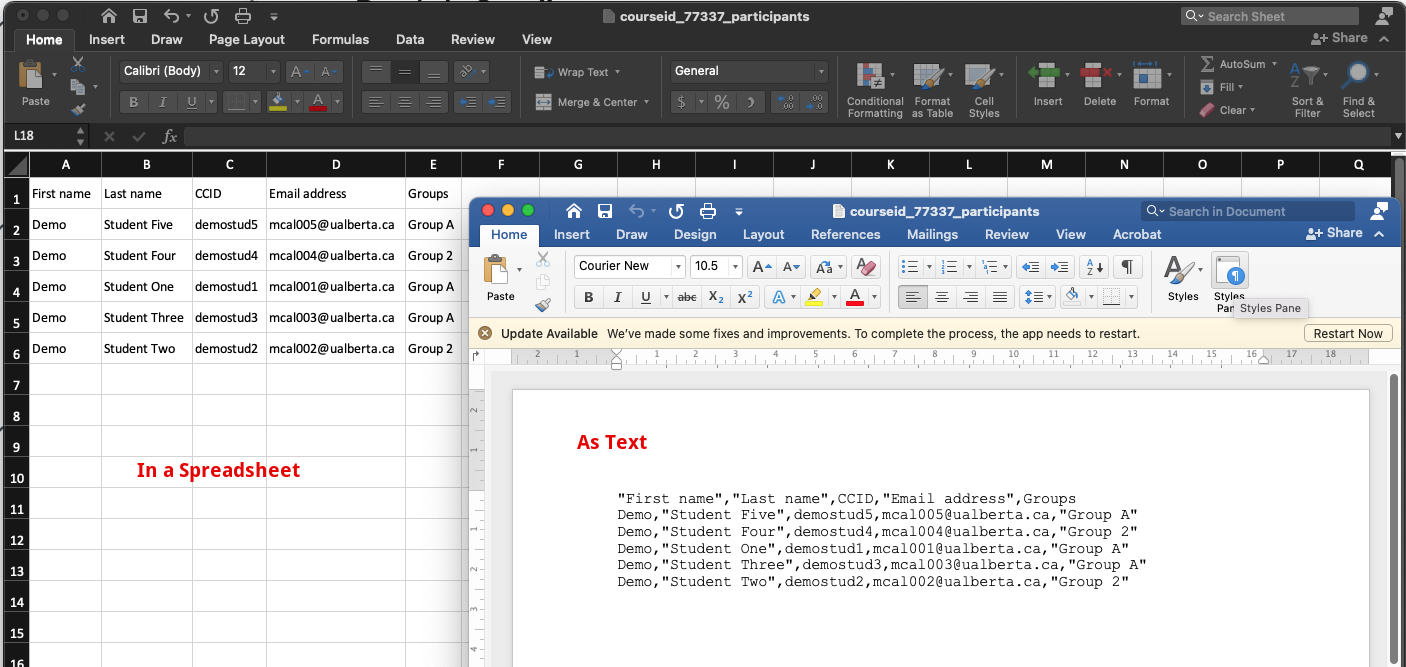
While choosing a comma-separated values file will create a .csv file that can be viewed as text or in a spreadsheet.
Adding Additional Participants: The process of adding additional participants, such as TAs, designers, and additional instructors, to a course is detailed in the articles Adding Additional Users to my eClass Course and Enrolling Students in eClass Courses. Note: If the eClass course is a Bear Tracks credit course, you should NOT try to manually enroll students into your eClass course. In all regular Bear Tracks sections on eClass, students are automatically enrolled by the IST eClass Support team as a part of the automated course creation system. As an instructor, you will never need to enroll regular credit students manually in your course. If you wish to message some of your course participants, refer to the article Sending Messages to Students for more information. Note: If you wish to send a message to all of the participants in your course, we recommend that you use the Announcements forum, which, by default, is present at the top of every course. Course participants are automatically subscribed, and they will have the messages posted there forwarded to their email accounts. For more information on using the Announcements forum, please see the article Posting Course Announcements. | |
|
|