|
Preparing and Adding Content to eClass
Last modified on 23 November 2022 03:55 PM
|
|
|
Generally, there are two ways to add content to a course: creating new 'Page' resources (HTML files with content added directly to eClass) and uploading existing documents as 'File' resources. Contents:
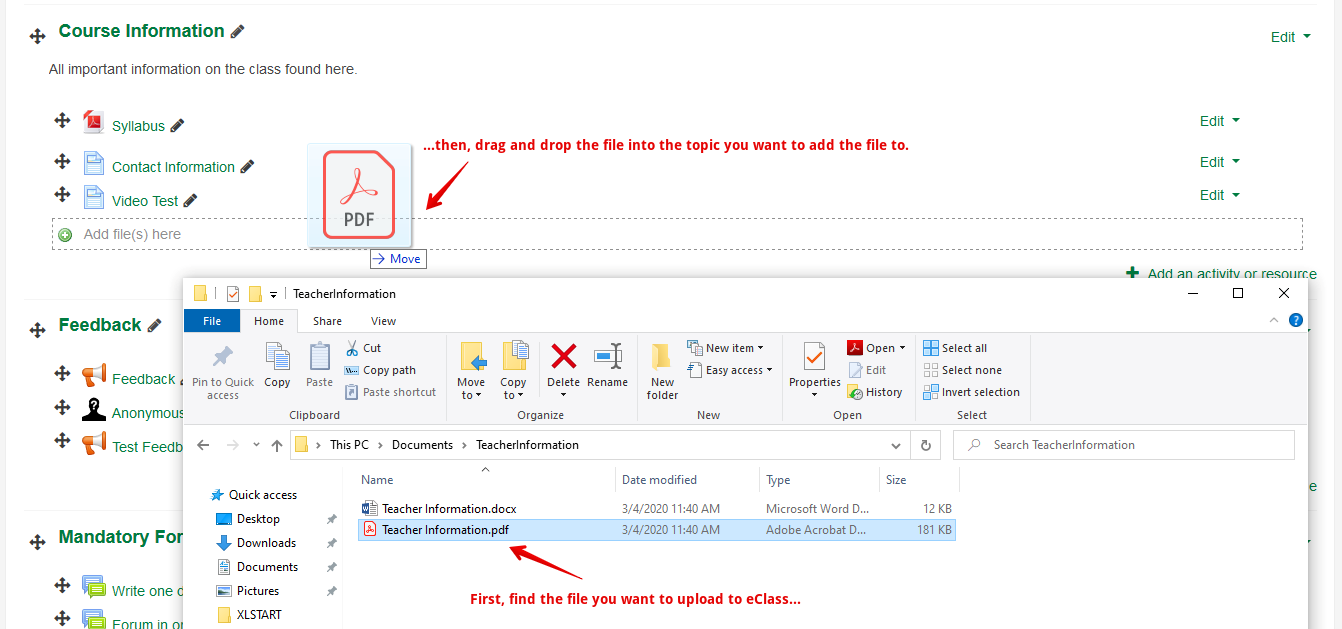
Dragging-and-Dropping Existing Files If you have a file such as a PDF, and you want to add it to your course page, then the easiest way of adding content would be to drag-and drop it into your course, where it will be added where you choose to drop it. To start this process, go into your course and make sure that you click on the Turn editing on button in the top-right of your course main page, below the gear icon.
To add a file, find the file you want to add. Then, if your course has topics, drag the file into the topic you want it in. If you don't have topics, just add it into the main page of your course.
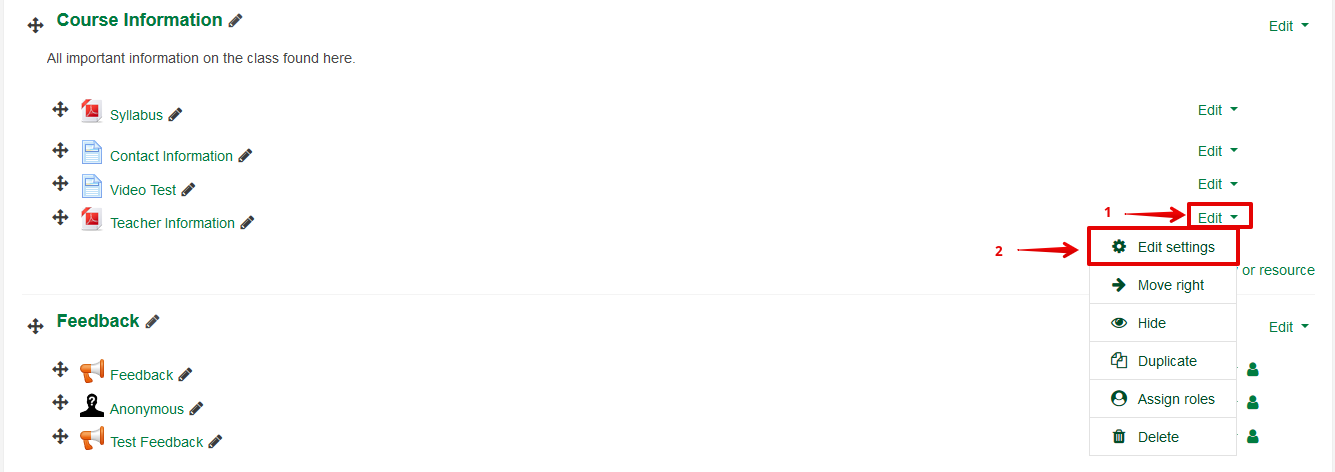
The file will then be added to your course. If you want to change the name and other settings, click on Edit next to the file you added, and in the drop-down menu that appears, click on Edit settings.
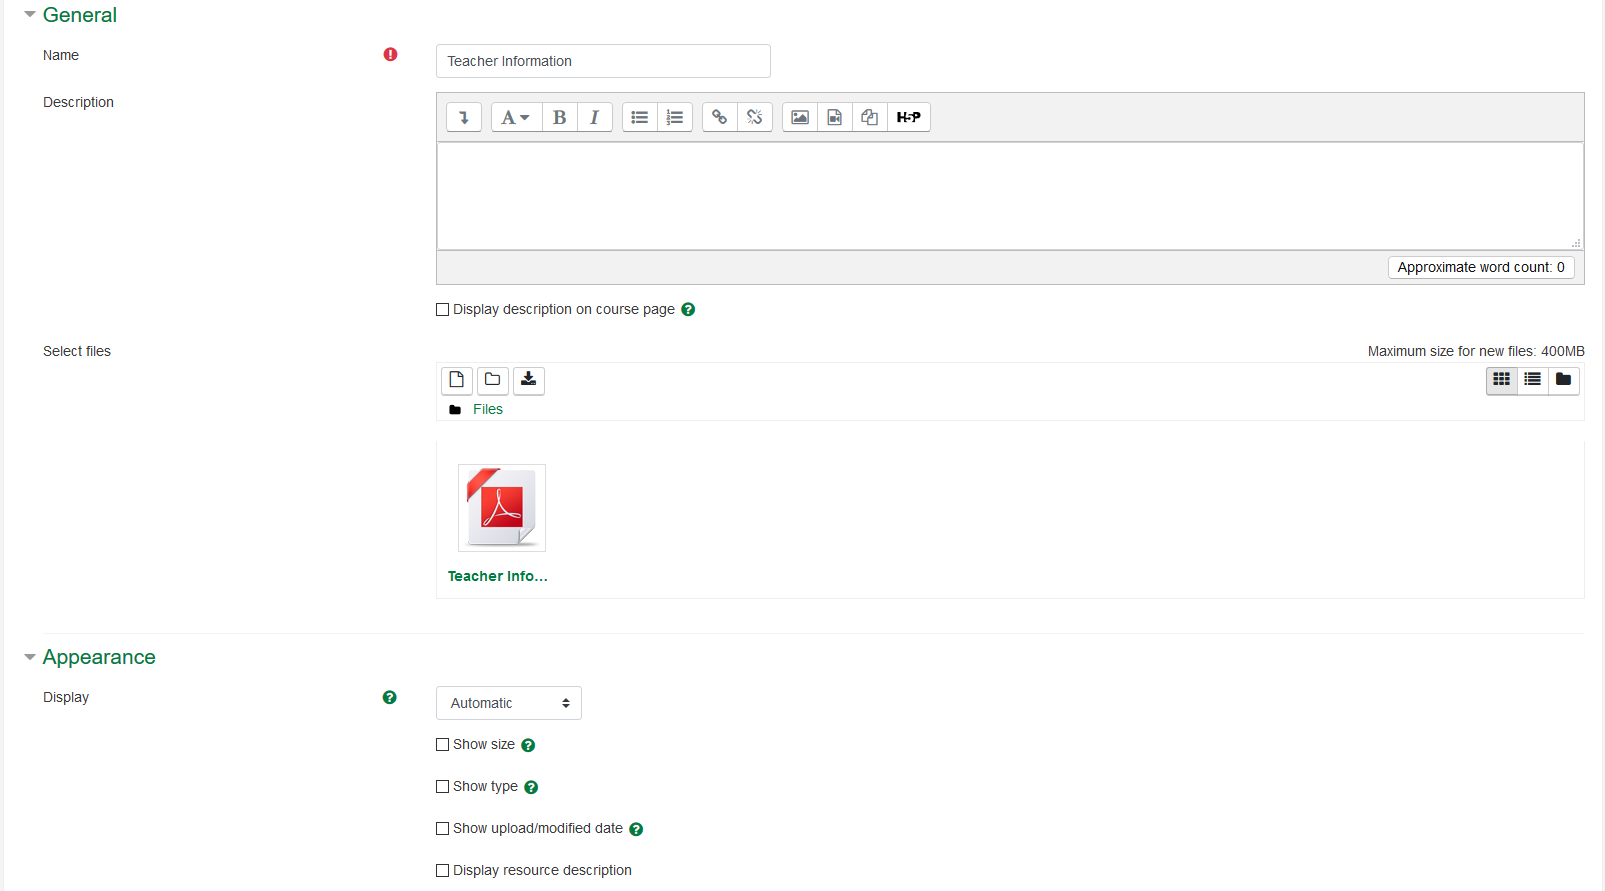
You will then be taken to a page of settings. Some important ones to look for are:
For more information about adding files, please see the following article: Adding Files. Adding activities and resources We recommend using HTML (Page resources) for content that you would need to update online regularly. These are easily entered online using the built-in eClass editor and can also be printed off by students. File resources would be a good choice if you already have a lot of documents created. File resources cannot be edited online so you must upload new versions of the files each time you make changes. Both these resource types are available in editing mode through the Add an activity or resource button.
Detailed instructions for adding pages can be found here. When you are adding resource content within eClass using the standard editor, ensure that you click the top left icon to show the full range of editing icons available as in the image below. The editor features most of the standard editing options. You can also copy and paste content into this editor. Most formatting will not be copied - the only formatting preserved should be bold, italic, and underlined text.
If you want to upload existing files (as File resources), we recommend that they be in PDF format. PDF files open automatically in the browser and cause fewer problems and less confusion. Existing PDF files can be added by drag-and-drop from your desktop or another folder, as shown above at the top of the article. You can find more information in the following article: Adding Files. When dragging and dropping files into the files area (see screenshots in Adding files article), ensure that you have the correct file format and the desired file name. eClass will attempt to detect the file type but if it is not explicit, it may identify the file type incorrectly which can cause users problems when viewing or downloading. Once added to your course, if you need to edit file information such as the name, license information or view file size and date, open editing by click on Edit > Edit settings on the right of the resource.
Then click on the file icon in the Content area.
Make required changes in the popup dialogue, and click update to save your changes.
| |
|
|