Blocks can be added on your main course page or on some activity and resource sub-pages. If you are using a small display and do not see any blocks on the right-hand side of your course, the block drawer may have been closed. You can restore the regular view by zooming out using the standard browser shortcuts of CMD/CTRL '-'.
Adding blocks:
1. Click on Edit mode at the top right of your course page:

2. Open the block drawer if necessary:

3. Click the Add a block link :

4. From the menu, click on the type of block that you would like to add. The block will be added automatically to the block drawer:

Editing block settings:
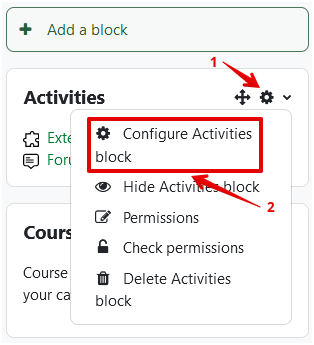
1. Click on the gear icon, then click, in this example, Configure Activities block to customize the block.
2. Each block has a standard set of customizations that are the same for each element:
-
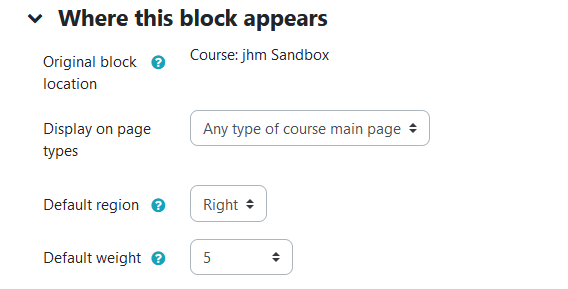
- Where this block appears:
- "Original block location" - This is the original location where the block was created. Block settings may cause it to appear in other locations (contexts) within the original location. For example, a block created on a course page could be displayed in activities within that course. A block created on the front page can be displayed throughout the site.
- "Display on page types" - Determines what page types you want your block to be displayed. You can choose any of the following: 'Any page', 'Any course page', or 'Any type of course main page'.
- "Default region" - Themes may define one or more named block regions where blocks are displayed. This setting defines which of these you want this block to appear in by default. The region may be overridden on specific pages if required.
- "Default weight" - Allows you to choose roughly where you want the block to appear in the chosen region, either at the top or the bottom. The final location is calculated from all blocks in that region. For example, only one block can actually be at the top. This value can be overridden on specific pages if required.
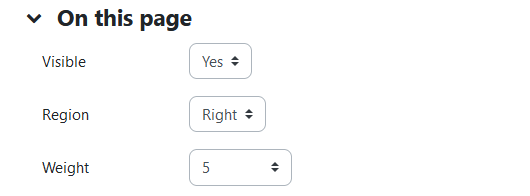
- On this page:
- "Visible" - Toggles whether or not the block will be visible on the current page you’re on.
- "Region" - Toggles where you want the block to be displayed on the current page you’re on.
- "Weight" - Allows you to choose roughly where you want the block to appear in the chosen region on the current page you’re on.
3. Set the customizations for each area and save it when you are done.
Moving blocks:
Blocks can be dragged and dropped to different areas of the screen when in Edit mode.
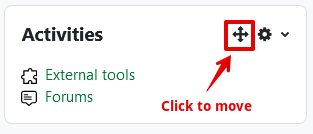
1. Click and hold on the four-headed arrow to drag-and-drop the block to where you need it.
Depending on your browser settings, you may not be able to drag-and-drop, and may have to move blocks manually.
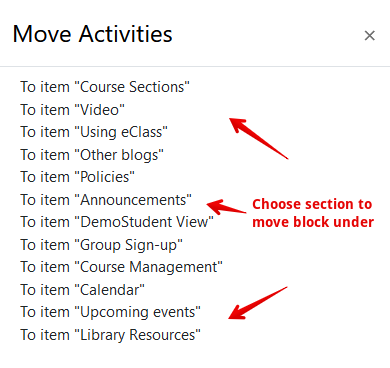
2. If you simply click on the four-headed arrow, you can select the location to move it.
3. Click on the location under which you would like the block moved:
Detailed Descriptions of Blocks:
Some blocks have detailed articles explaining their function: