|
Managing Student Assignments in Assign2
Last modified on 19 September 2023 07:14 PM
|
|
|
This article describes how instructors can manage their Assign2 assignments, ensure students have access to the assignment, adjust due dates, and release grades and feedback to students. See Creating Online Assignments Using Assign2 for details on setting up these assignments along with an overview of the tool. Note that these details refer to the Homework type of assessment, not the in-person PDF type.
Contents:
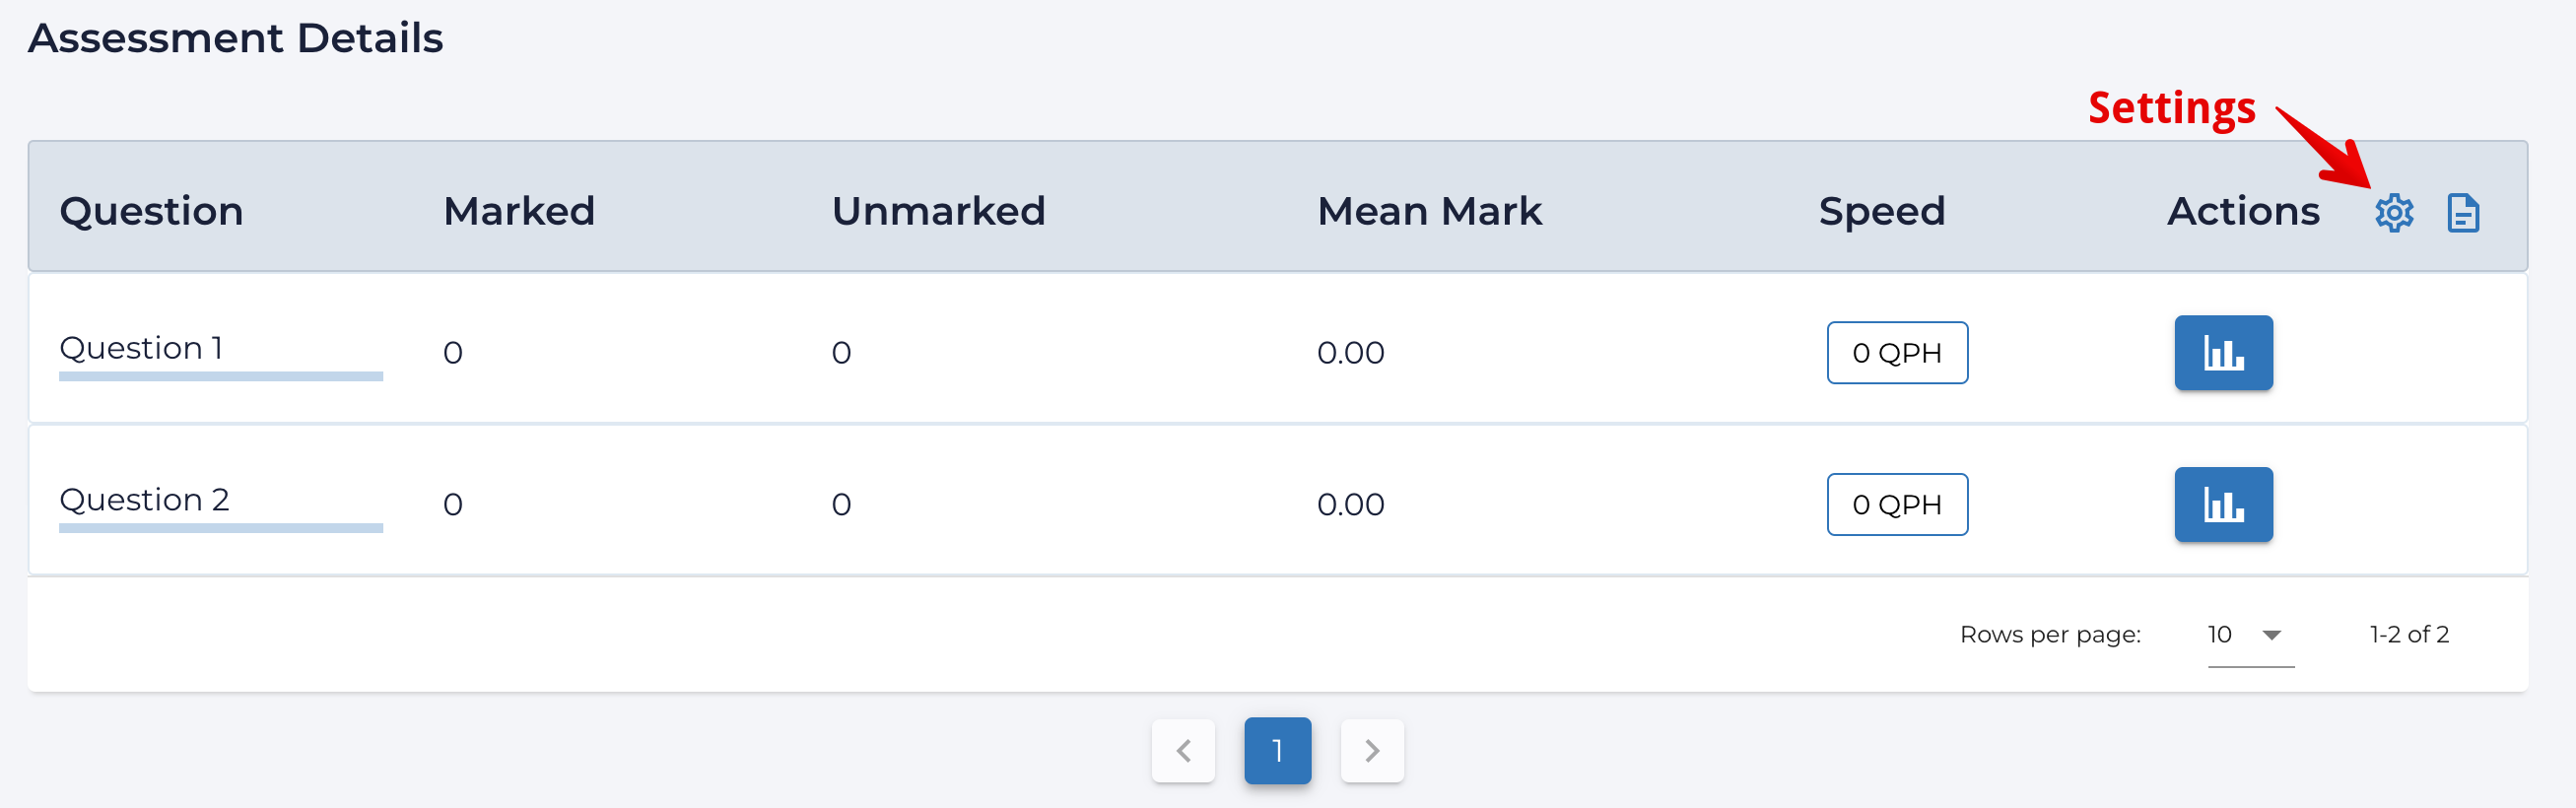
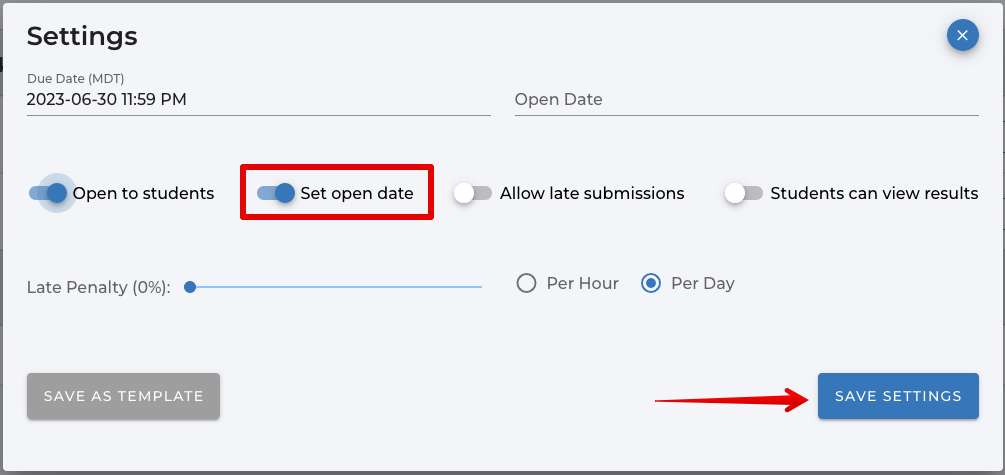
Giving Students Access to Assignments Once your assignment has been saved, it’s important to ensure your students can access the assignment. Assignments can be made available to students manually by toggling 'Open to students':
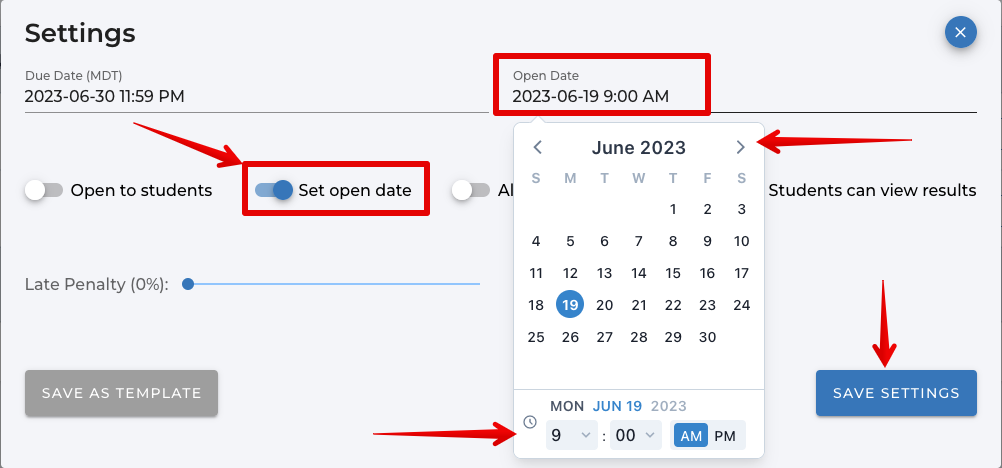
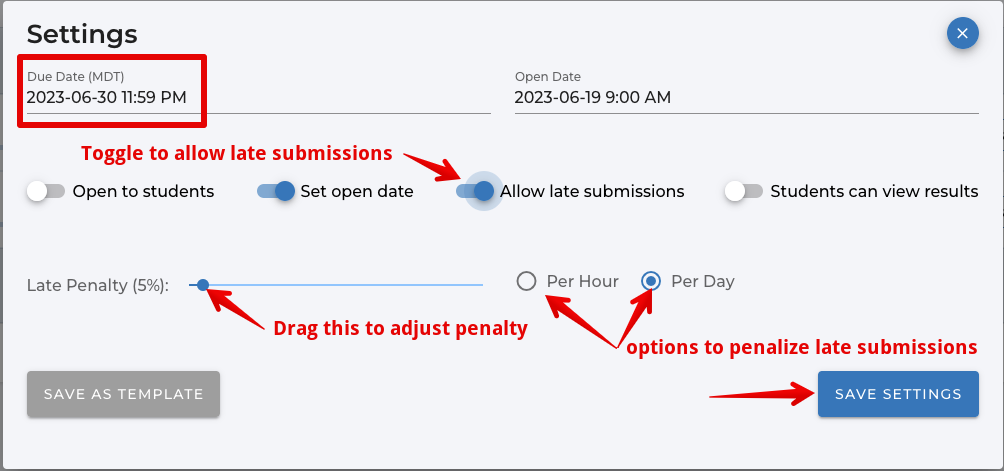
Assignments can also be set to open at a specific time through 'Set open date' (available by updating the settings after the assignment has been created) and then entering the date and time when the assessment should automatically toggle open for student access:
Note: Date and time settings are set to the user's local time so instructors not in Edmonton will need to adjust their deadlines accordingly. eg. if an instructor is working remotely from Ontario and they want an exam to open at 8PM, they would need to set it to open at 10PM in their interface.
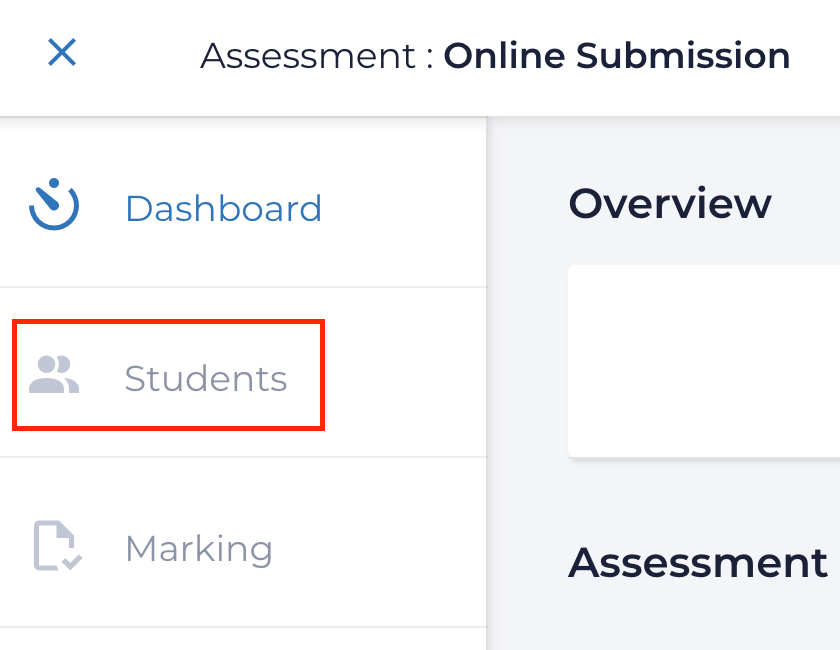
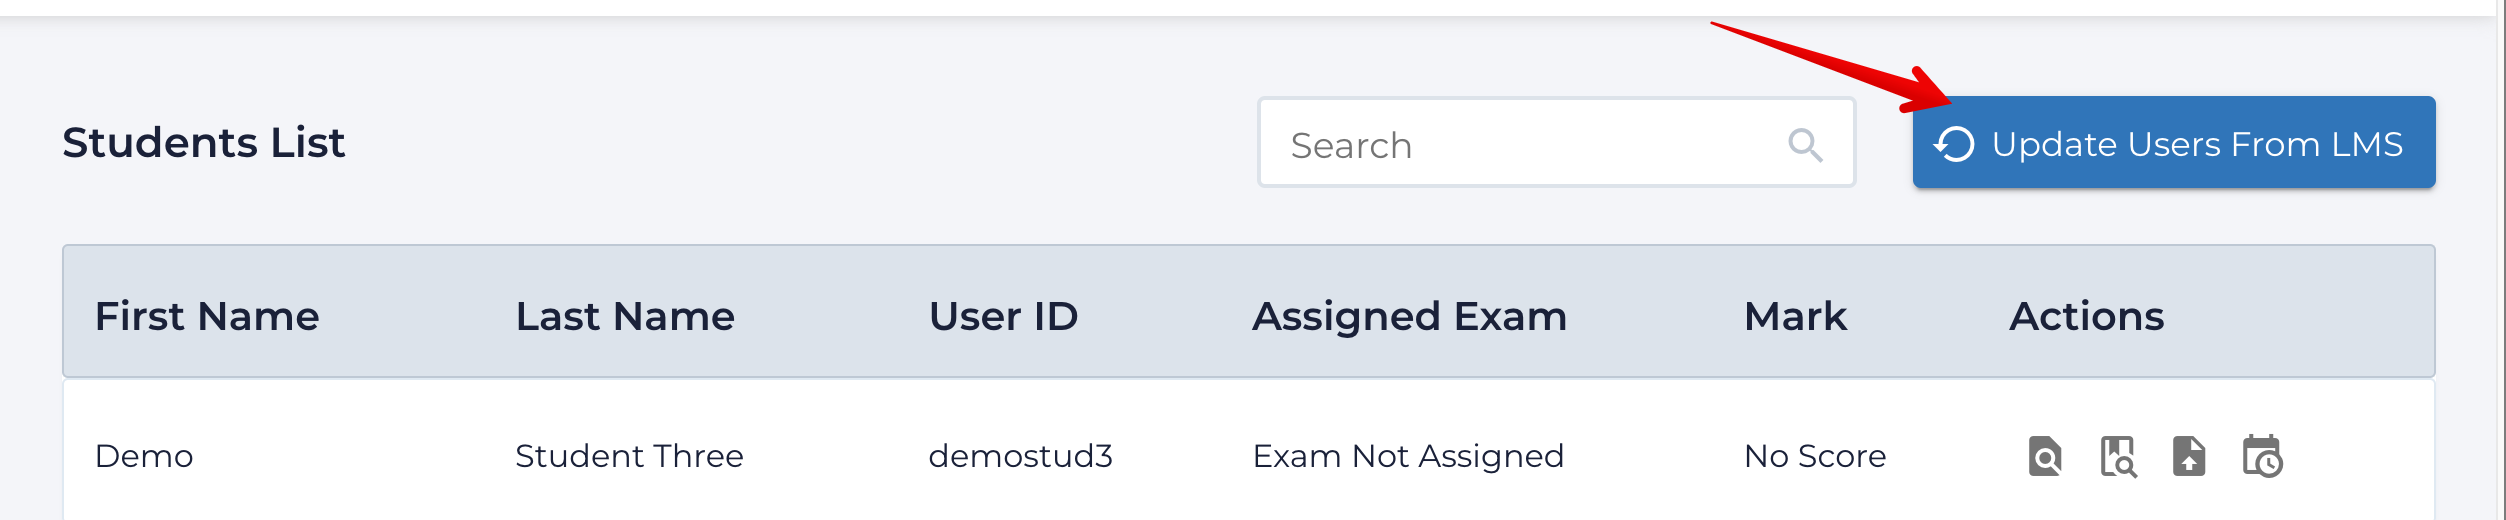
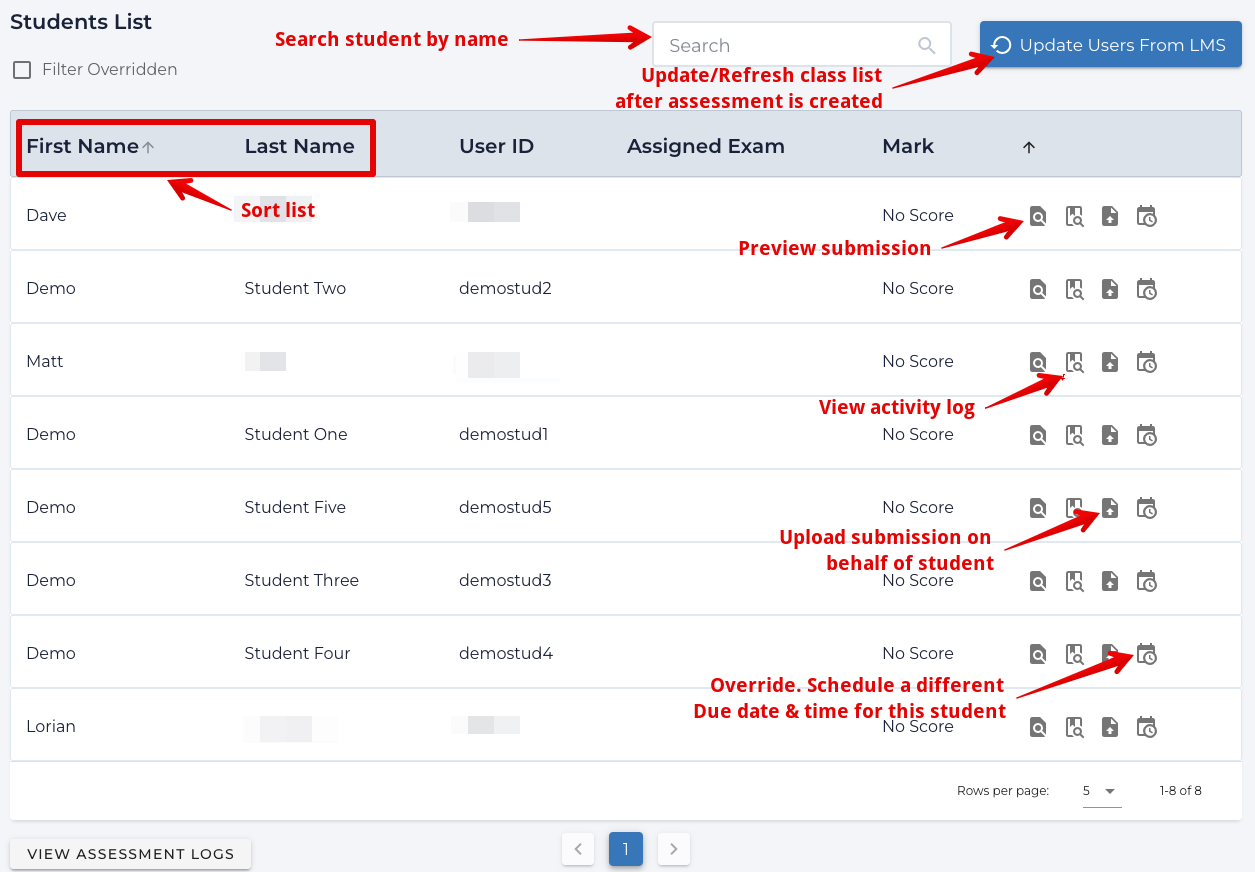
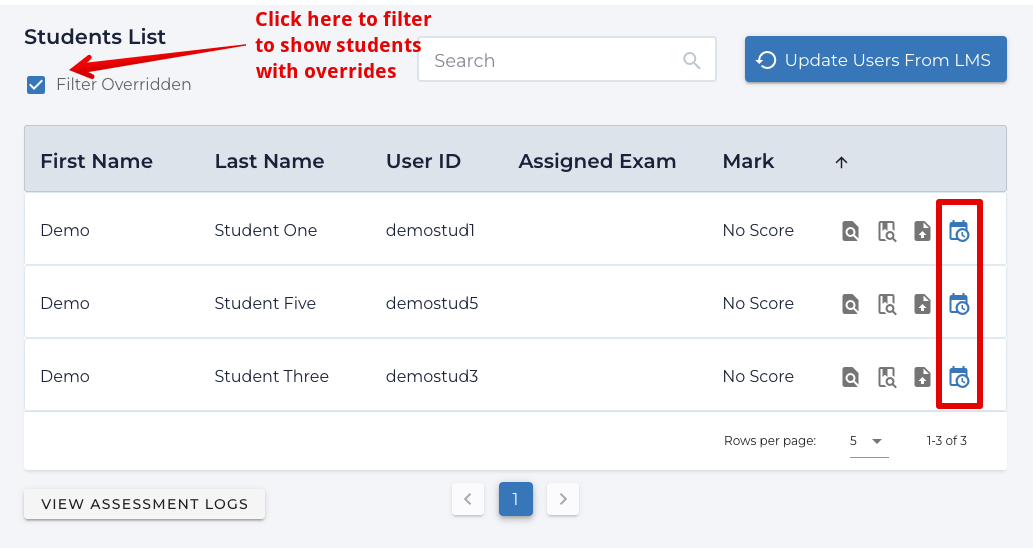
Students are automatically populated in Assign2 when an assessment is created. Please note: a known issue prevents student lists from populating when access restrictions are set on the external tool link. Instructors can hide assessments and release them manually as a workaround. Your class list will be displayed in the “Students" tab in your dashboard:
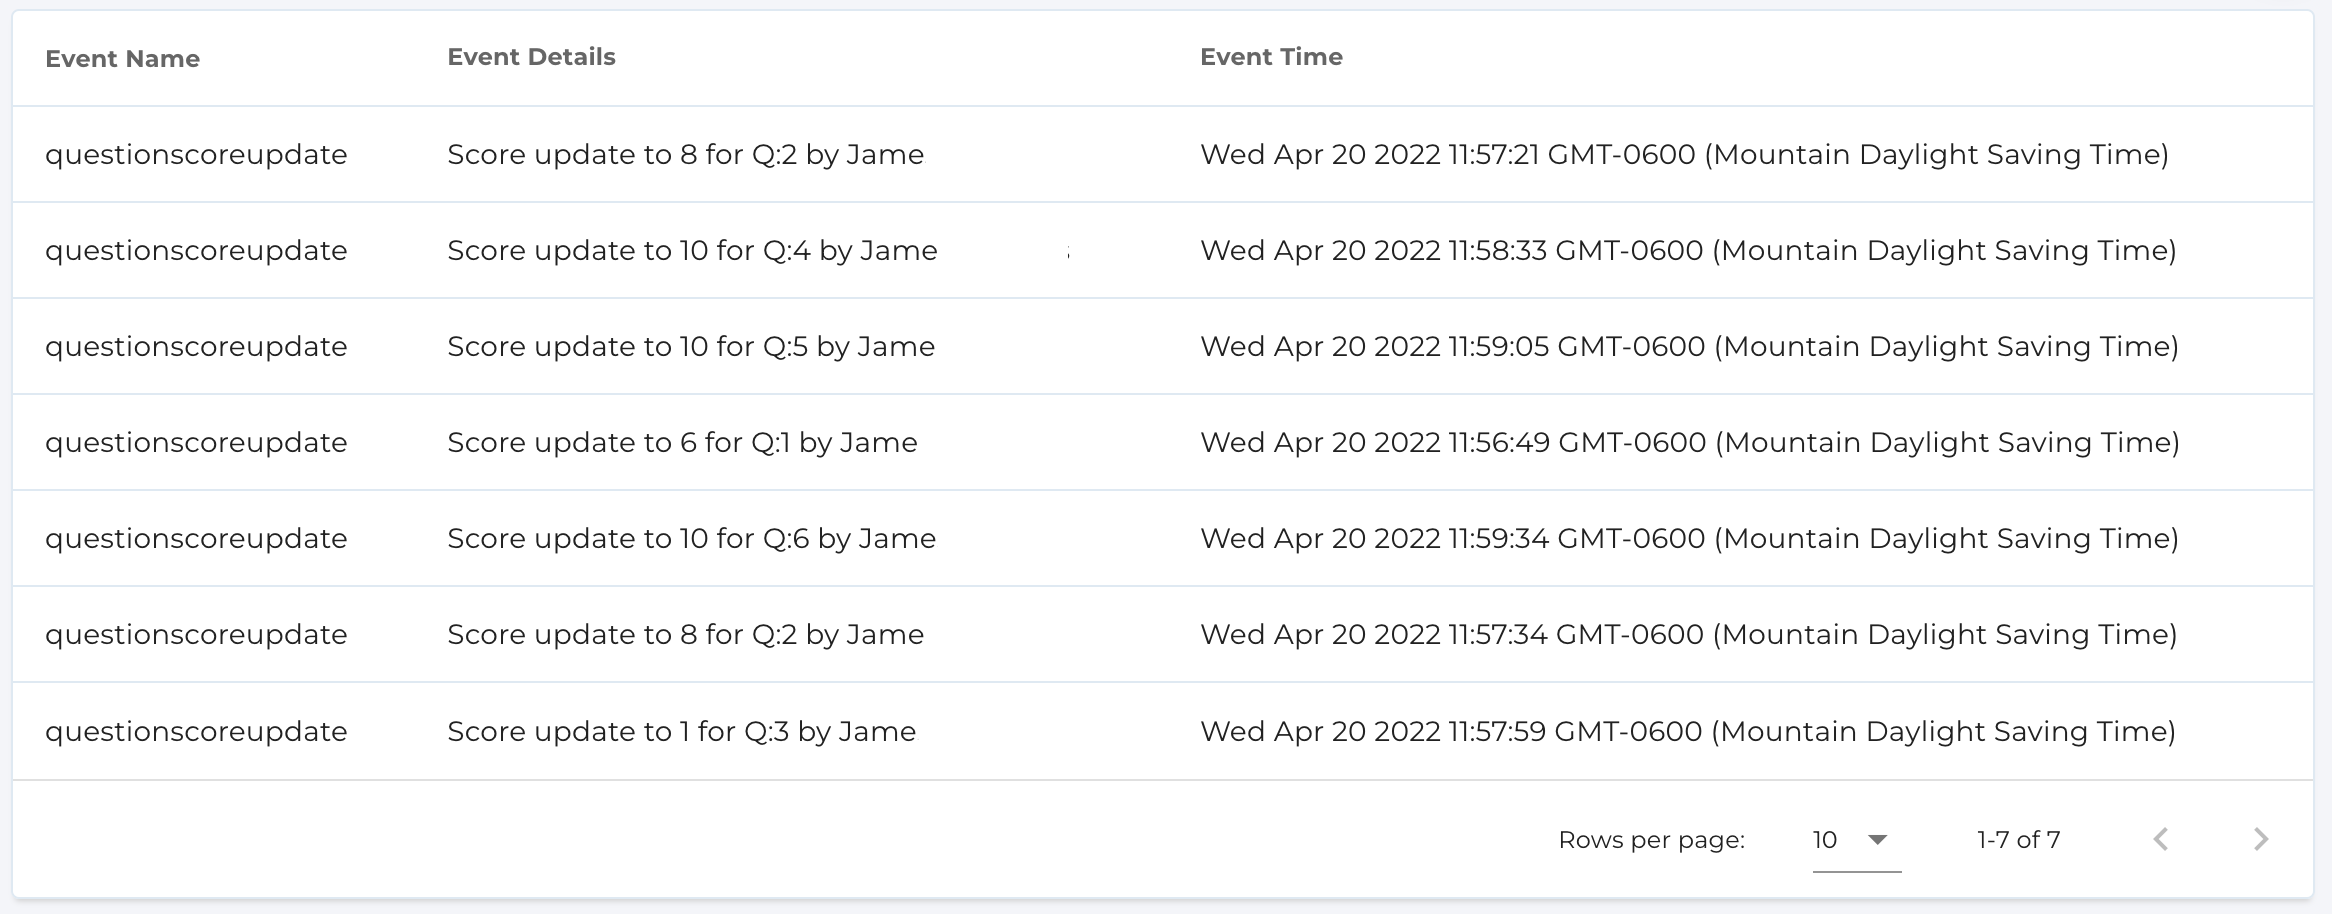
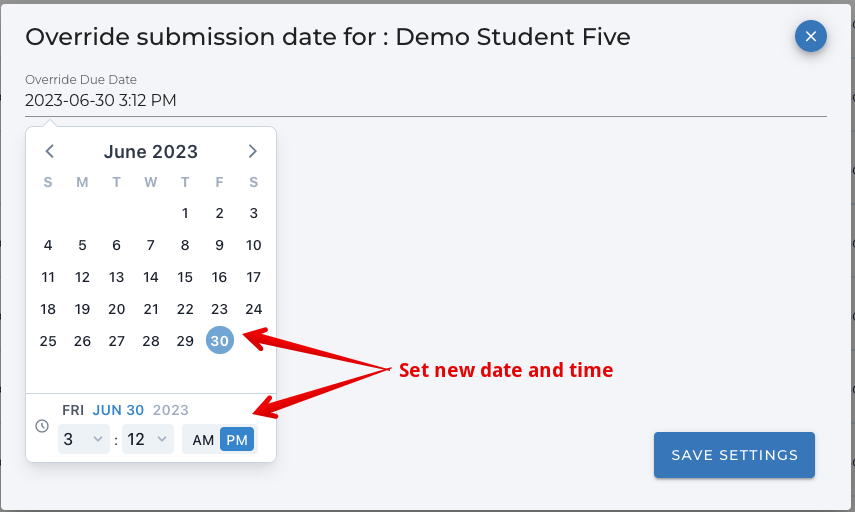
The students table has several features:
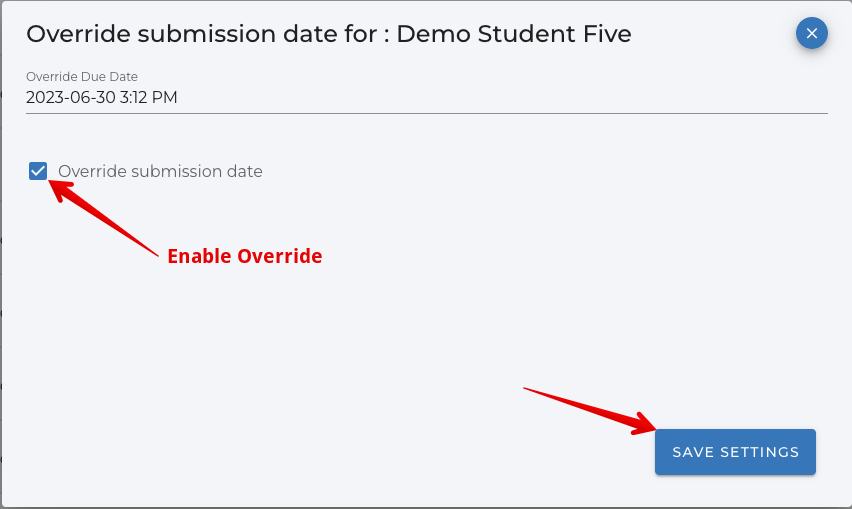
If you need to change the date or time the assignment is due or change whether or not late submissions are allowed, follow these steps:
Once all of the assignments are marked instructors can release the grades to students by pushing the scores to the eClass gradebook; students can also be shown their in-context marks and any added feedback for each question directly in Assign2 (see below). Note that once grades have been pushed from Assign2 to eClass, it is no longer possible to adjust the total score for the grade item in the tool settings so ensure this is correct before proceeding. Before releasing grades, ensure that on the Dashboard page, the "Fully Marked" column matches the "Total Exams" column.
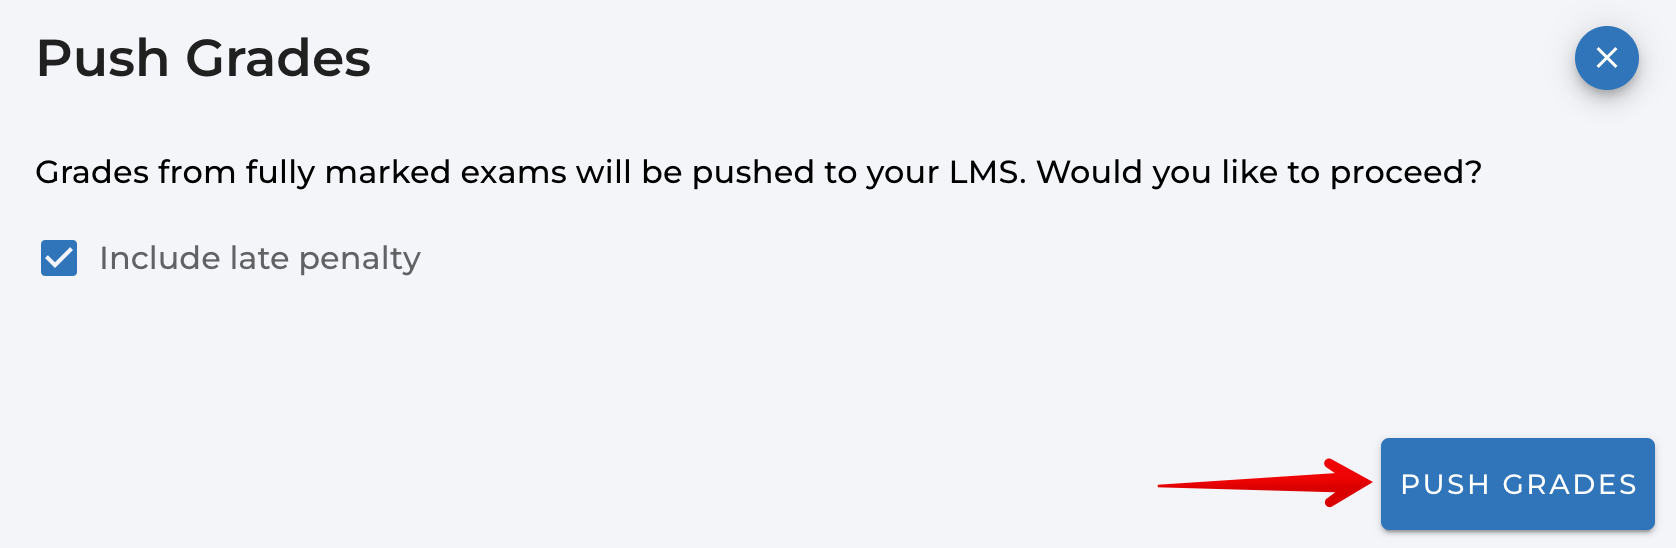
Once all exams are marked scores must be transferred to the eClass by clicking Push Grades. This will upload each student’s mark for the assignment into the gradebook in eClass. Students will see their total mark received on the assignment in Gradebook unless you have grades set as hidden. On your Dashboard, click the icon to the right of 'Fully Marked' to Push Grades:
An overlay will confirm if you would like to proceed and give the option to inlcude or exclude late penalties. Click “Push Grades” to confirm the action:
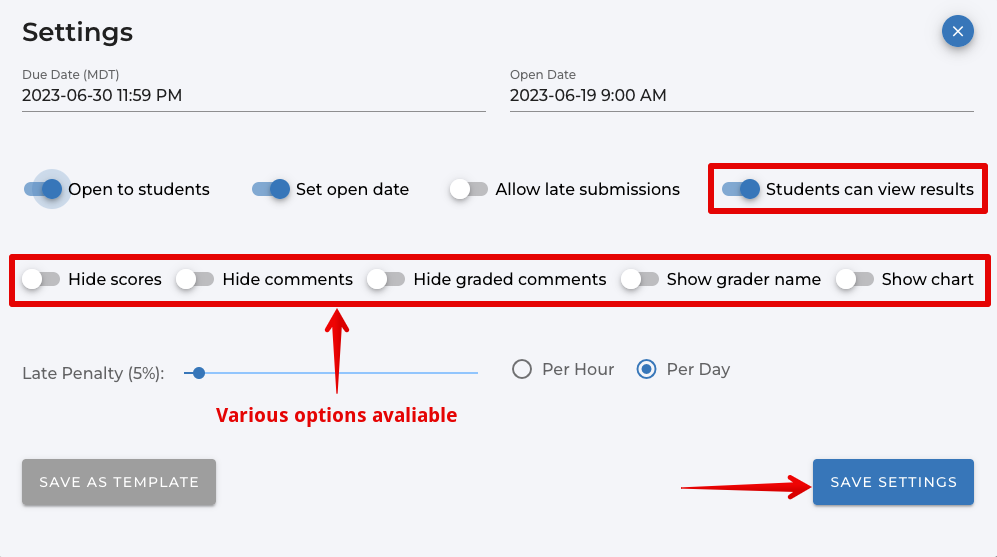
Making Grades AND Feedback Visible within Assign2 Instructors can allow students to view the mark they received on each individual question as well as any feedback or annotations you provided in Assign2 (in addition to seeing their total score in the course gradebook). Important note: displaying this contextual feedback to students will prevent any further submissions from being made for that particular assessment so this action should ONLY be taken after all students have completed their work. To do this:
Note: Students do not automatically receive a notification that this has been done so you will need to let them know that their results are now available for review in Assign2. When they click on the assignment in eClass again it will take them directly to their results. | |
|
|
Knowledgebase: Online Assessment


Comments (0)