|
Adding Blocks
Last modified on 15 August 2025 03:24 PM
|
|
|
NOTICE: Please be advised that the content of this article may only be relevant for users concluding the final stages of course work on eClass or for users on the eClass External system. The eClass Learning Management System is currently in a read-only state that prohibits new courses, enrollments, and users from being added to the site. Credit courses and co-curricular courses at the UofA are now being delivered on Canvas, and full articles on how to use Canvas can be found here.
Blocks can be added on your main course page or on some activity and resource sub-pages. If you are using a small display and do not see any blocks on the right-hand side of your course, the block drawer may have been closed. You can restore the regular view by zooming out using the standard browser shortcuts of CMD/CTRL '-'. Contents:
Adding blocks:1. Click on Edit mode at the top right of your course page:
2. Open the block drawer if necessary:
3. Click the Add a block link :
4. From the menu, click on the type of block that you would like to add. The block will be added automatically to the block drawer:
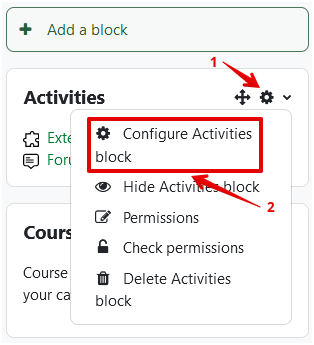
1. Click on the gear icon, then click, in this example, Configure Activities block to customize the block.
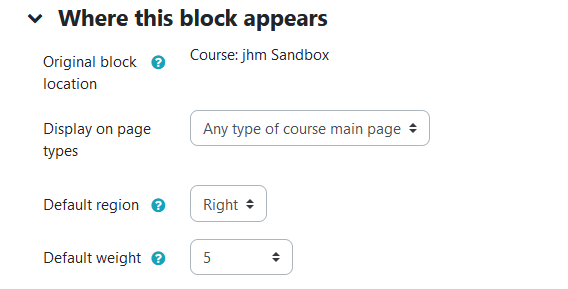
2. Each block has a standard set of customizations that are the same for each element:
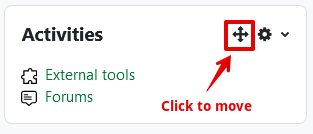
3. Set the customizations for each area and save it when you are done. Moving blocks:Blocks can be dragged and dropped to different areas of the screen when in Edit mode. 1. Click and hold on the four-headed arrow to drag-and-drop the block to where you need it. Depending on your browser settings, you may not be able to drag-and-drop, and may have to move blocks manually. 2. If you simply click on the four-headed arrow, you can select the location to move it.
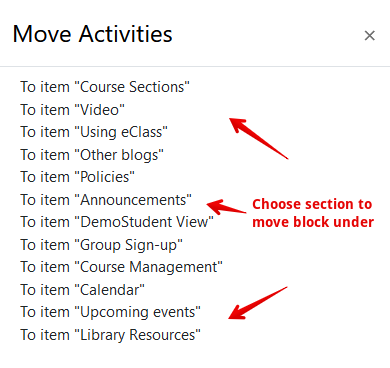
3. Click on the location under which you would like the block moved:
Detailed Descriptions of Blocks: Some blocks have detailed articles explaining their function: | |
|
|