|
Using Groups in Canvas
Last modified on 15 October 2025 12:54 PM
|
||||||
|
Participants in a Canvas course can be divided into groups much like in eClass (Moodle) however there are some key differences which will be outlined in this article. Most notable is that it is NOT possible to have anonymous groups - if placed in groups, students will be able to see and interact with their group mates and use all the features available on the groups home page. This CANNOT be disabled. New in August 2025, Canvas has introduced new functionality called Differentiation Tags to cover some of the different use cases provided by groups in eClass. See below for usage information. Contents:
Functional Differences Between Canvas and Moodle
Creating Groups (Canvas how-to articles)The basic practices for creating groups are well documented in the Canvas guides:
Additional notes:
Group Self-Sign UpIt is possible to allow students to easily sign up for a group; however, this option will only be available to students if the People in the course left navigation tab is visible. When students visit the People tab, they will see groups with the option to join. Group Home Page FunctionsOnce groups have been created, students in them will have access to a Group Home Page with functions similar to those found at the course level. The Group Home Page cannot be disabled. Group home pages are always visible to and can be moderated by course instructors.
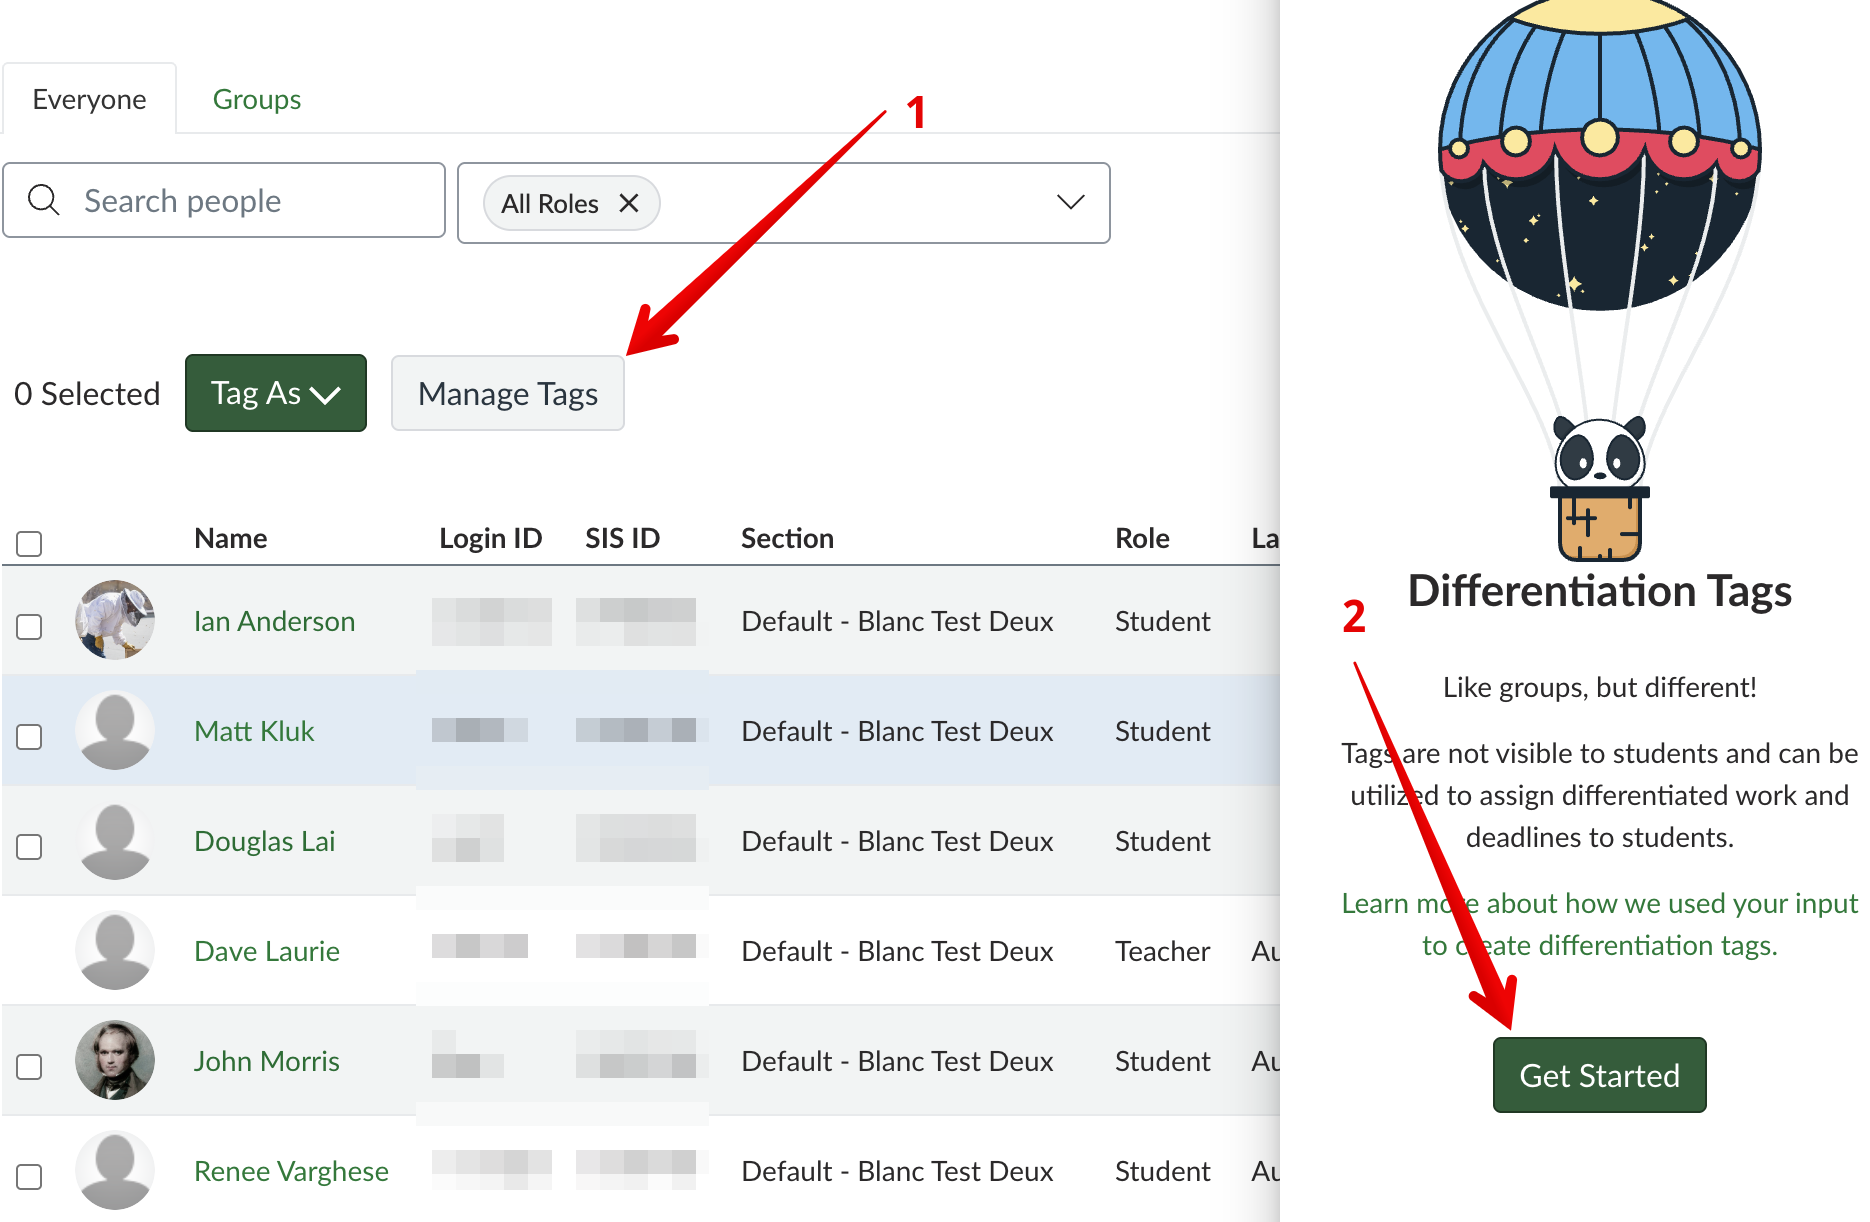
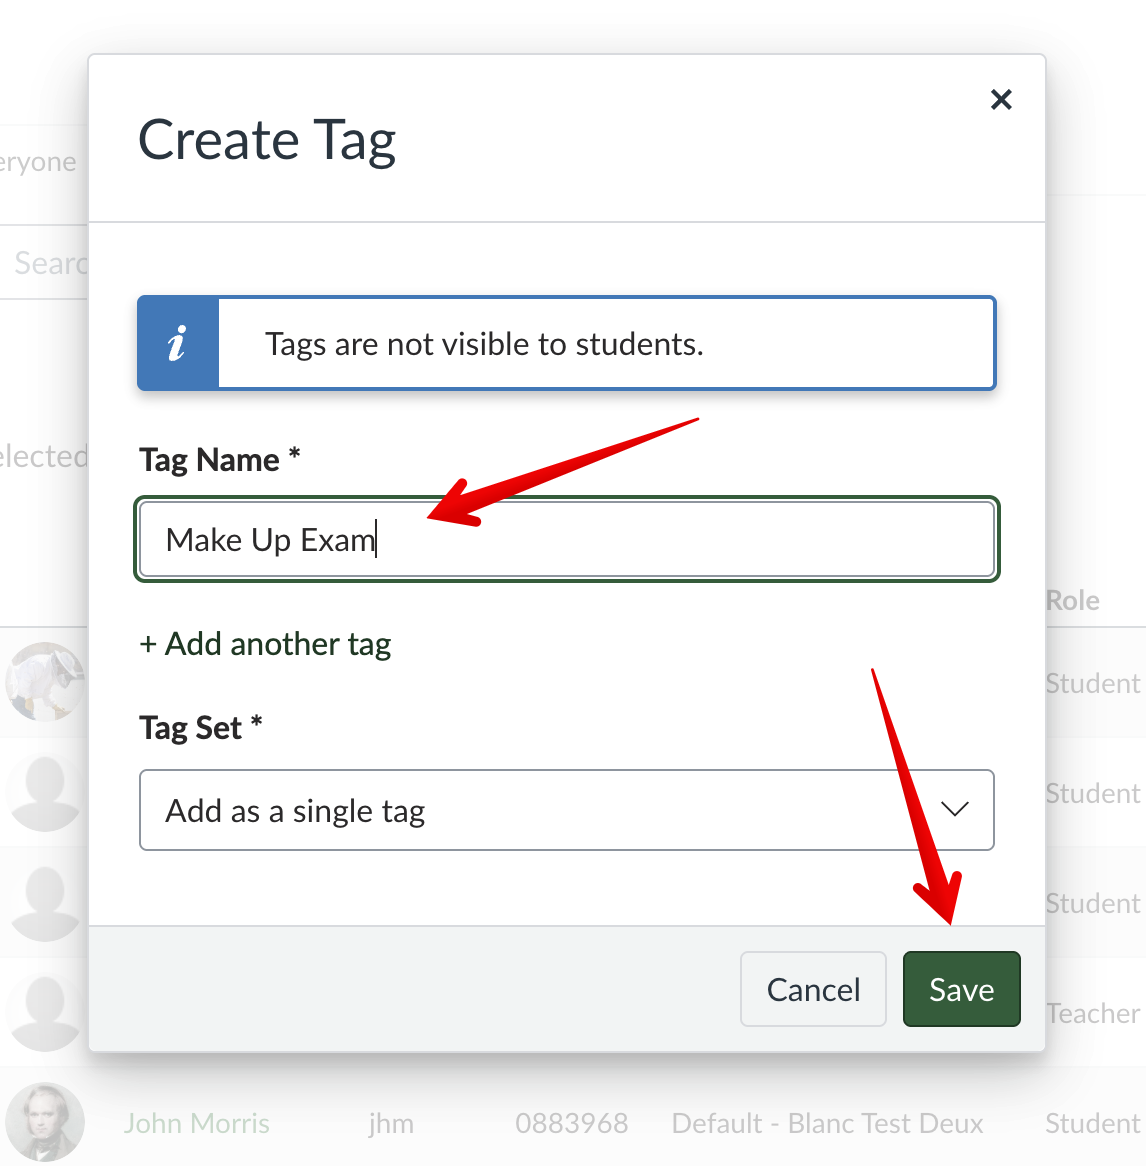
Group AssignmentsWhen configuring an assignment as a group assignment, it's important to have groups established prior to publishing, and in order to prevent submissions from ungrouped students, assign it to groups rather than everyone. For details, see the note in the KB article Using Canvas Assignments. It is not possible to assign quizzes or assignments only to a specific group. This can be accomplished with differentiation tags. Differentiation TagsThis function in Canvas allows instructors to create functional groupings of students in their courses as an alternative to manipulating course Sections or using Groups. Differentiation Tags are managed in the People section of a course. Click Manage Tags, then Get Started:
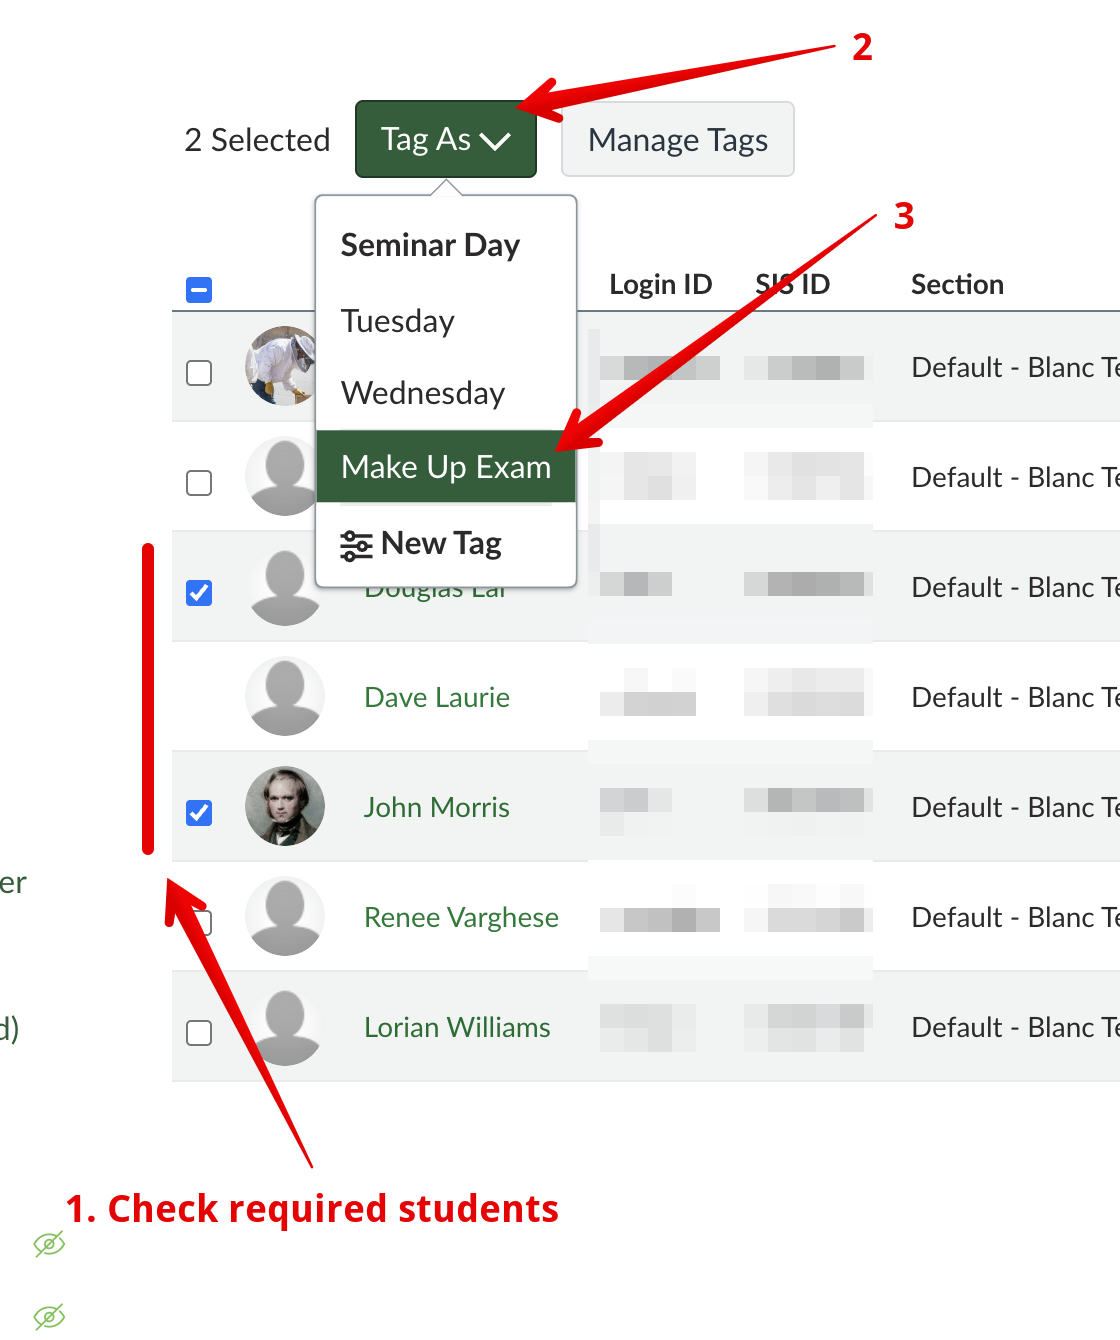
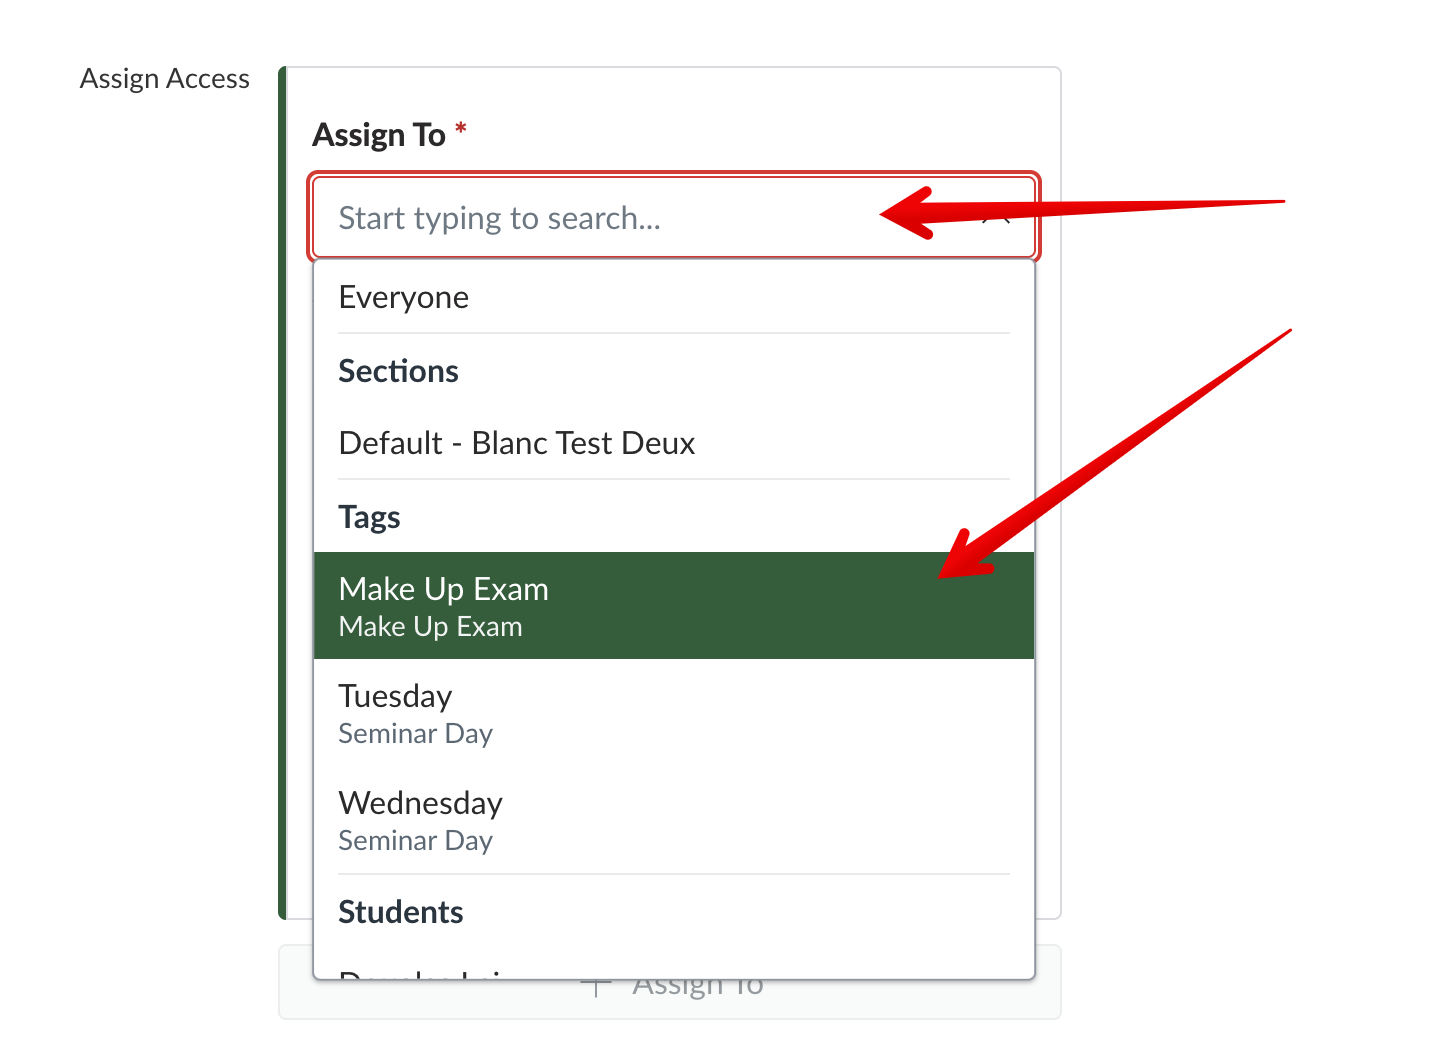
This tag could now be used in the Assign to box of any assignment to make that item visible ONLY to the students who are tagged:
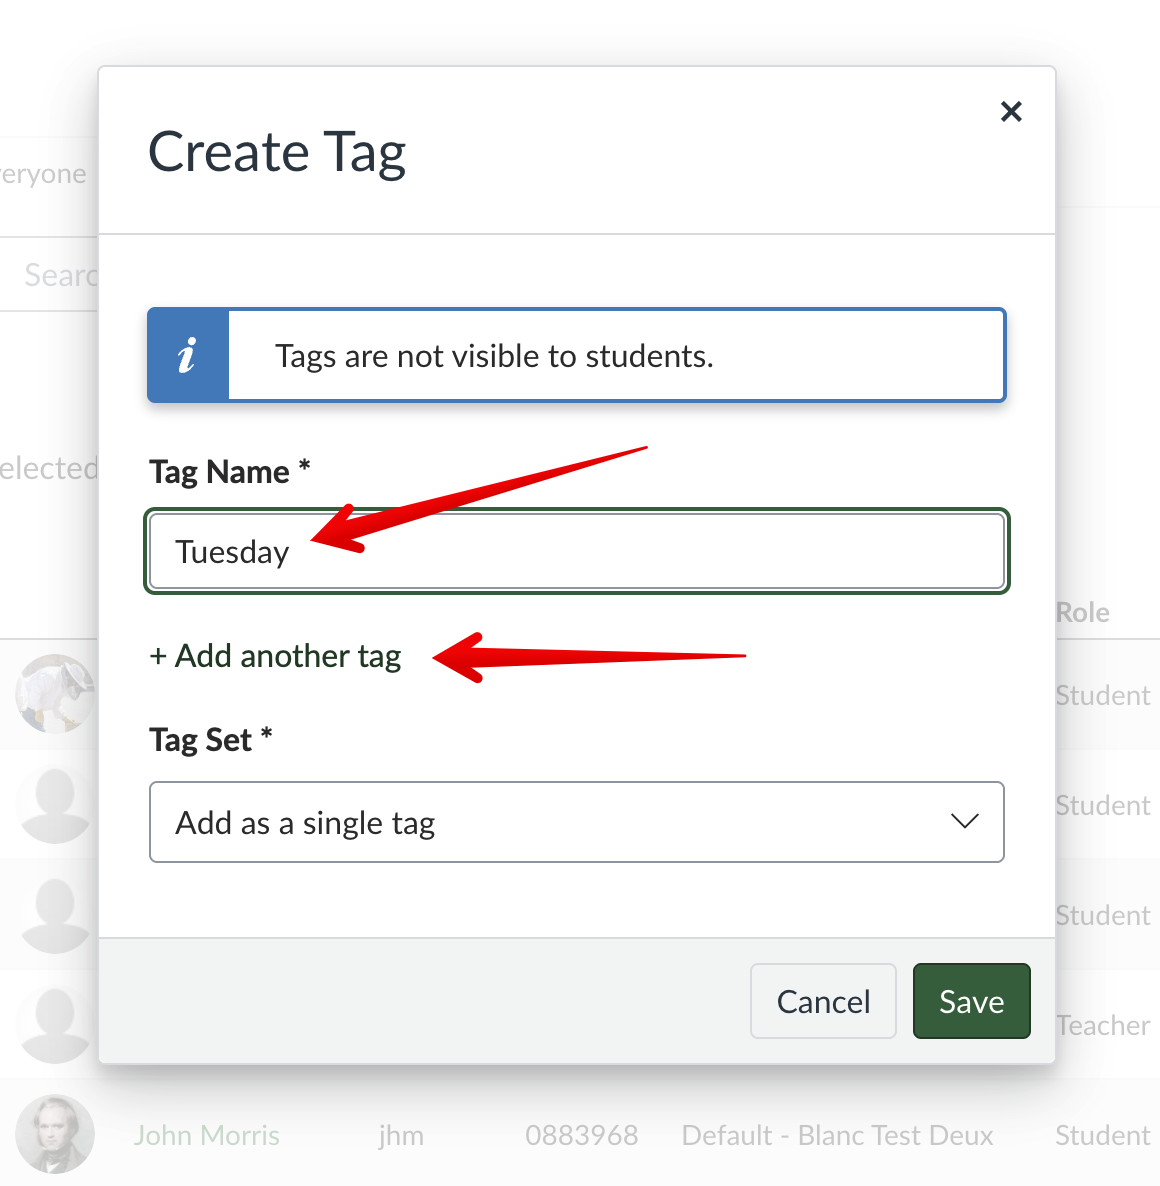
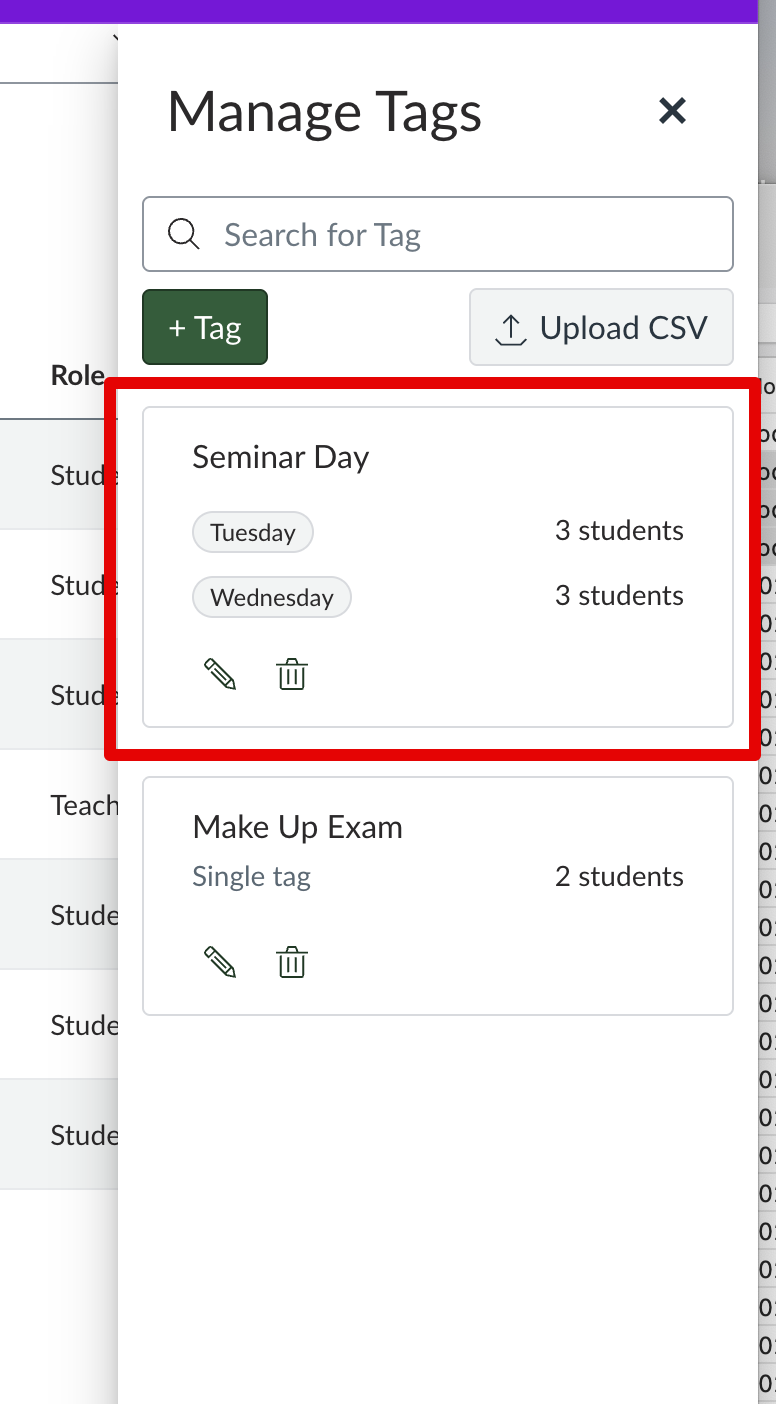
It is also possible to build sets of tags to further organize the tags for use cases where students would all be sorted into one particular tag within the set. This is done in the same 'Create tag' interface by entering a first Tag Name and then clicking + Add another tag:
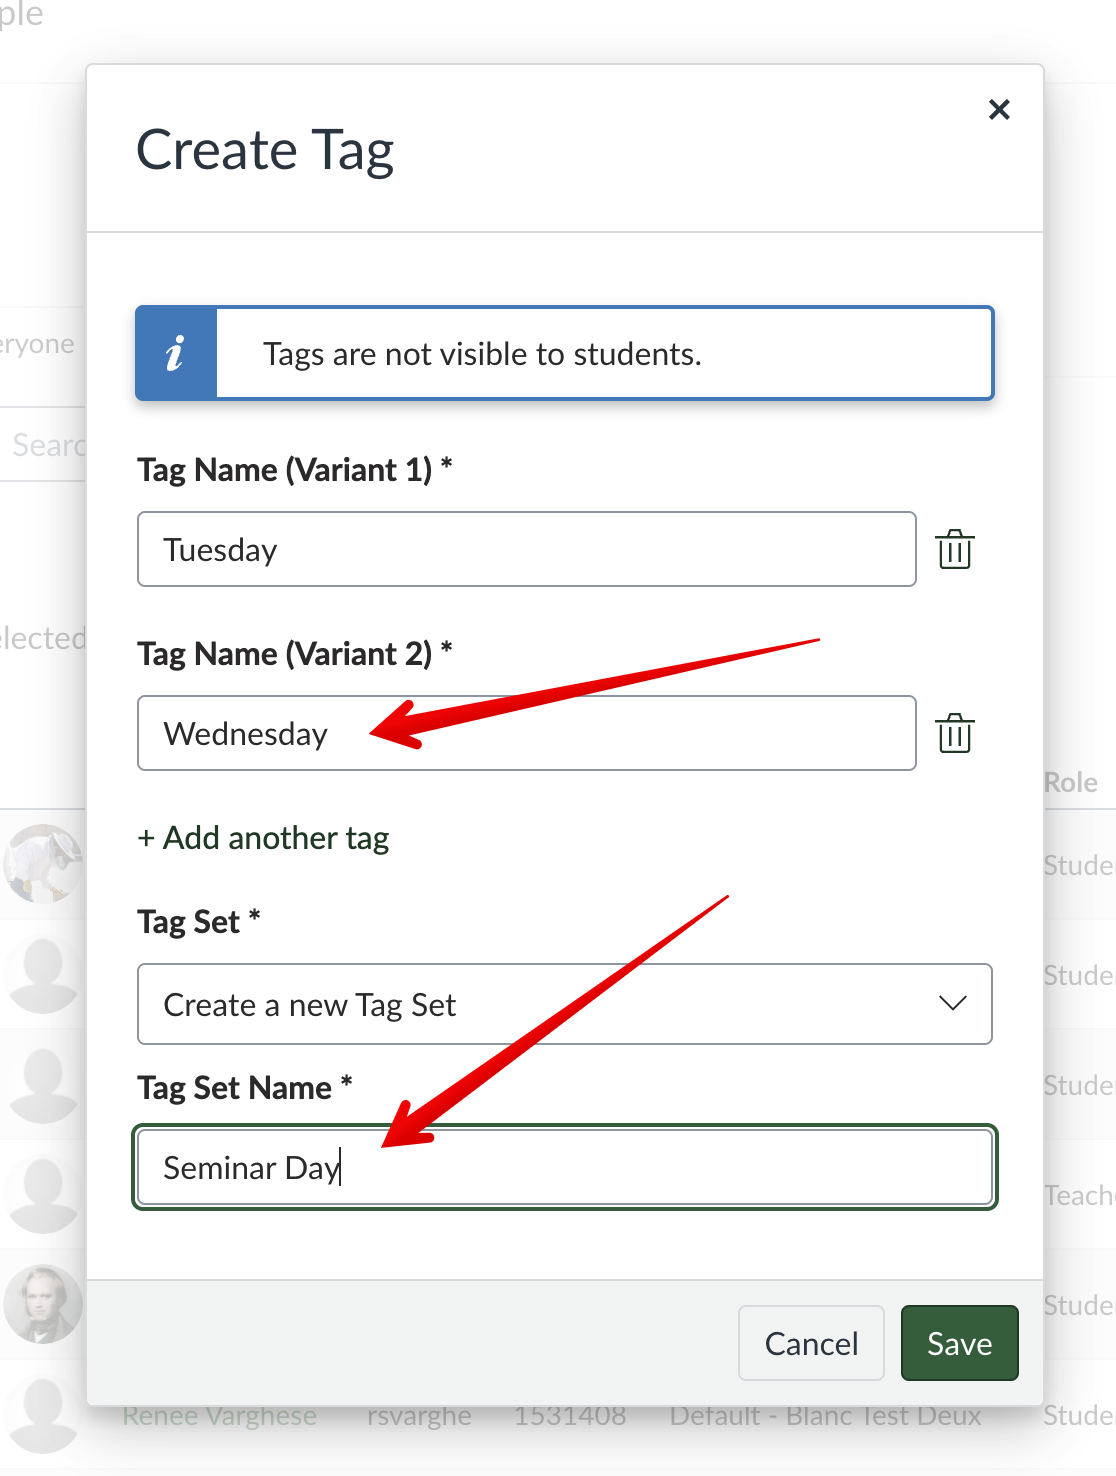
This will expand the interface and allow users to enter additional tags and then enter the Tag Set Name:
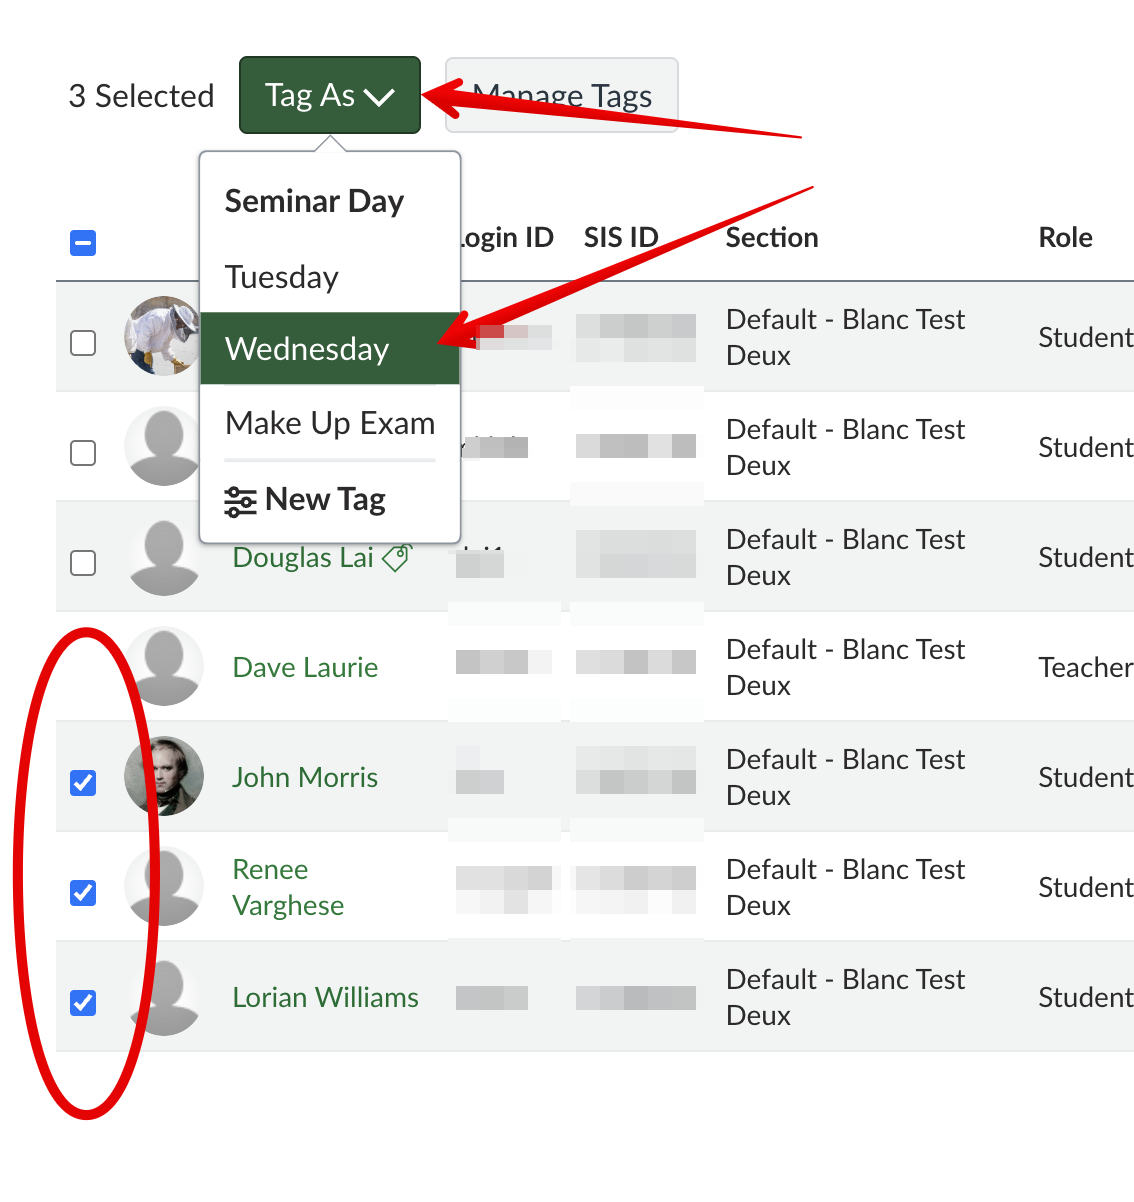
These can be added to students in the same way and they are then displayed under the set in the Manage Tags overlay:
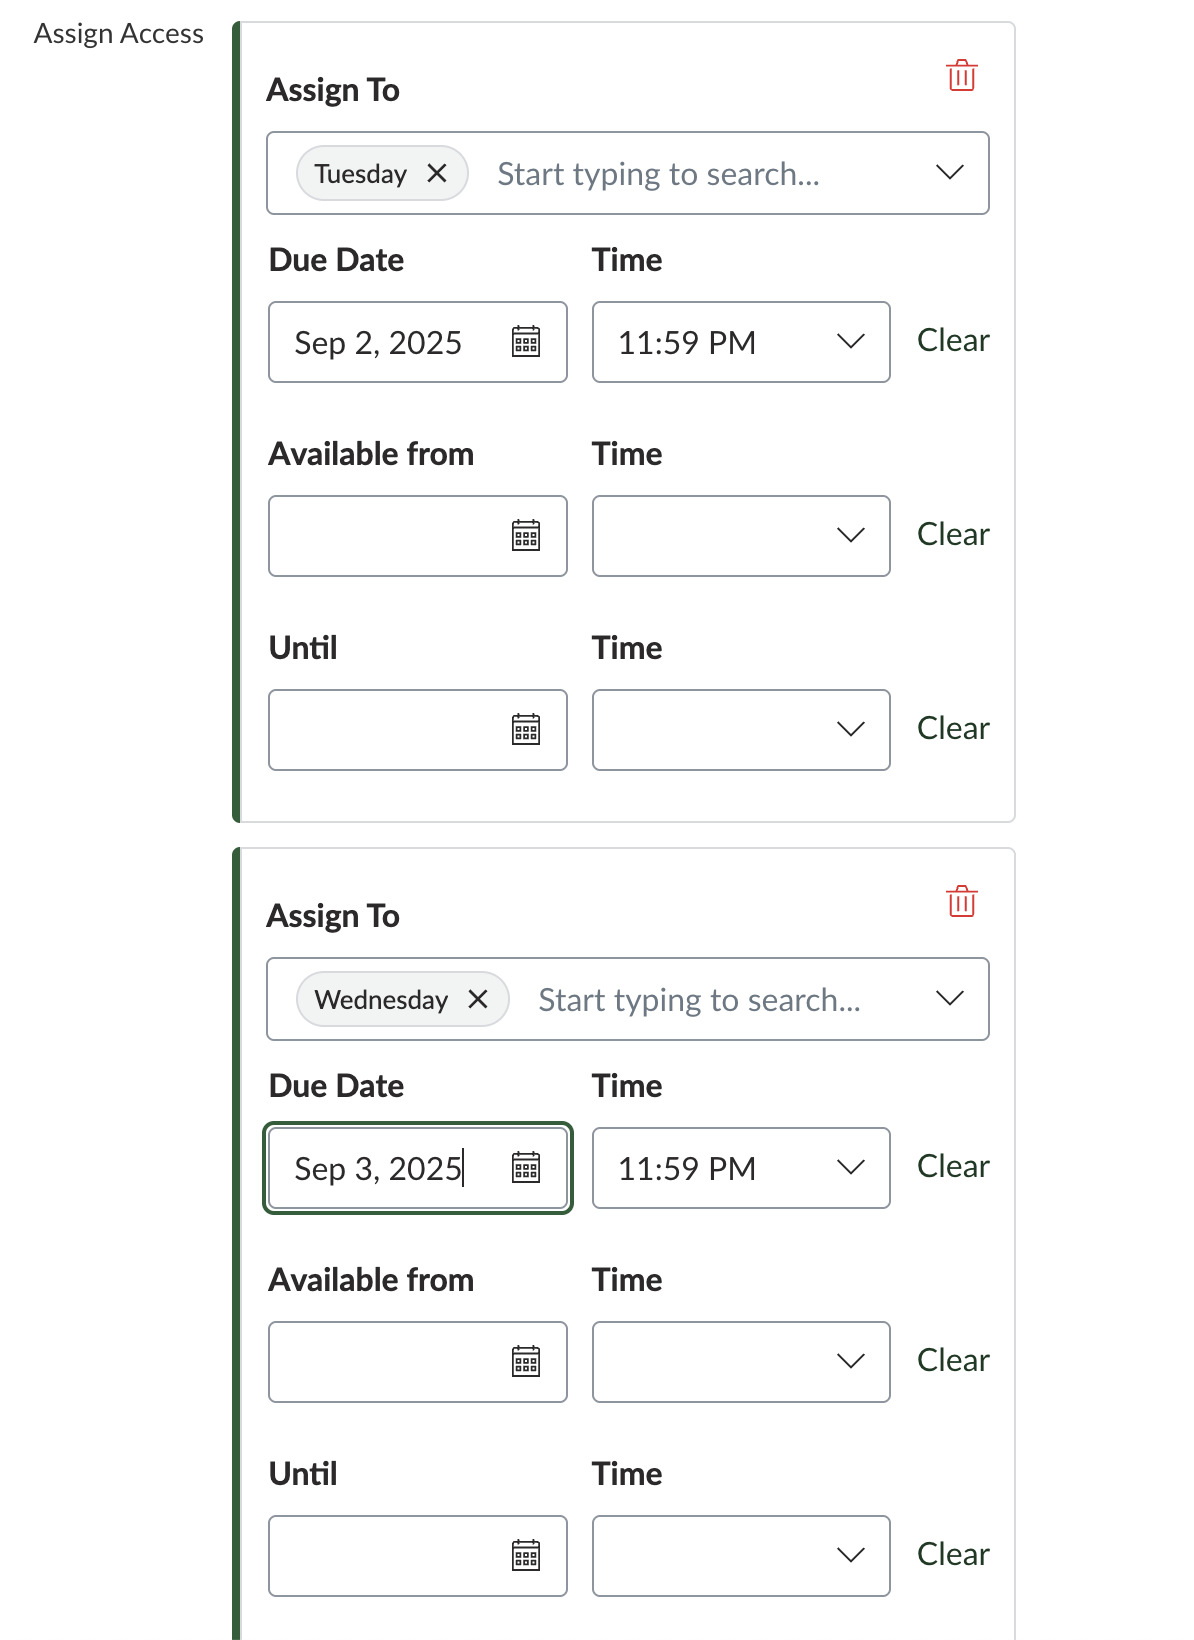
When making assignments, tag sets make it easy to see and assign different due dates:
Additional Notes/Known Issues:
| ||||||
|
|
||||||
Knowledgebase: eClass (Read-Only) > eClass For Instructors > Interacting With Students > Working with Groups
Comments (0)