|
Backup and Restore Your eClass Course Content
Last modified on 26 August 2025 10:06 AM
|
|
|
eClass users can back up the content of entire courses or selected content items from within courses. This process can retain backup files from courses that can be transferred to other LMSs or kept as archives. It is also possible to use this process to add content to any courses requested blank (but this is generally not recommend since the less complicated import process can do the same thing.) Backup files made from eClass courses can also be imported manually into Canvas but users should be aware that this process produces slightly different results than what is provided by the K16 Mass Migration. Update January 2025: we have identified a new issue that affects backup and restores to Canvas involving quiz questions so users should familiarize themselves with that problem if that is their use case. This example illustrates a simple backup and restore process, in which the destination course is assumed to be empty. Contents:
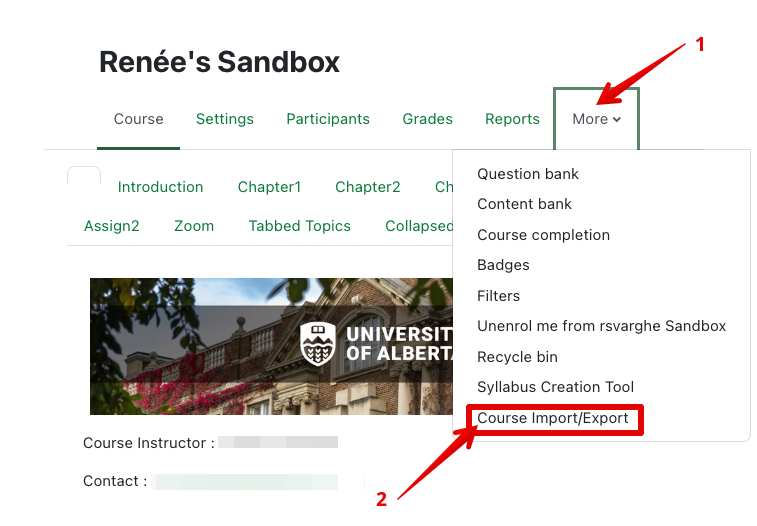
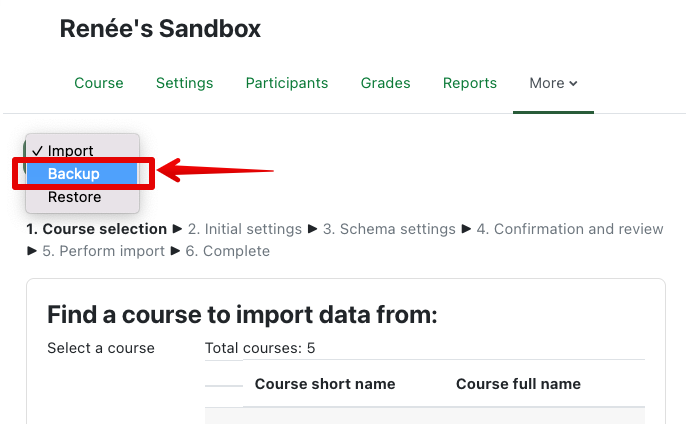
1. In your course, click on the More drop-down menu and click Course Import/Export. 2. Then select Backup from the drop-down list.
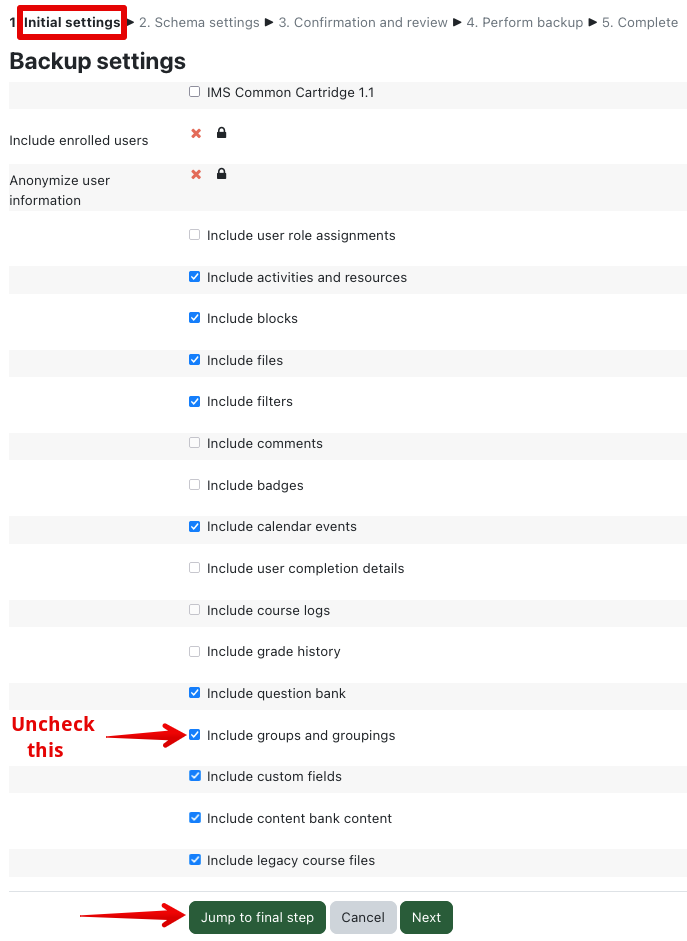
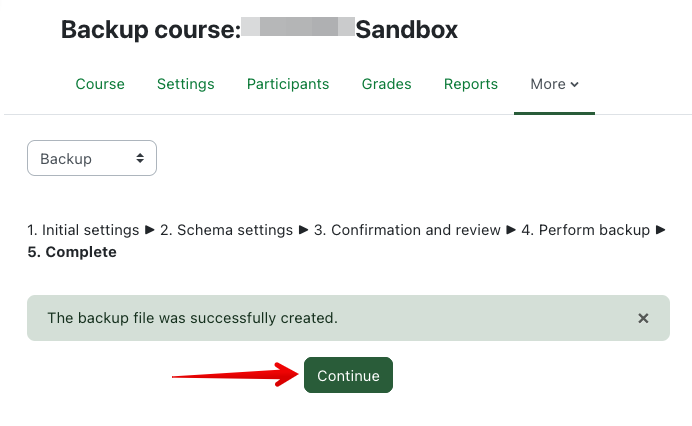
3. In the Initial settings step, choose what you want to include in your backup. Typically, you would deselect 'Include groups and groupings'. Otherwise, the defaults are acceptable. Scroll to the bottom and click Jump to final step to perform the backup. (You may proceed by clicking Next to go through the other steps if you wish to choose content to backup and preview your selection specifically.) 4. After the backup, you will see the message, "The backup file was successfully created." Click Continue to proceed.
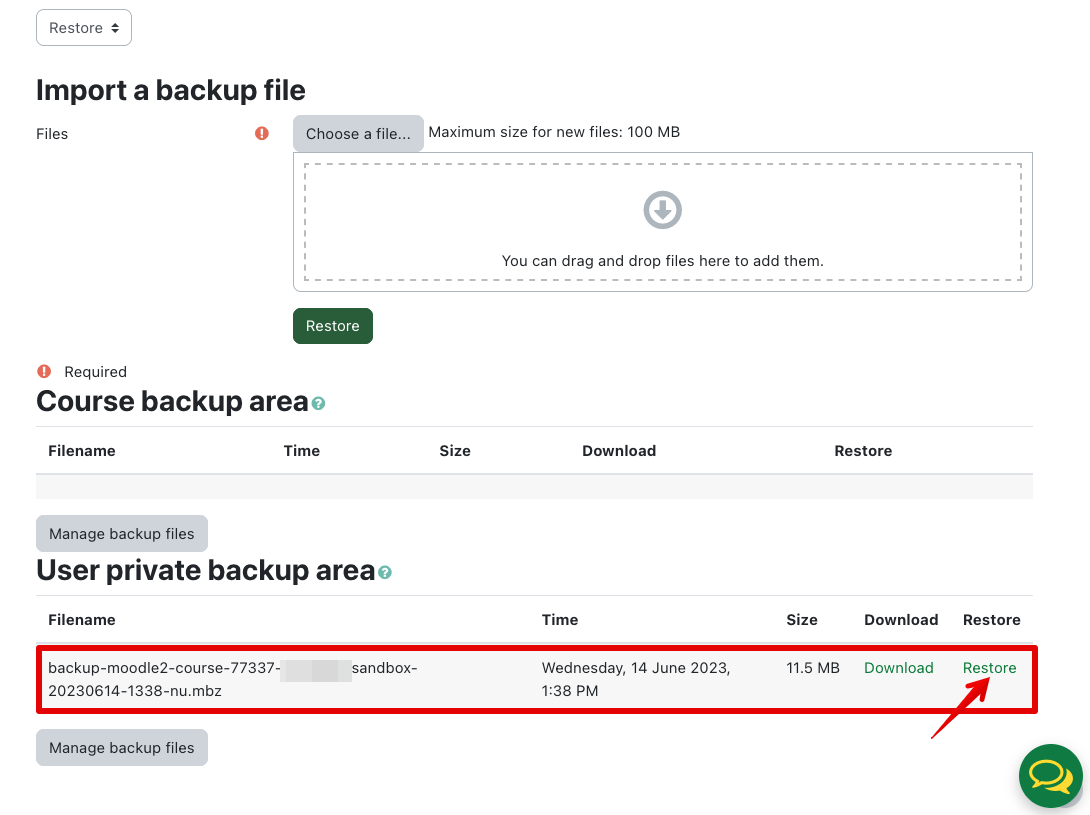
If importing the content into Canvas skip to Importing a backup into Canvas below. 5. Automatically, you are taken to the Restore course screen. In this screen, you have options to 'Import a backup file' from your computer, the 'Course backup area', the 'User private backup area' and a button to manage your backup files. To identify your file, your restore file will include parts of your course name as well as show the date and time of backup. In the 'User private backup area', locate your course that was just backed up and click Restore and proceed to the 'Confirm' screen.
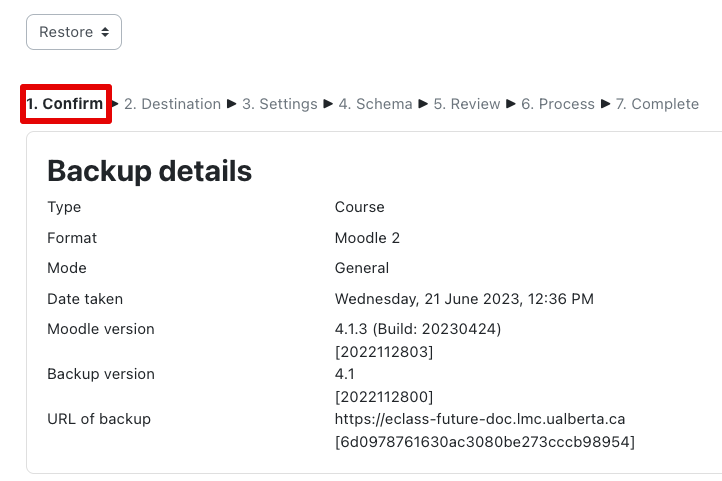
6. On the 'Confirm' screen, review the details and click Continue at the bottom.
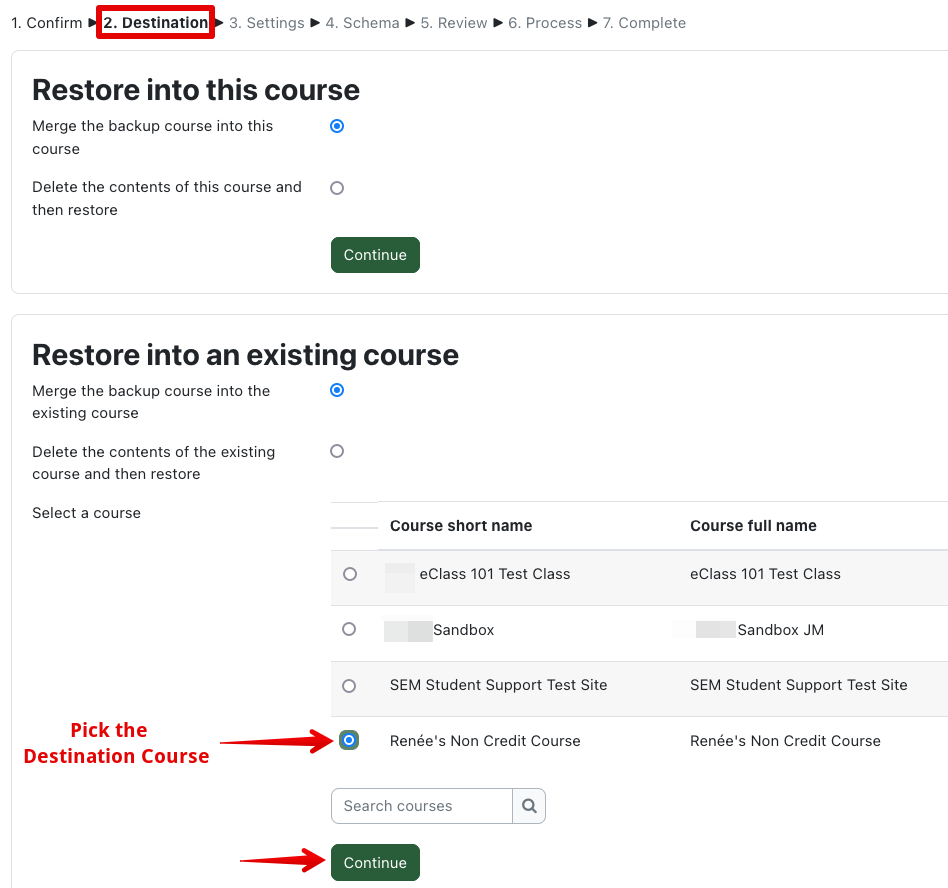
7. On the 'Destination' screen, you are presented various options for restoring your course. In the 'Restore into an existing course' section, locate your destination course from the list shown and select it. Click Continue when ready to proceed.
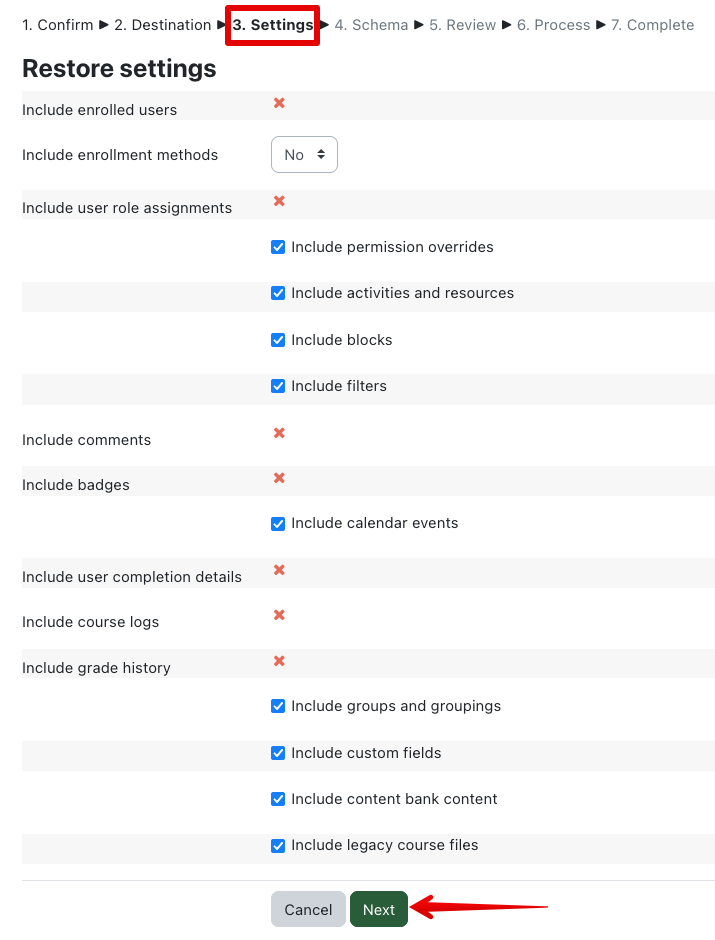
8. Review your settings on the 'Settings' screen. The defaults will typically suffice. Click Next at the bottom to confirm and continue.
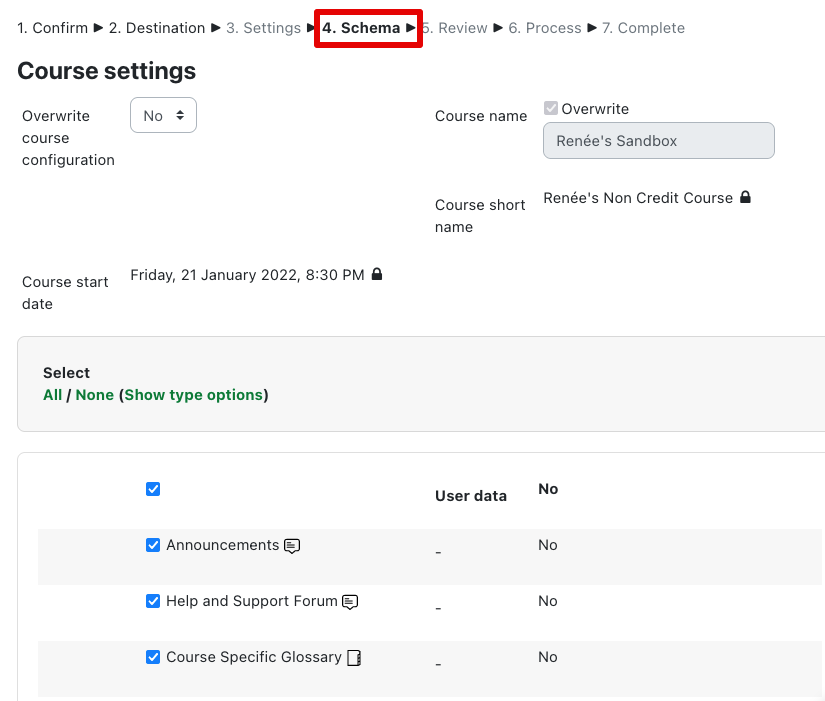
9. On the 'Schema' screen, you can choose to change your course name and select specifically what content you wish to import. In this example, we will use the default options. Scroll to the bottom and click Next to continue.
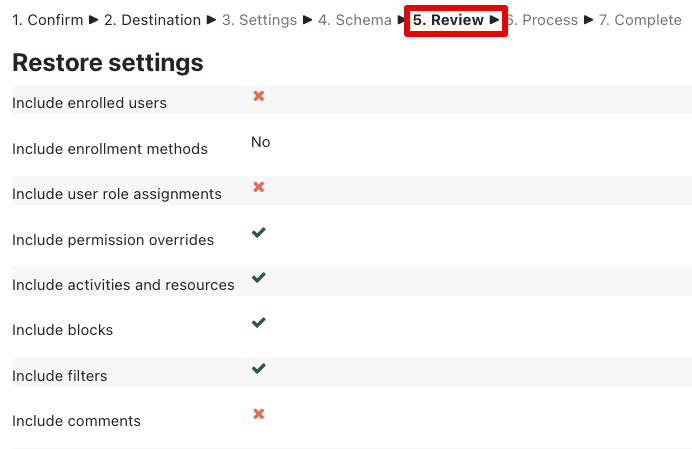
10. The 'Review' screen gives you one last chance to review your options. Click Perform restore on the bottom right of this screen.
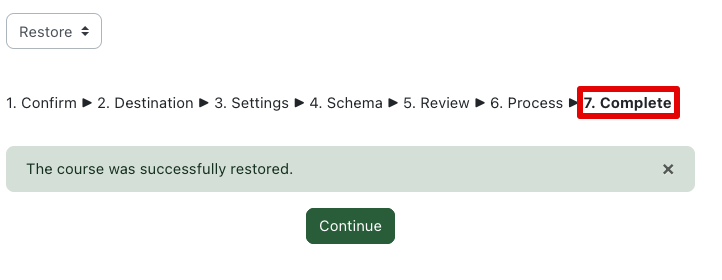
11. You should get the message, "The course was restored successfully, clicking the continue button below will take you to view the course you restored." Click Continue and you will be automatically taken to your destination course.
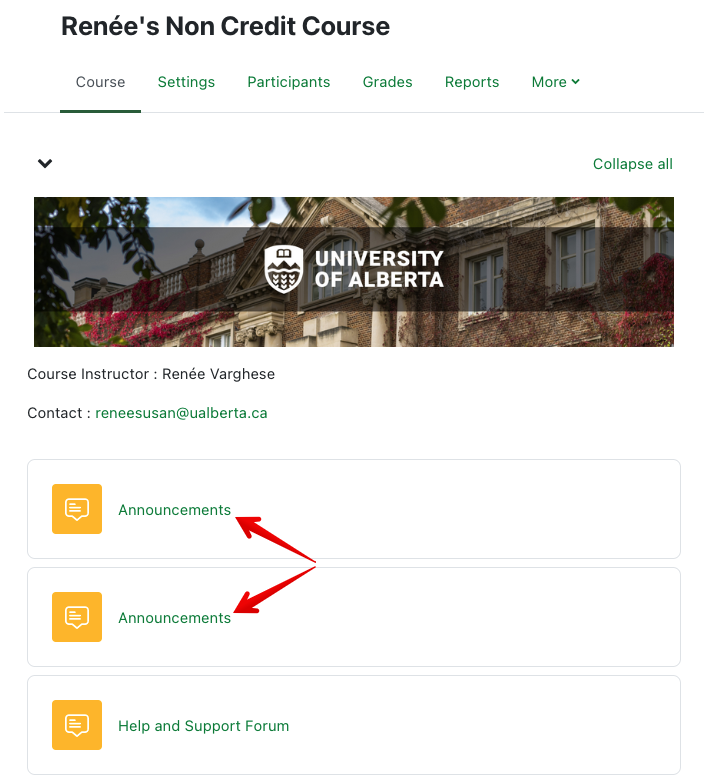
12. Finally, you can clean up your course as needed. In the screenshot below, you can see that the Announcements forum has doubled up (one from the origin course and another from the default destination course). Review the content and make any required content updates to your course.
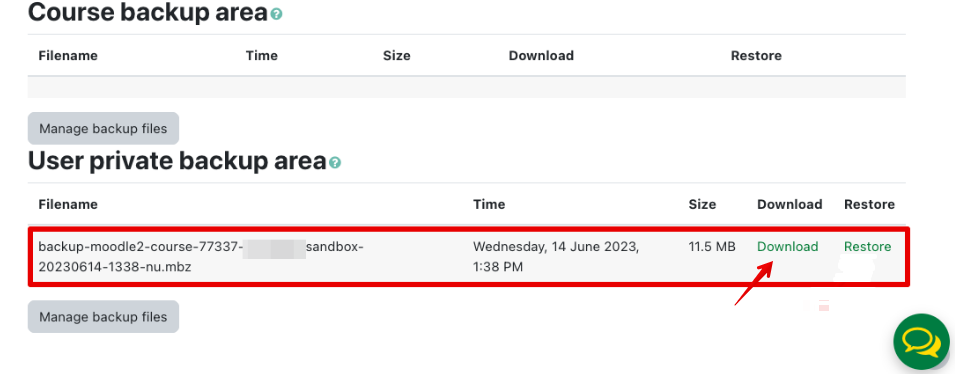
Importing a backup into Canvas: After following the steps above to create a backup file in eClass, the file will be available in your User private backup area:
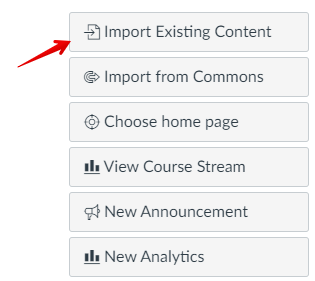
To use your backup file in Canvas, you must first download it. Please note where it has been downloaded. After downloading your backup file, then log into Canvas and access the course where you want the content. (If you do not yet have a course on Canvas, you will need to create one before you can import content - either an actual credit course, or a co-curricular or sandbox course.) From your Canvas Home page, select 'Import Existing Content':
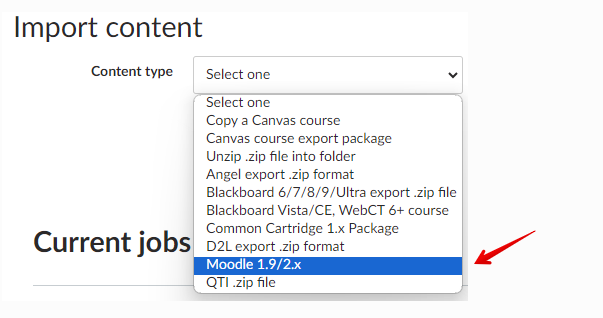
From the dropdown menu, choose 'Moodle 1.9/2.x': Please note that there is a known issue that affects backup and restores to Canvas involving quiz questions when multiple versions have been cereated. For detailed instructions, please see How do I import content from Moodle into Canvas? in the Canvas Community knowledge portal. Importing Within CanvasIf you need to do a manual import between Canvas courses, follow this procedure: How do I copy content from another Canvas course using the Course Import tool? Note: When choosing options for importing, selective import is strongly recommended so that you do not import the announcements from the older Canvas course. | |
|
|

